Build your Document Parsing API
In this walkthrough, we'll walk through the steps to create your own document parsing API. In this example, we'll use the W-9 tax form from the USA.
Prerequisites
- You will need a free account. Sign up and confirm your email address before proceeding
- Download this sample training set.
This tutorial describes the steps required to create a custom document data extraction API using Mindee.
Over the course of this tutorial, you will learn how to train a deep learning model that can parse and extract the data of your choice in your documents.
Once the ML model is trained, you will be able to use the custom REST API backed by that model in your application code using the language of your choice.
Let’s see how to build and deploy your first document data extraction REST API using the following scenario: as a developer, you want to extract the name, address, and social security number from W-9 tax forms.
Set up your API
Once you have signed up and logged in at https://platform.mindee.com, press the Create a new API button, as shown below:
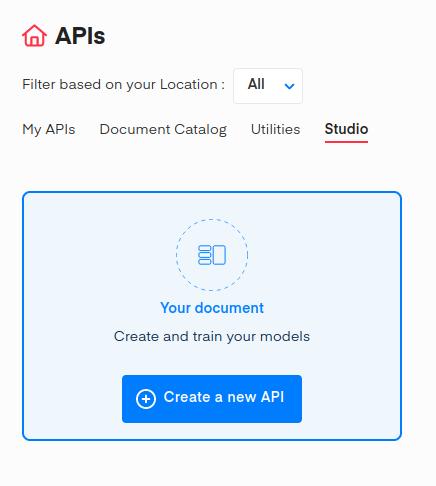
First, we need some basic information about your new, custom document scanning API. That info will help us highlight your API in your Mindee API Hub (and in other users’ API Hubs if you choose to share your API with them). The requested properties are:
-
Document type: The common name of the document type your API will be trained on.
Examples: 1040 US Tax Form, Pay Stub, Bank Statement -
API name: The resource name of your API URL. We automatically generate one for you based on your document type but you can customize it at your own convenience. Note however that you can’t use special or accented characters. The format of your API URL complies with the following scheme: https://api.mindee.net/v1/[username]/[API_name]/v1/predict
-
Description: An optional, short blurb aimed at conveying the purpose of the API. This description will appear below the image in your API Hub (and others if you choose to share your API with other users). We suggest you make it as clear and concise as possible to maximize its effectiveness.
-
Image: An uploaded image that appropriately illustrates your API. Other users may see it in their API Store if you choose to share it with them.
Here is a possible configuration for our W- 9 API:
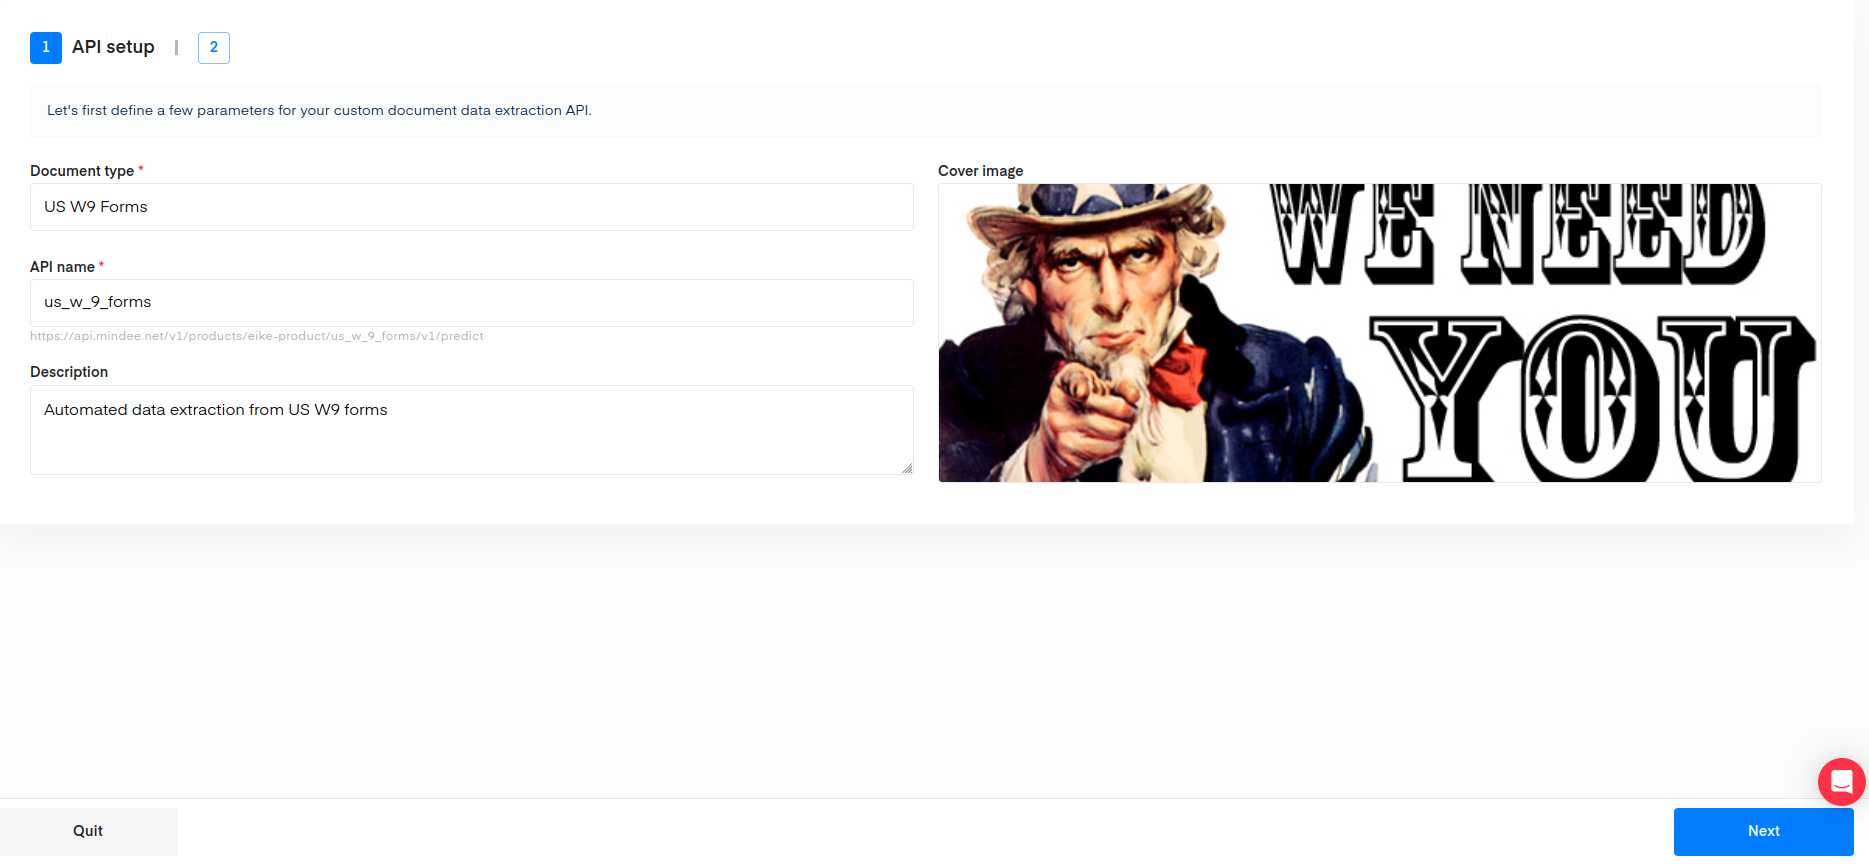
Once you’re done setting up your API, press Next to begin defining your data model. We'll create the list of fields we’d like to extract from the W-9 documents.
Define your document data model
The following page shows up:
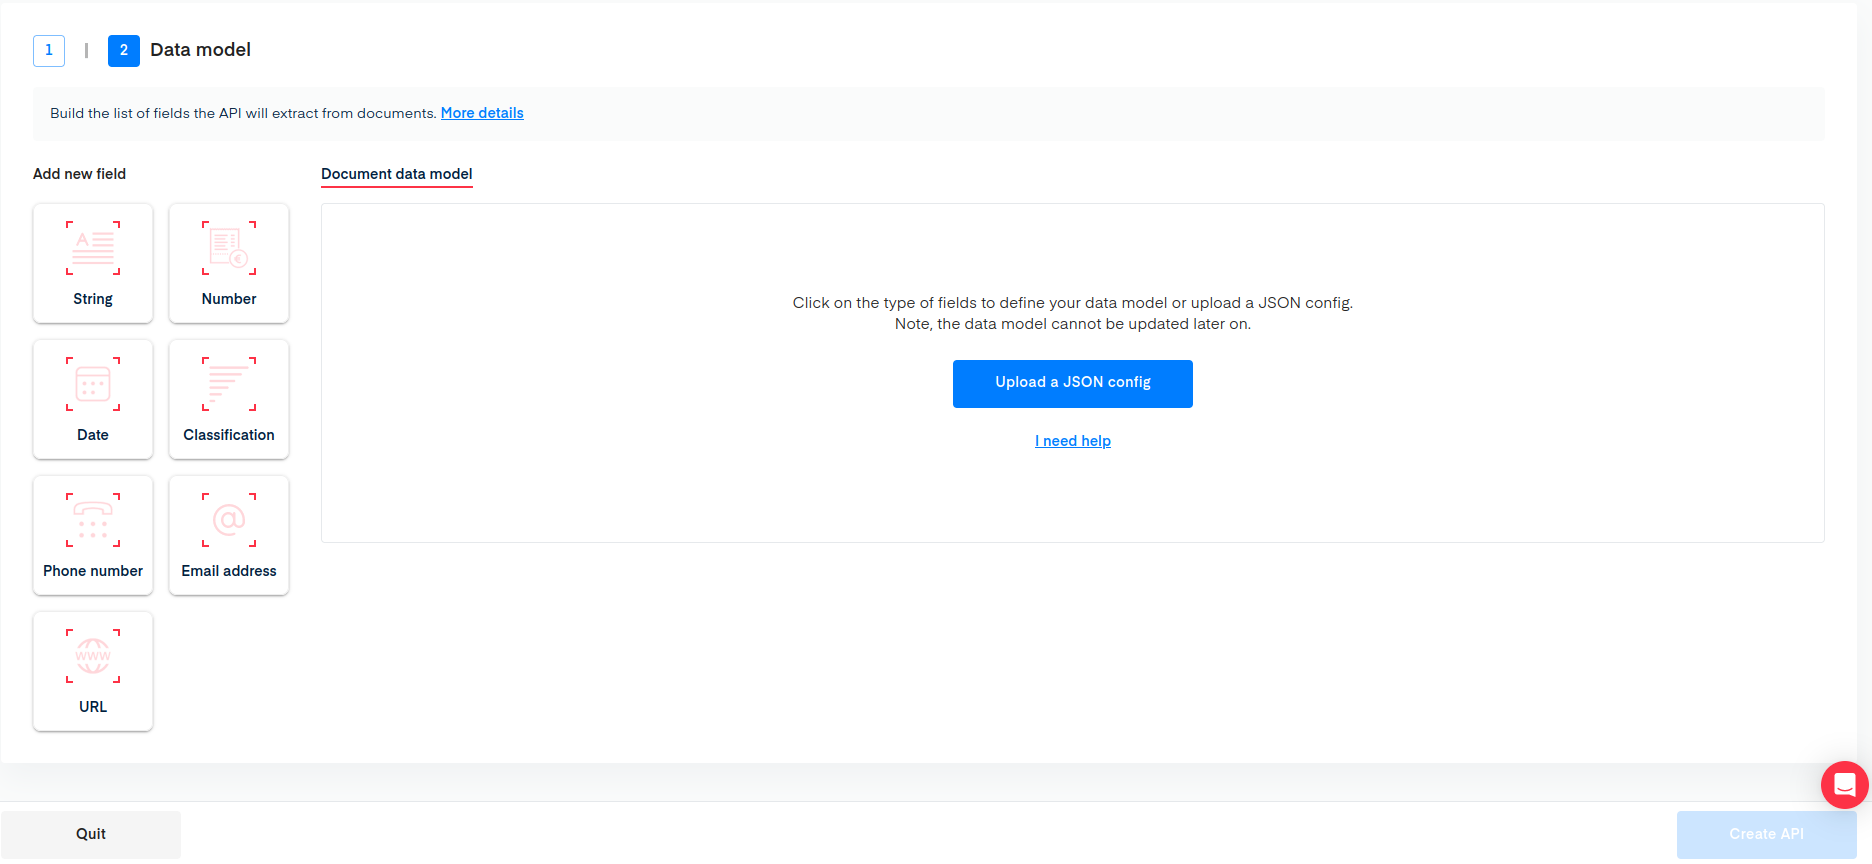
Document data model
You can either manually add each field or upload a json-formatted file, typically generated from an existing data model someone previously built (and exported).
For each piece of data you are extracting, you'll need to choose the data type from the list on the right, For simplicity in this demo, we'll use the Text Field entry for all of the data extracted. (it is unlikely that you'll actually need the Social Security number as a number to perform operations on - you simply require the value). Learn more about the data types we support.
Once you select a field type, the following information is required for each field:
- Field name: The field name used in your API documentation.
- API response key: The field key available in your API response to carry the extracted field value for each document
For the purpose of this tutorial, we want to extract the following information from our image or PDF documents:
- Name: a string that we'll define as not having numbers
- Street address: a string that can have numbers AND alpha characters
- City: a string that we'll define as only letters
- State: a string that we'll define as only letters
- Zip code: a string that we'll define as only numbers
- Social Security Number: a string that we'll define as only numbers
For example, here is a screenshot of defining the name:
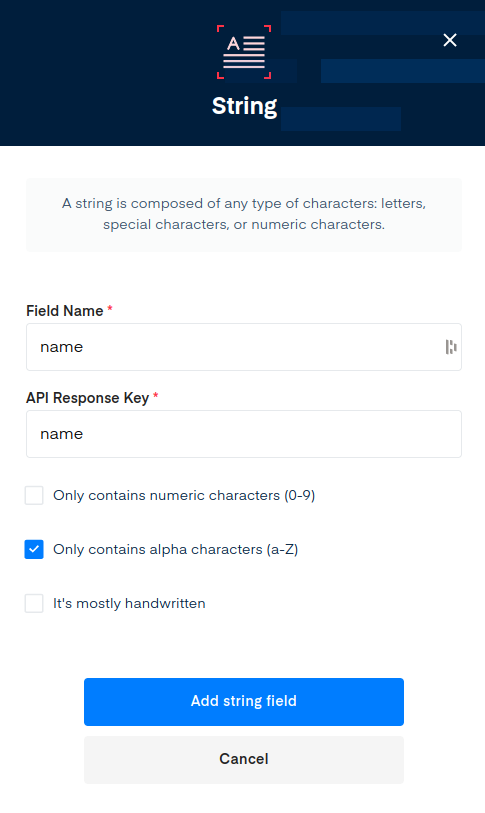
The Mindee representation of these fields after setting them up one by one is the following:
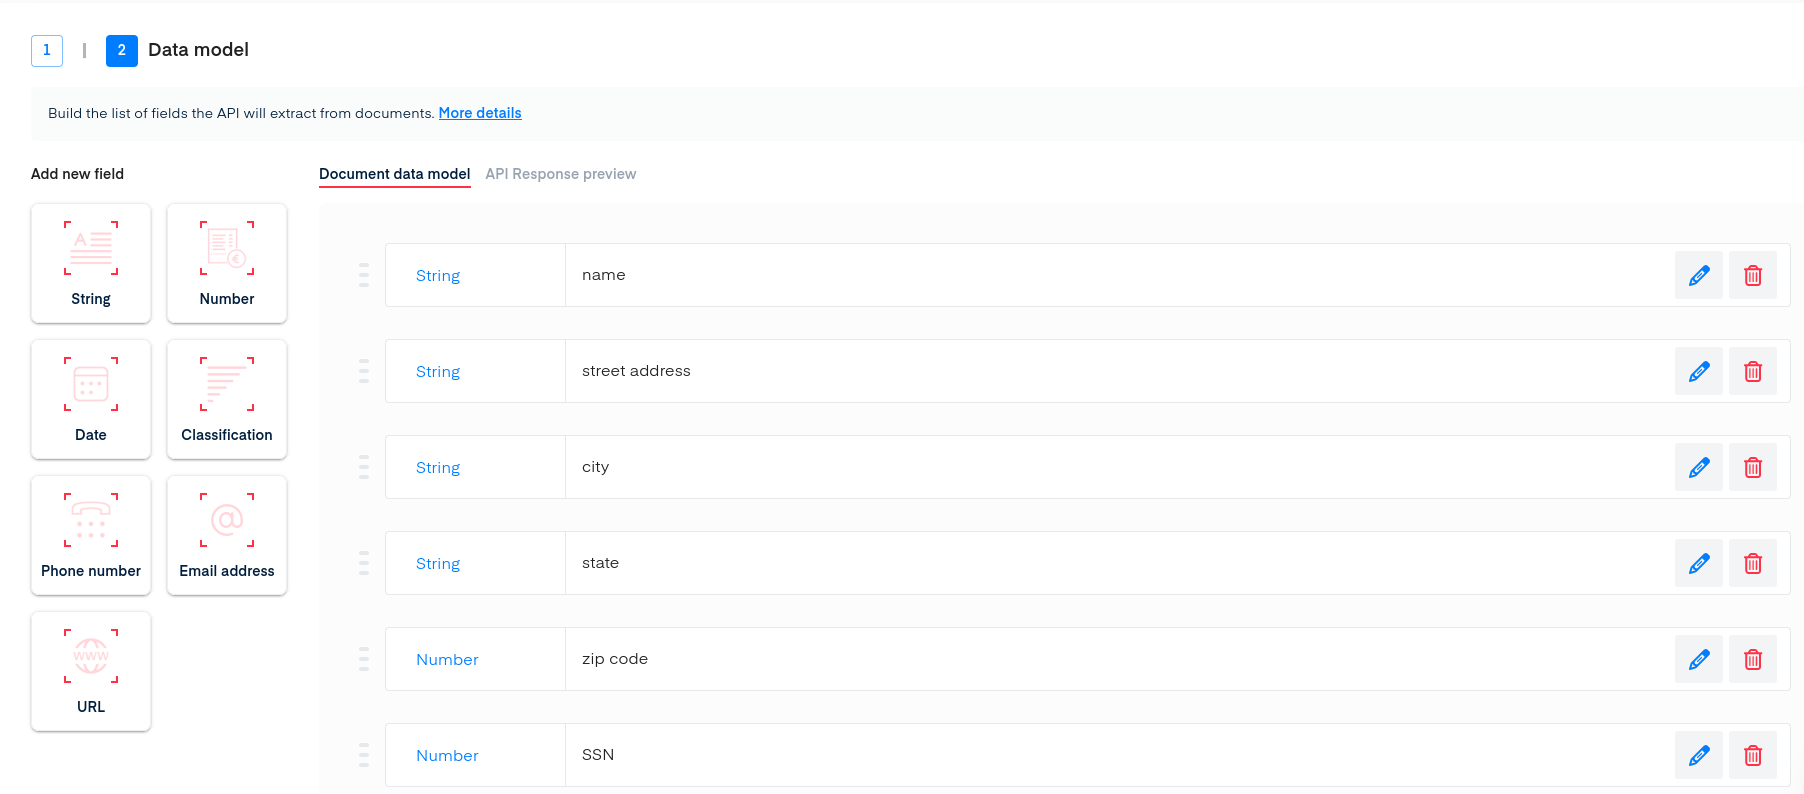
W9 data model
You can manually add them one by one or you can upload a configuration file to automatically populate your data model (this file is typically generated using the Config Export feature available to existing models in the Settings section of your API dashboard).
Once you’re done setting up your data model, press the Create API button at the bottom of the screen.
Train the model
Now is the time to train our W-9 deep learning model in the Training section of our API:
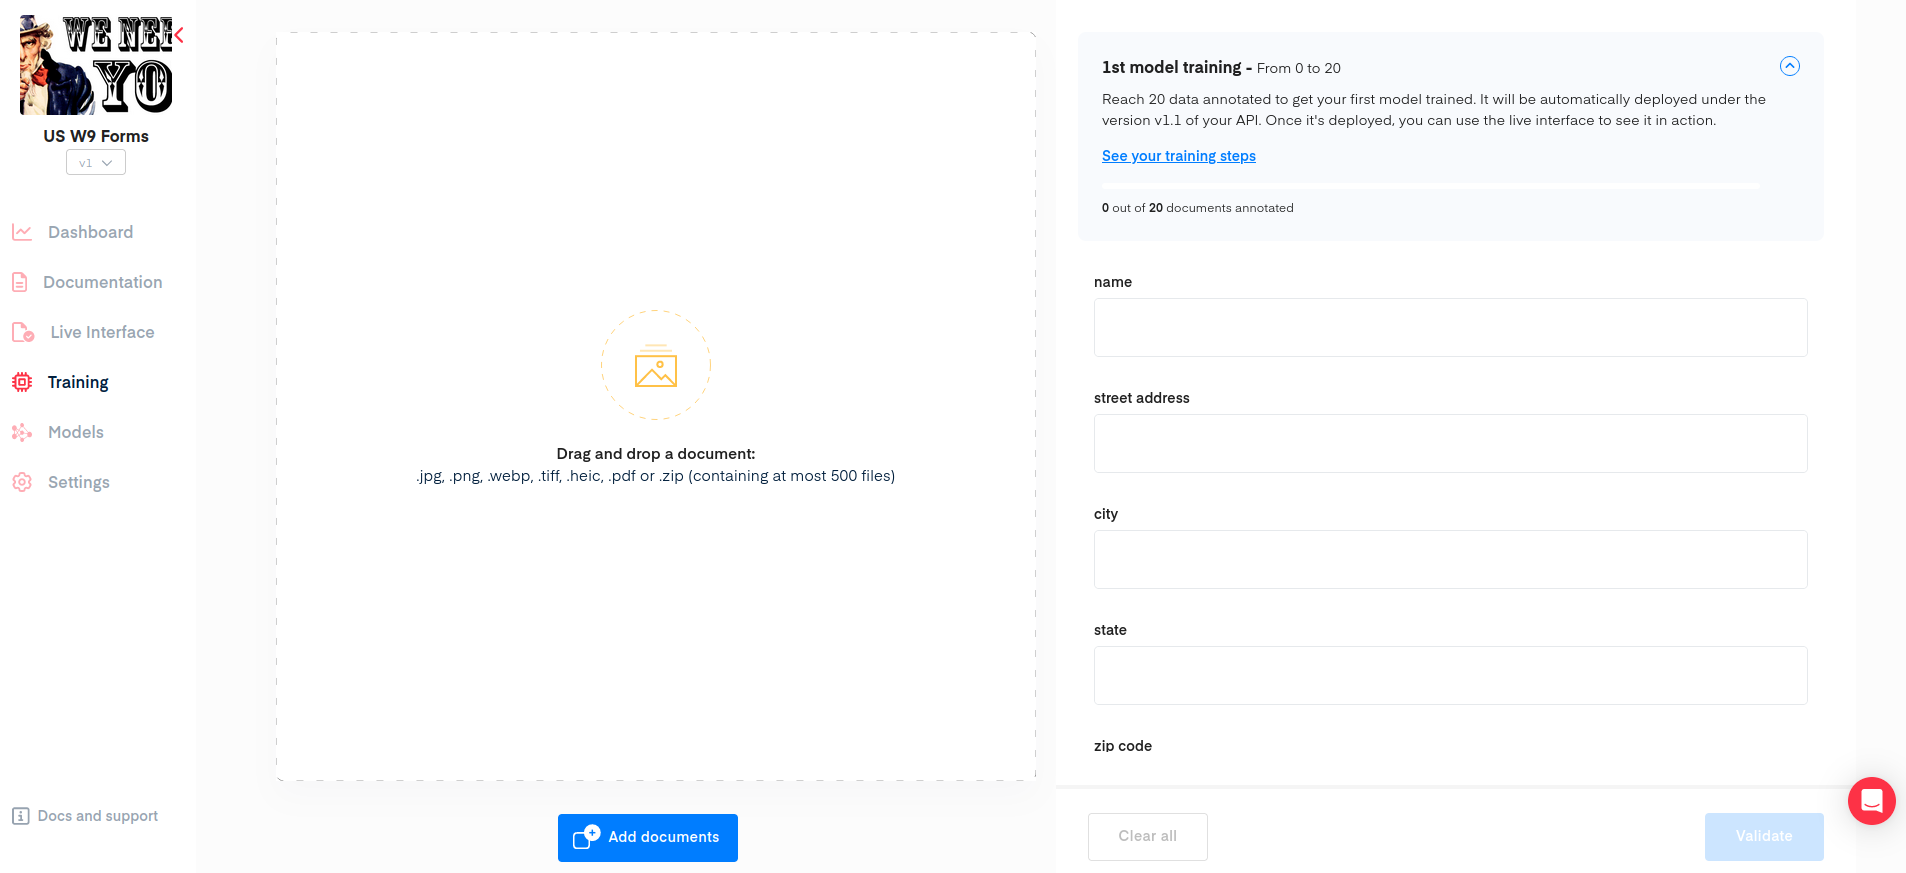
As the page states, you may upload one file at a time or many files in a zip archive.
For each of our documents, we must assign a value to each field by selecting a box (or several consecutive boxes) displayed in the uploaded document. The Mindee selector highlights all the potential candidates for each field in blue, as shown below:
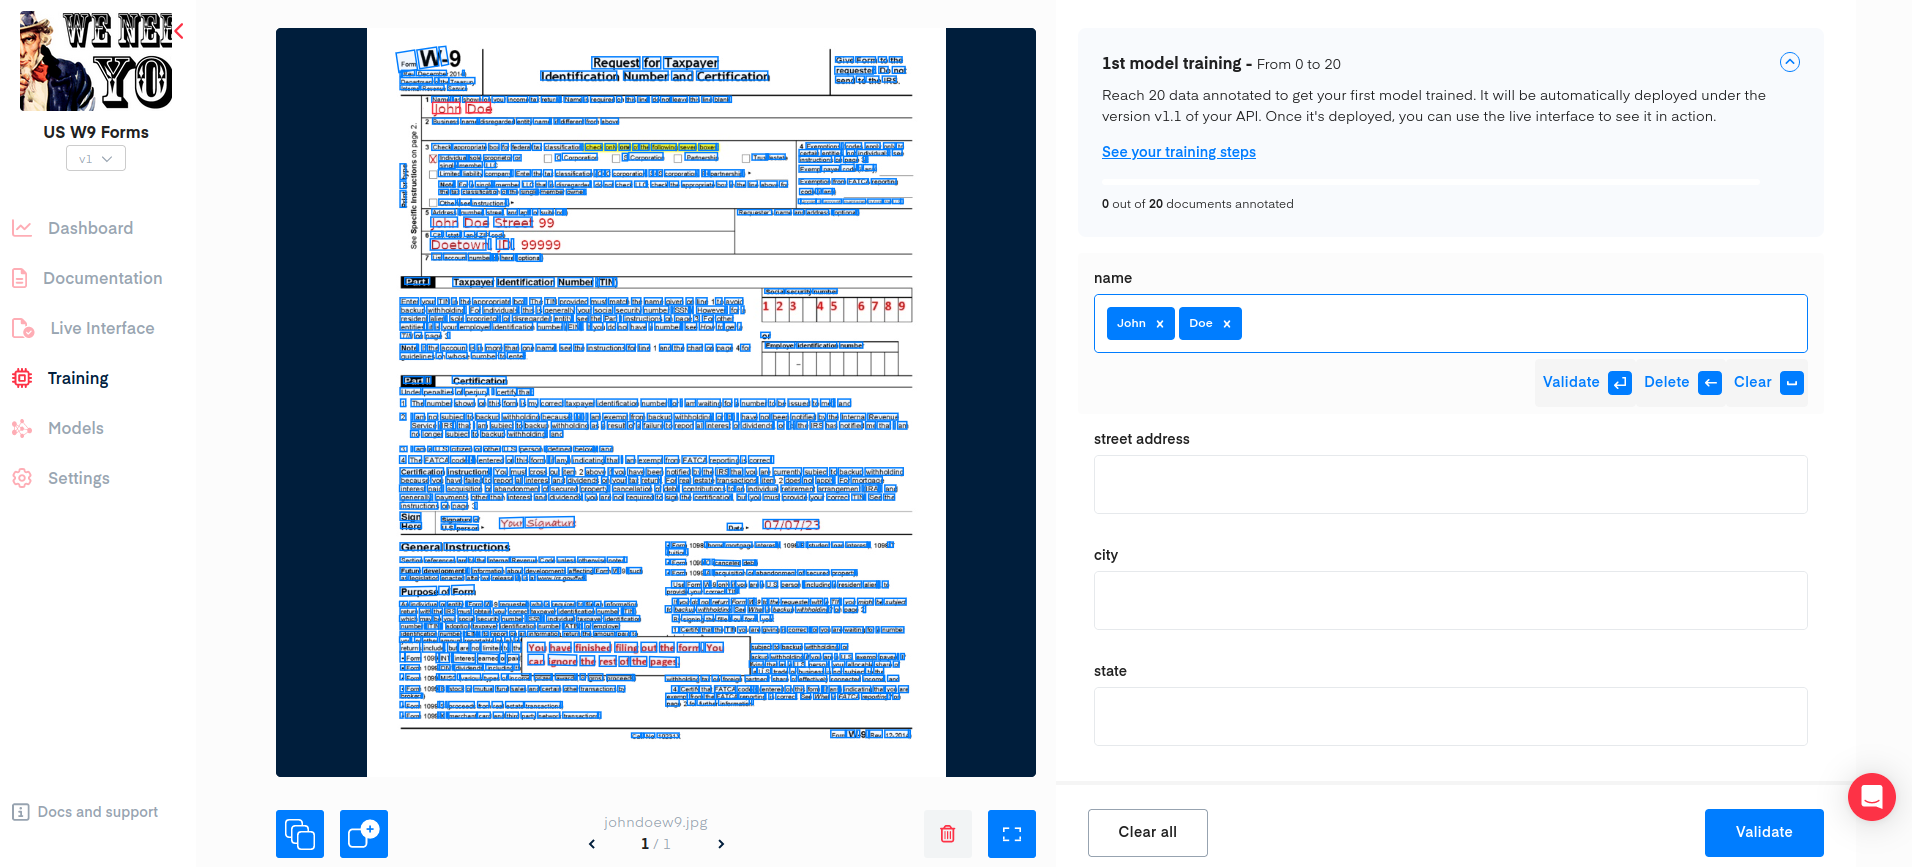
When you find the blue box that matches the field you are looking for, simply click that box. This populates the field text box with the selected value and shows the selected box in an identifiable color. For instance, the screenshot below highlights the box we selected for the name fields in red:
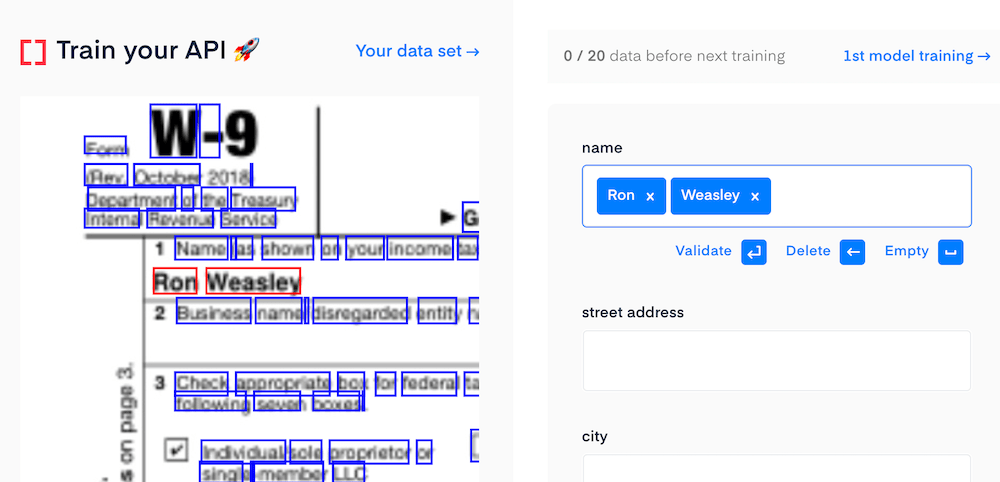
If the content you are looking for is composed of more than one box, simply select all the consecutive boxes that match your field (non-consecutive boxes may result in an inefficient model). For example, the screenshot below shows the Street Address field populated with 3 boxes (also note, the order of the selection does not matter, just that the boxes are selected):
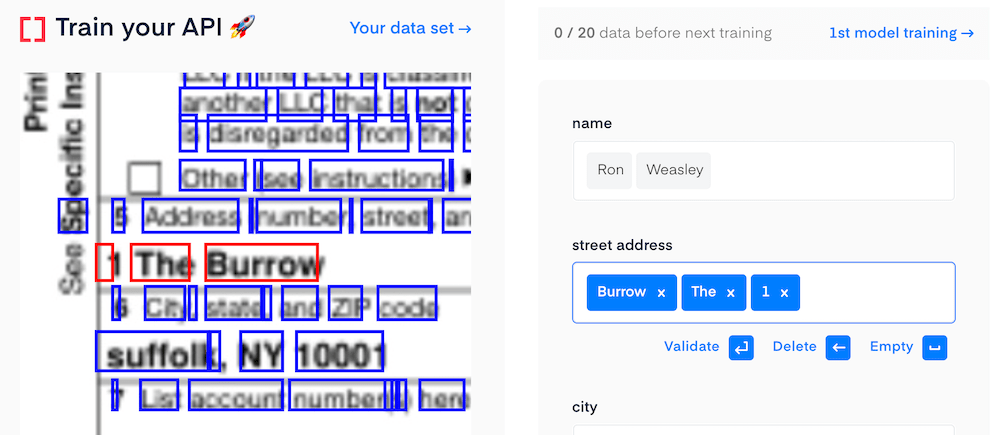
Once you have selected the proper box(es) for each of your fields (as displayed on the right-hand side of the document), press the validate button to submit the data to the training model. You must repeat the tagging process for 20 total documents before training can occur.
Models Training Page
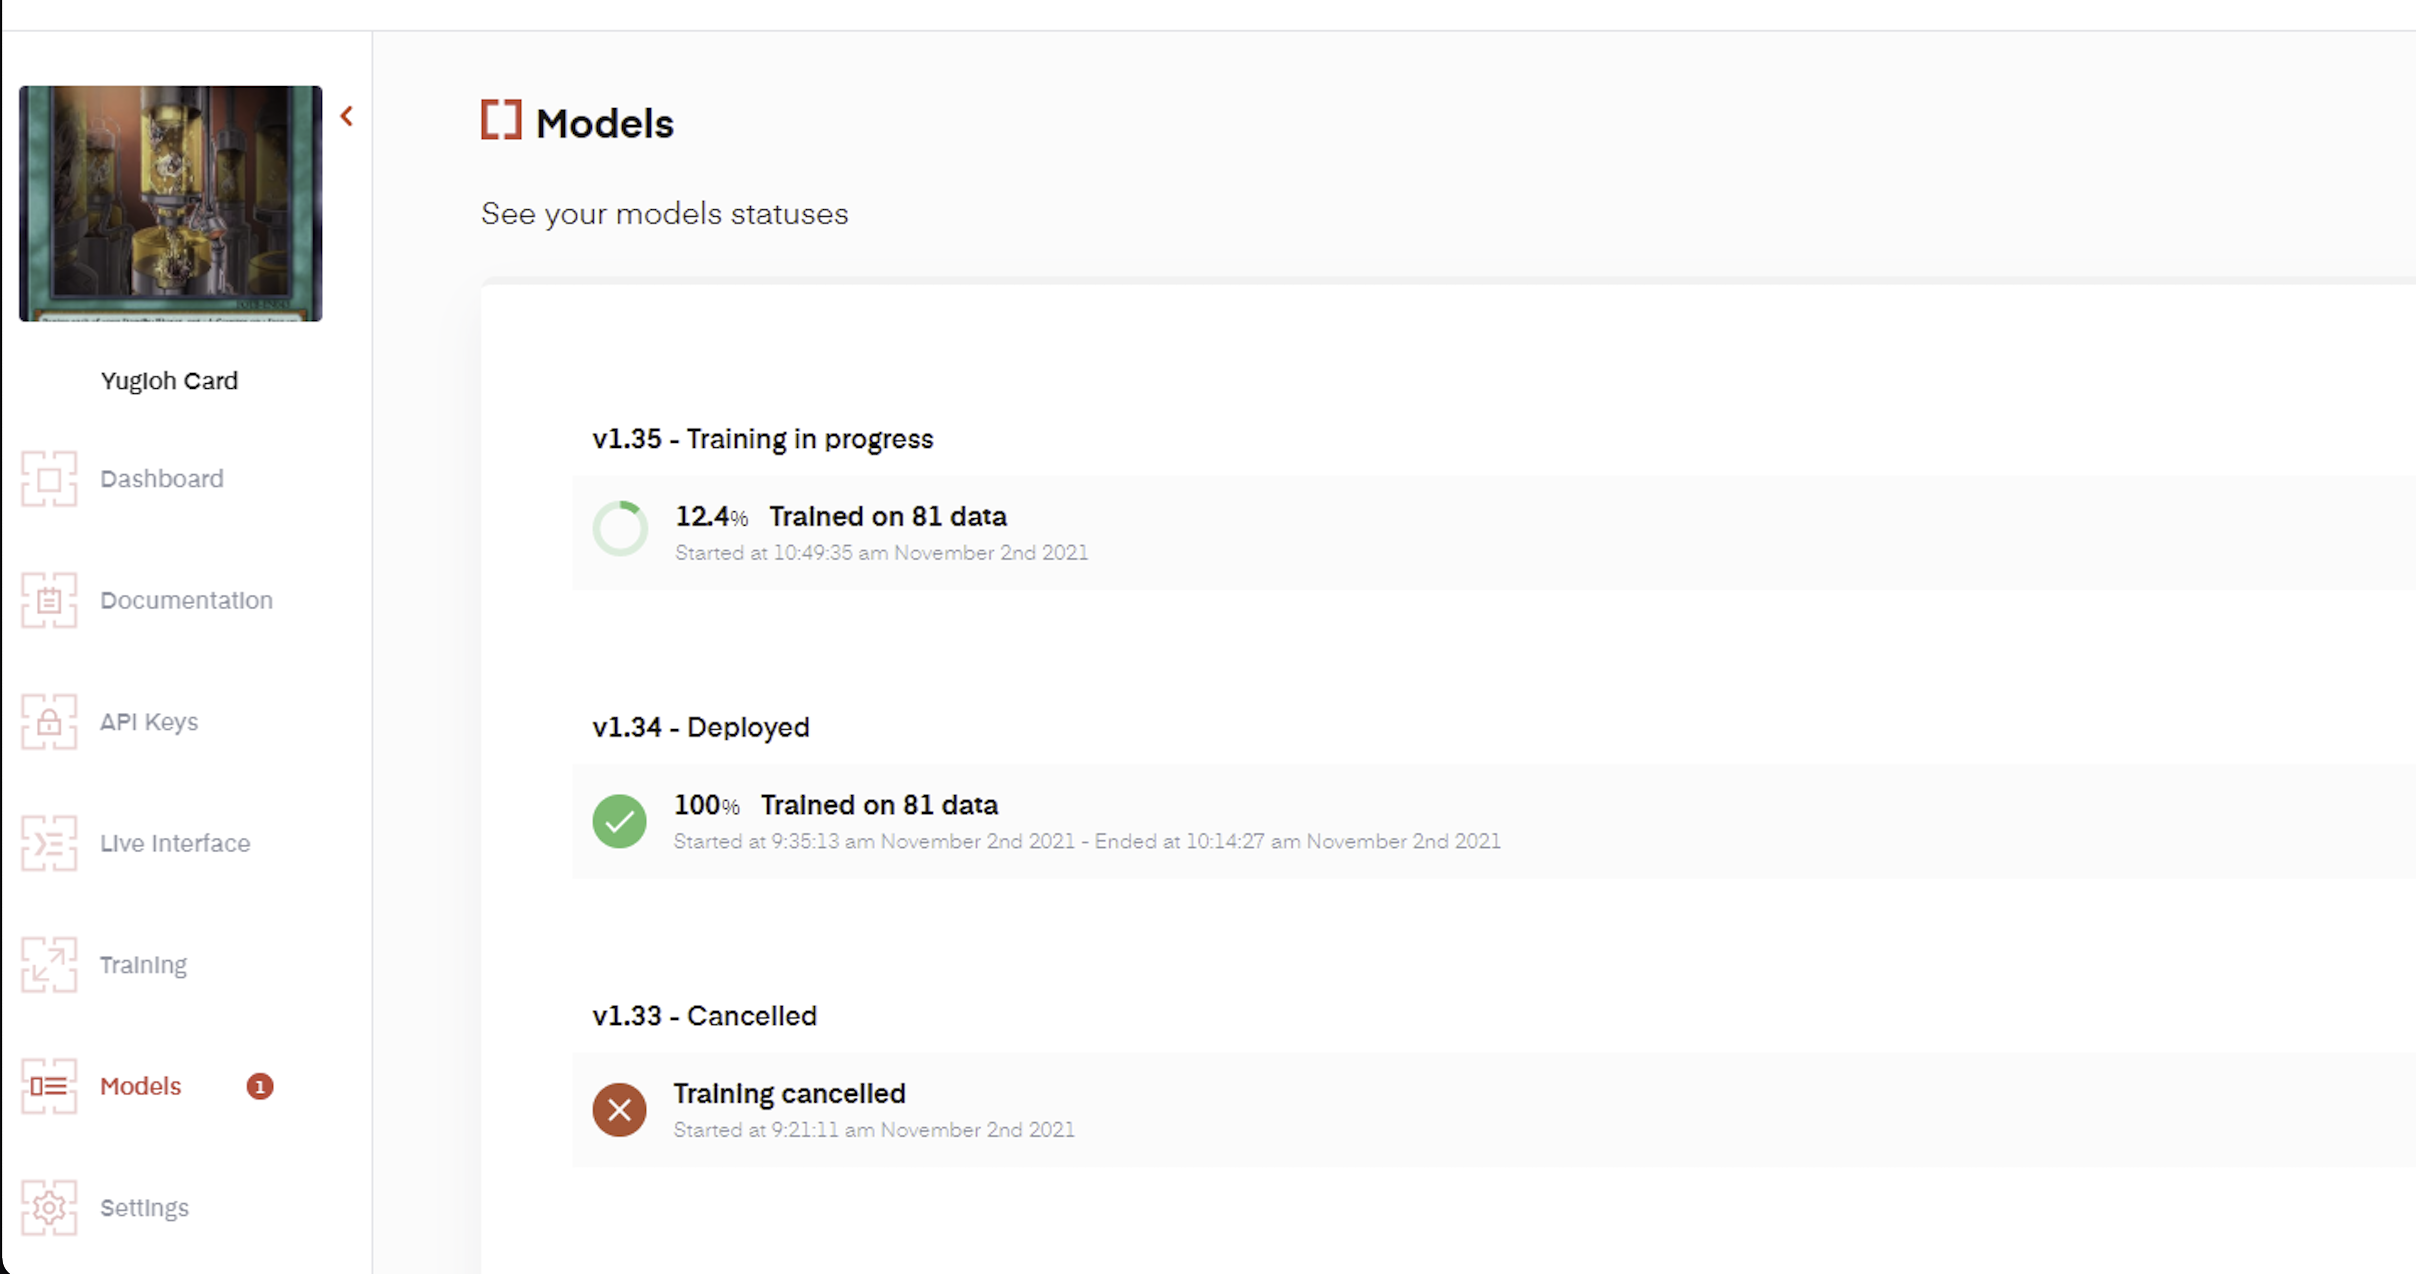
You can keep track of your training progress in real-time using the Models training page. When the API training is executed, you will be able to monitor its progress and know when it will be deployed. In addition, you can see the training that has been canceled.
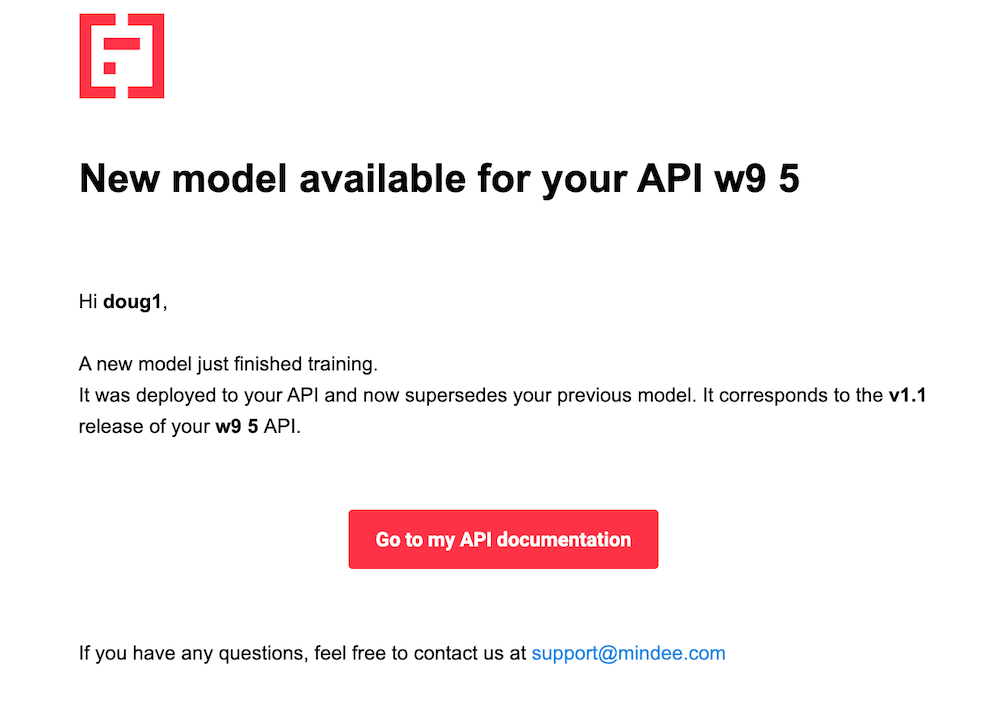
Once it's deployed, you will also receive an email indicating your latest model has been trained and is up and running.
Note that the more documents you feed into your model, the more accurate it will be.
How often is the model re-trained (these values are subject to change)
Under 100 documents trained
A new model is trained and automatically deployed into your API environment every 20 documents.
100-300 documents.
A new model is trained and automatically deployed into your API environment every 50 documents.
300-600 documents.
A new model is trained and automatically deployed into your API environment every 100 documents.
Over 600 documents.
A new model is trained and automatically deployed into your API environment every 200 documents.
With that being said, we will generate the first version of your trained model once you reach the 20 documents threshold (uploaded and validated).
At this point, you can experience the true power of the Mindee data extraction engine every time you upload a new training file, as the model will start filling out the fields on the right-hand side with the most likely values it was able to identify in the uploaded file.
From now on, the W-9 model will help you annotate new data in the Training section:
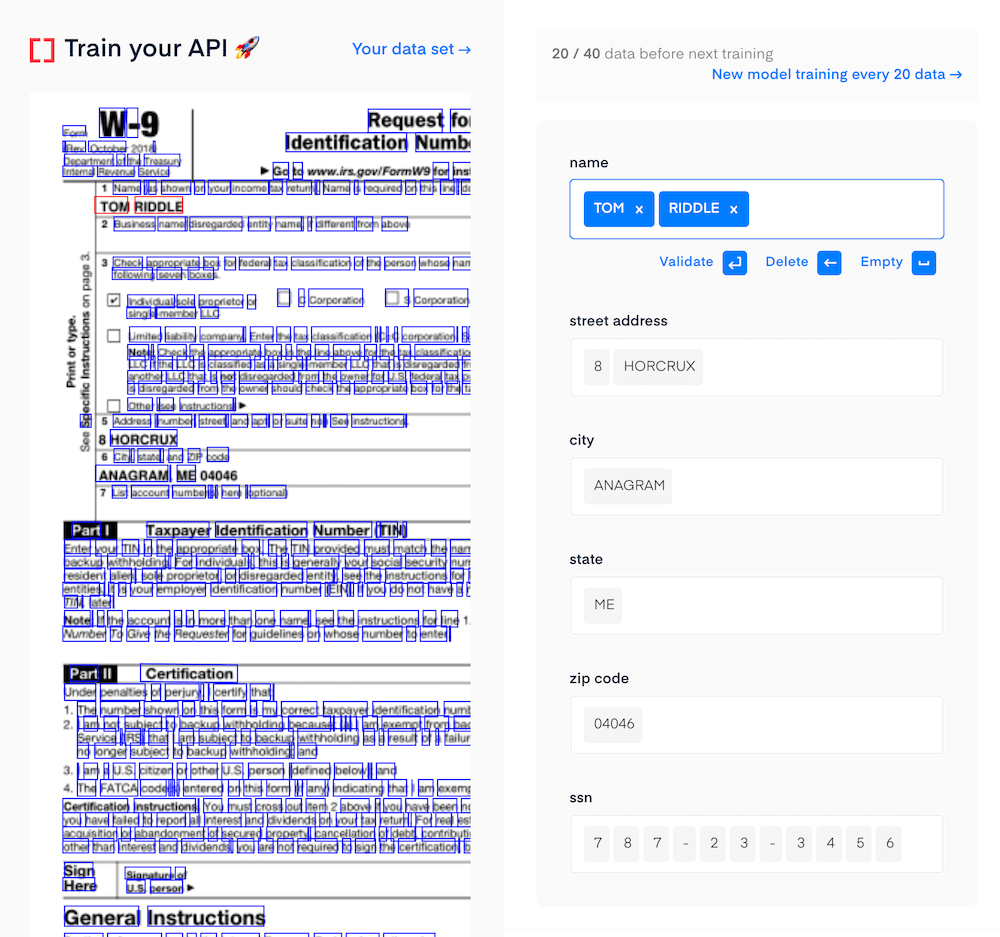
As you can see, the API has correctly identified this W9 as belonging to:
- Tom Riddle
- 8 Horcrux
- Anagram, ME 04046
- (the Social security number was correctly extracted as well.)
With a 20-documents training set, the model algorithm starts working pretty well on most fields, but still makes a few mistakes on the complex fields.
Once again, the more data you’re feeding to the model, the more accurate your API will get. So your job will now consist of correcting your model until you reach the next 20 documents threshold, which will kick off the generation of a new, more efficient model. You may repeat this task as often as you want.
You can perform the training while using your API with the annotation endpoint.
Settings, API keys, and documentation
Now that you have a model trained, you can use your API in your environment and build your W9 automation feature.
If you select the Documentation tab, the following page is displayed:
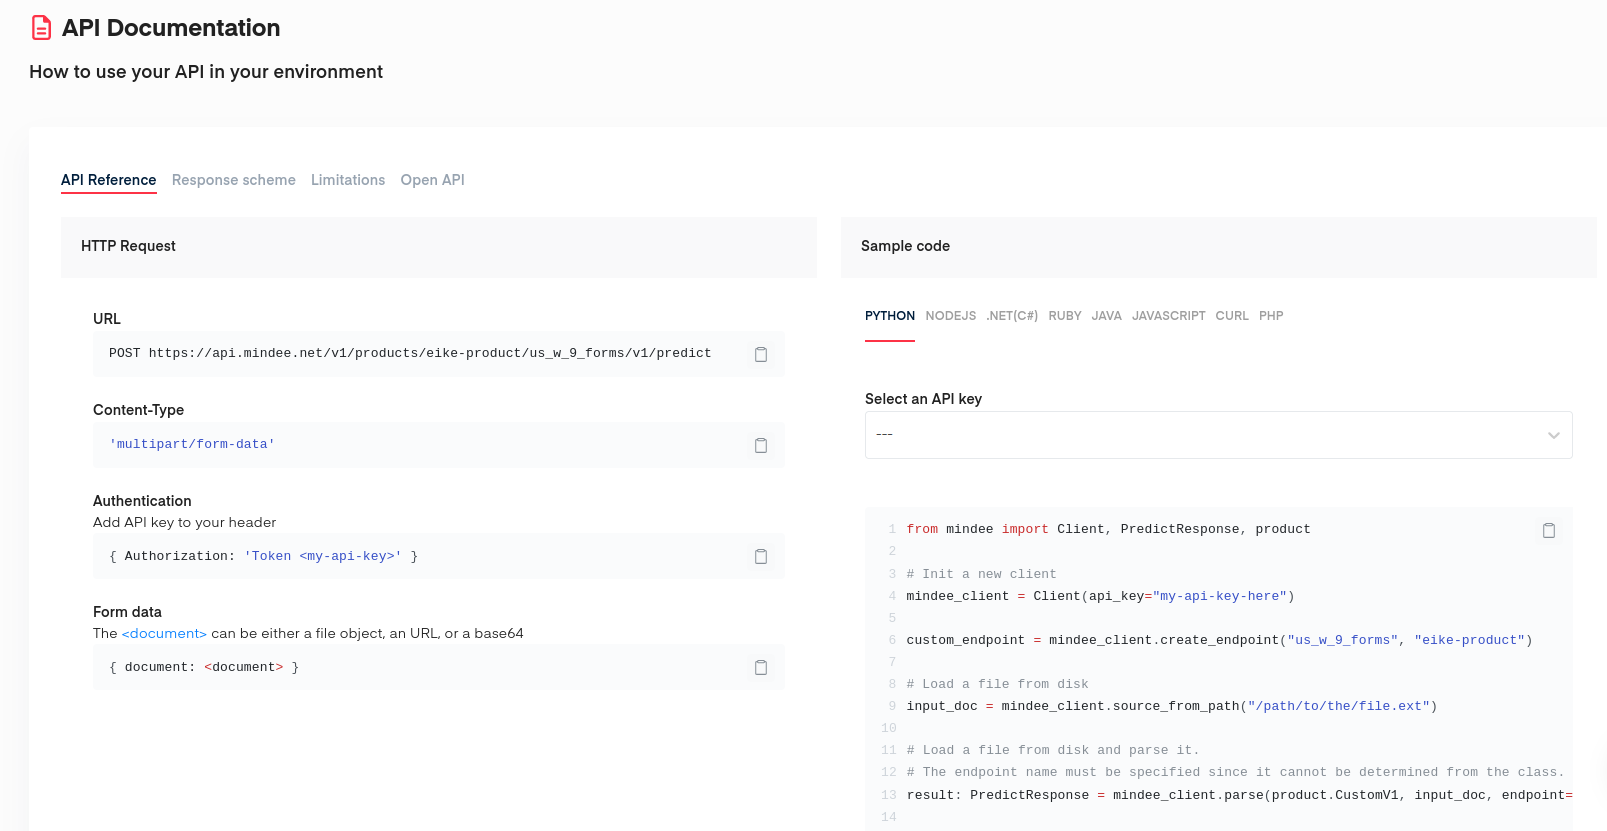
This page allows you to explore your API endpoints and download your API definition as an OpenAPI-formatted file. Hit the API Keys tab to create your first key and test your API.
The Settings tab allows you to update general information about your API such as its name or its description. It also allows you to download your data model field configuration, which can be used to create a new, enhanced data model without having to start from scratch.
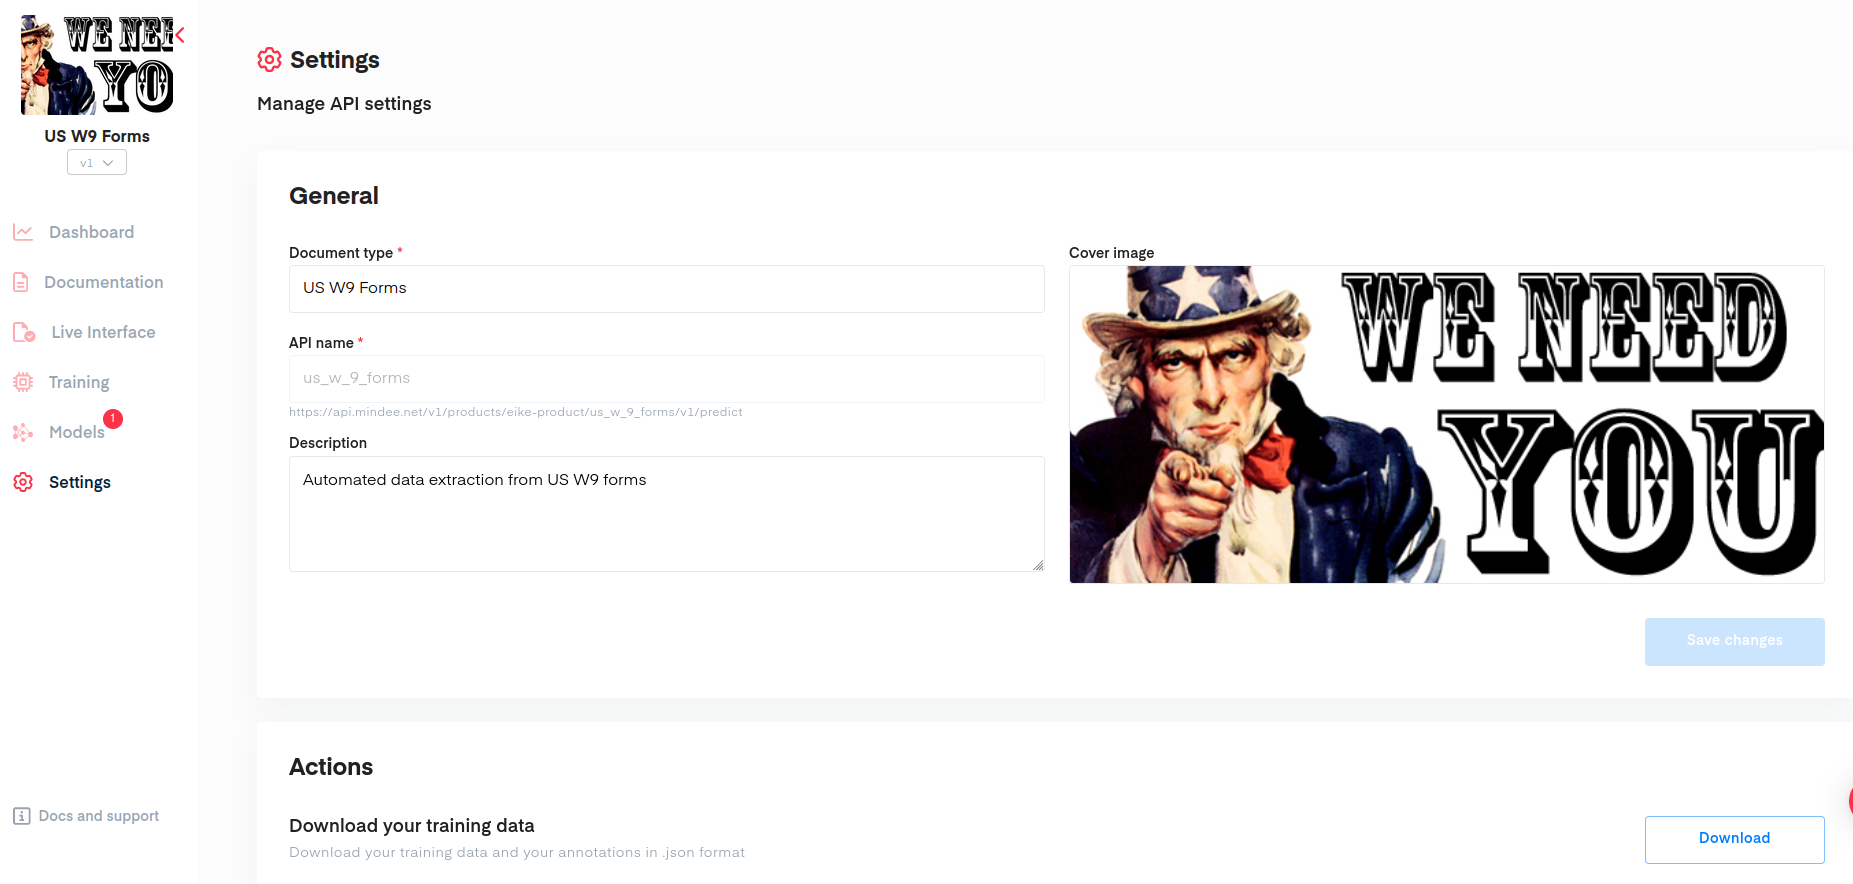
Further actions can be found within the settings: the training data set or the model config can be downloaded here. This is also the place to delete your API.

That’s it! You should now be able to set up a real-world use case now and build whichever document parsing API you may need.
Questions?
![]() Join our Slack
Join our Slack
Updated about 2 months ago
