How to test workflows using the mindee platform?
Overview
This guide will walk you through Mindee workflows in a few steps. Using the example of Reviewing data extracted from Invoices, we will showcase how to:
- Create a workflow,
- Add documents,
- Filter & select documents ,
- Validate extracted data.
- Export validated data.
Prerequisites
Before you start, ensure you have the following:
- A Mindee account. Sign up here if you don’t have one.
- Your API key, available from your Mindee dashboard.
Access to Workflows is for now limited to Enterprise customers.
Contact our sales team to get access to workflow.
Once activated you will see the Workflows menu item appear on the platform.
Create the workflow
- Click on the Workflows menu item to display the Workflow page.
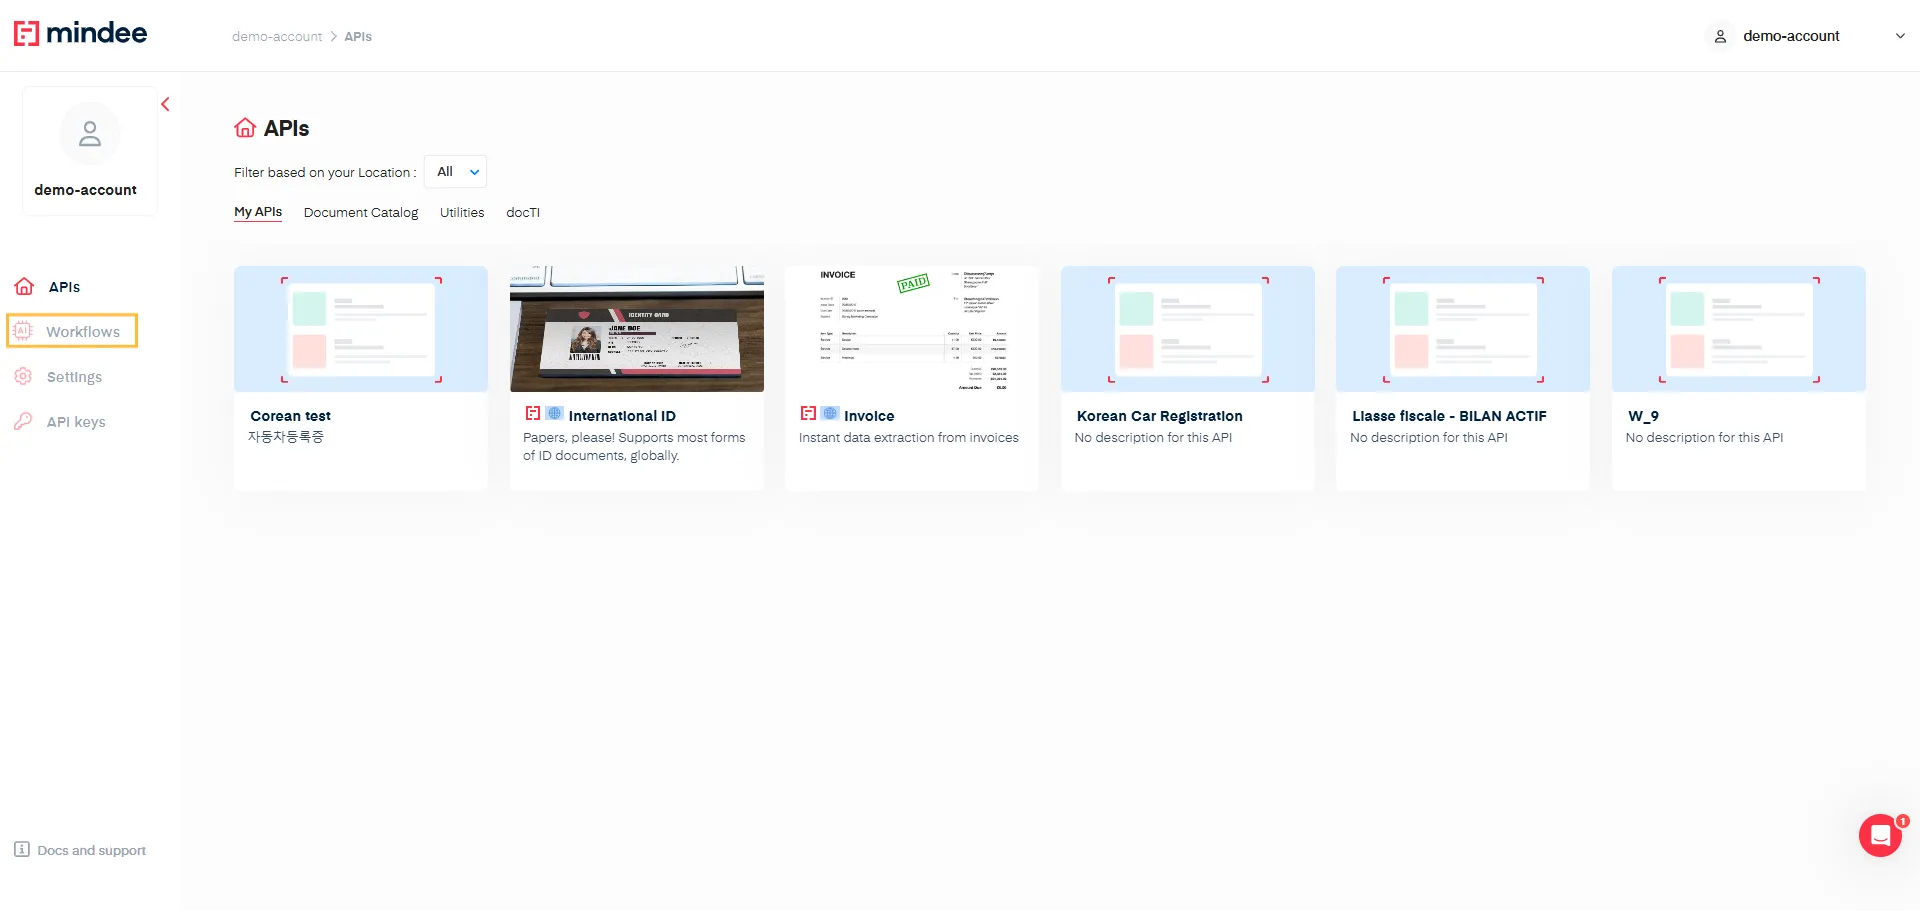
This page displays existing workflows and the creation button.
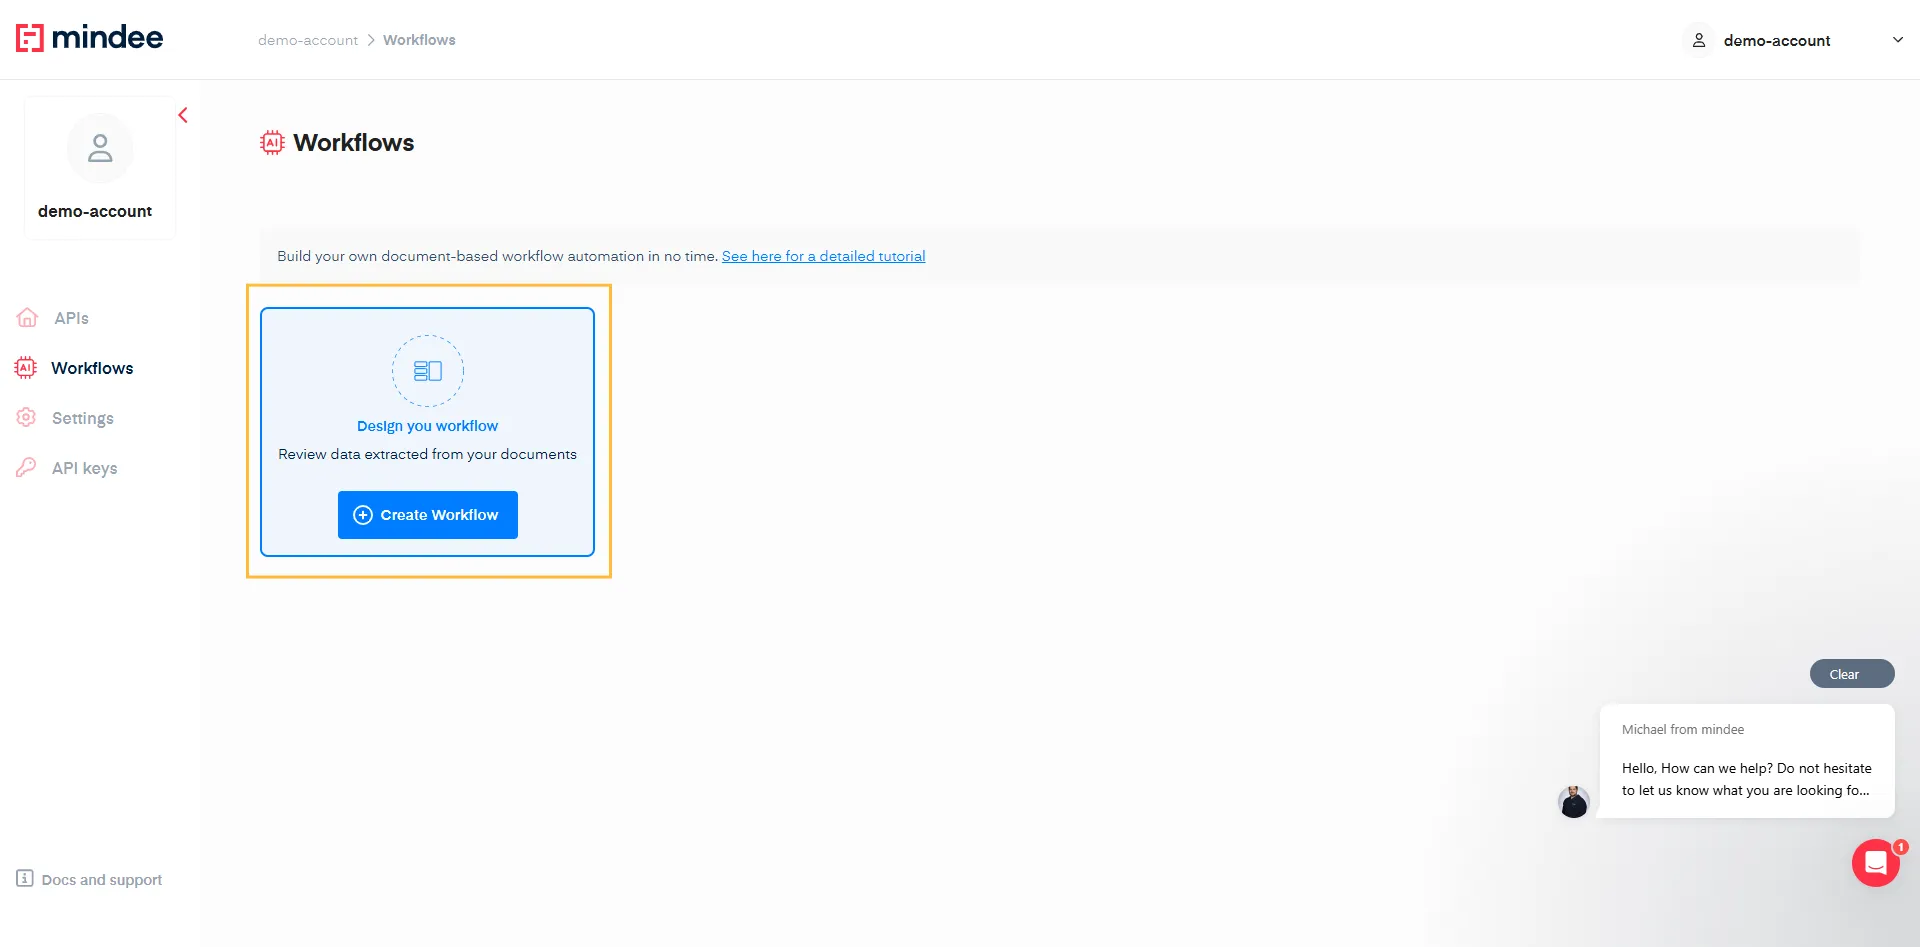
- Click on Create Workflow to start the creation process.
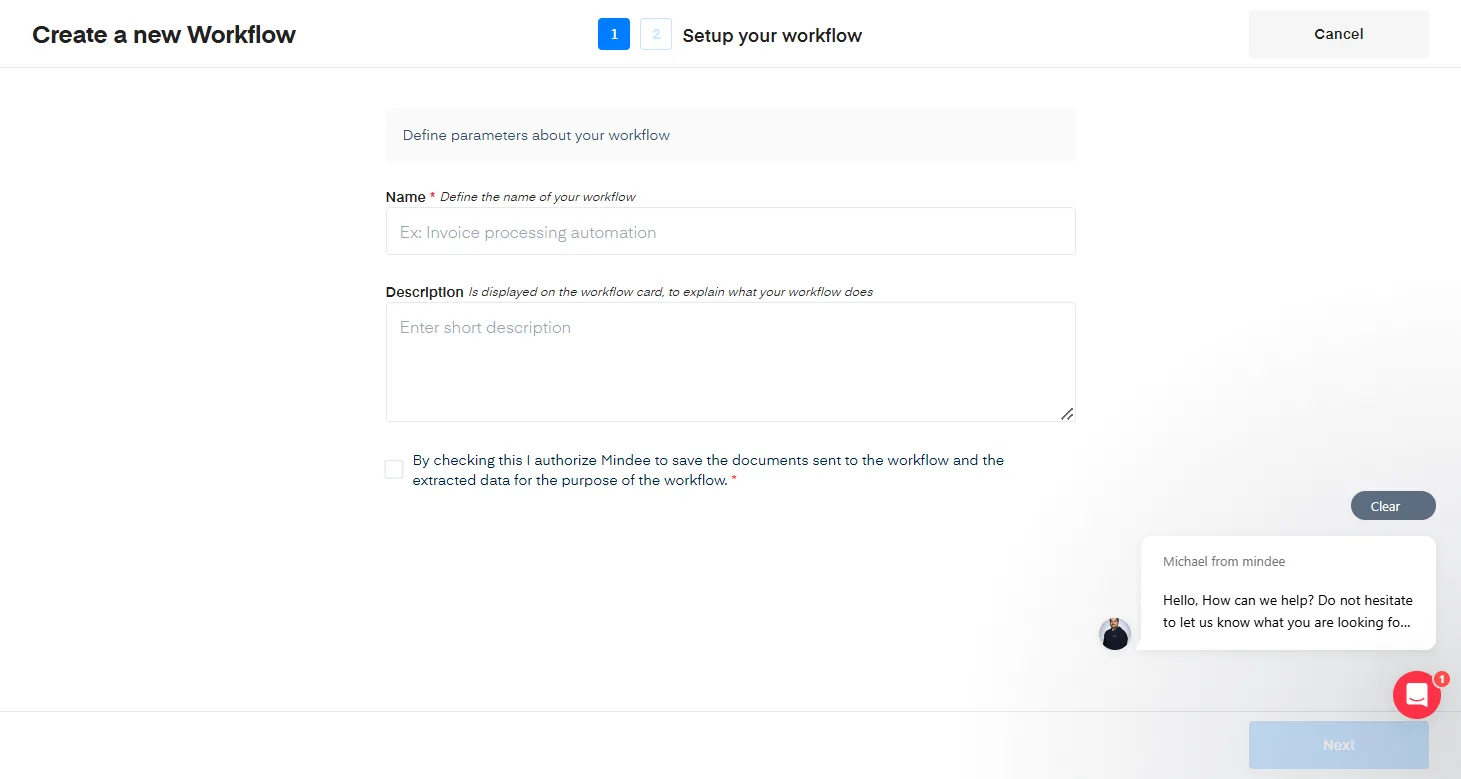
- Define the name of your workflow. Four our example, let’s call it ”Invoice Validation”
You can add a Description (optional). But this can help you later on to better differentiate your workflows. For our example we will enter: “Validate Invoice key information”.
- Finally check the box:
“By checking this I authorize Mindee to save the documents sent to the workflow and the extracted data for the purpose of the workflow.”
Typically, Mindee doesn't store your documents and data, but this is necessary for workflows since we need to keep the extractions for later validation.
Documents and extractions are kept for a period of XXX.
After this period, documents and data (both extracted and reviewed) will be deleted.
- Hit Next to move to the next step.
Within this step you will define the extraction product you will use within the workflow: in this case the Invoice endpoint, and select the fields you want to validate.
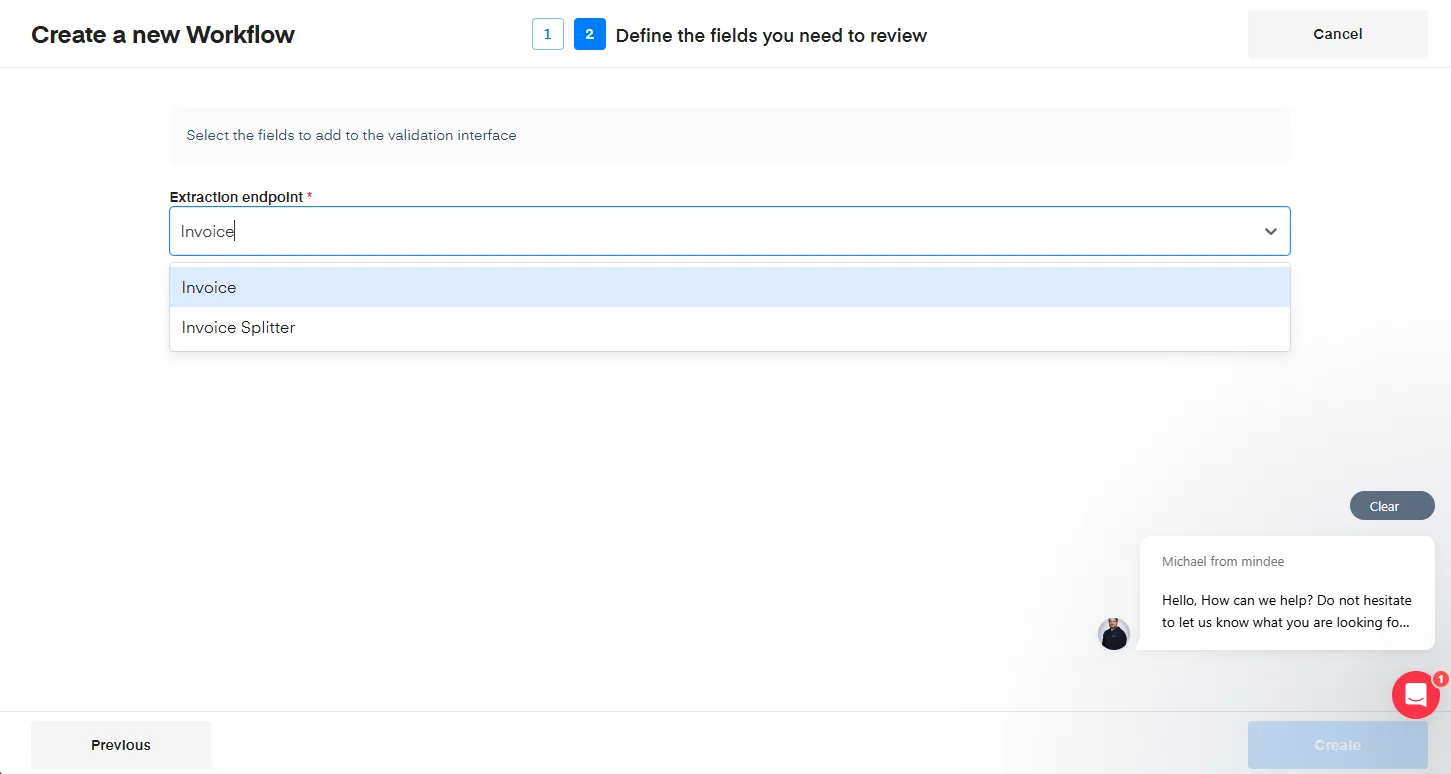
- First, select Invoice. For that you can type: “Invoice” within the Select field to find with ease the right extraction product.
The full list of fields from Invoice is now displayed and we can choose from among them the ones you want to choose.
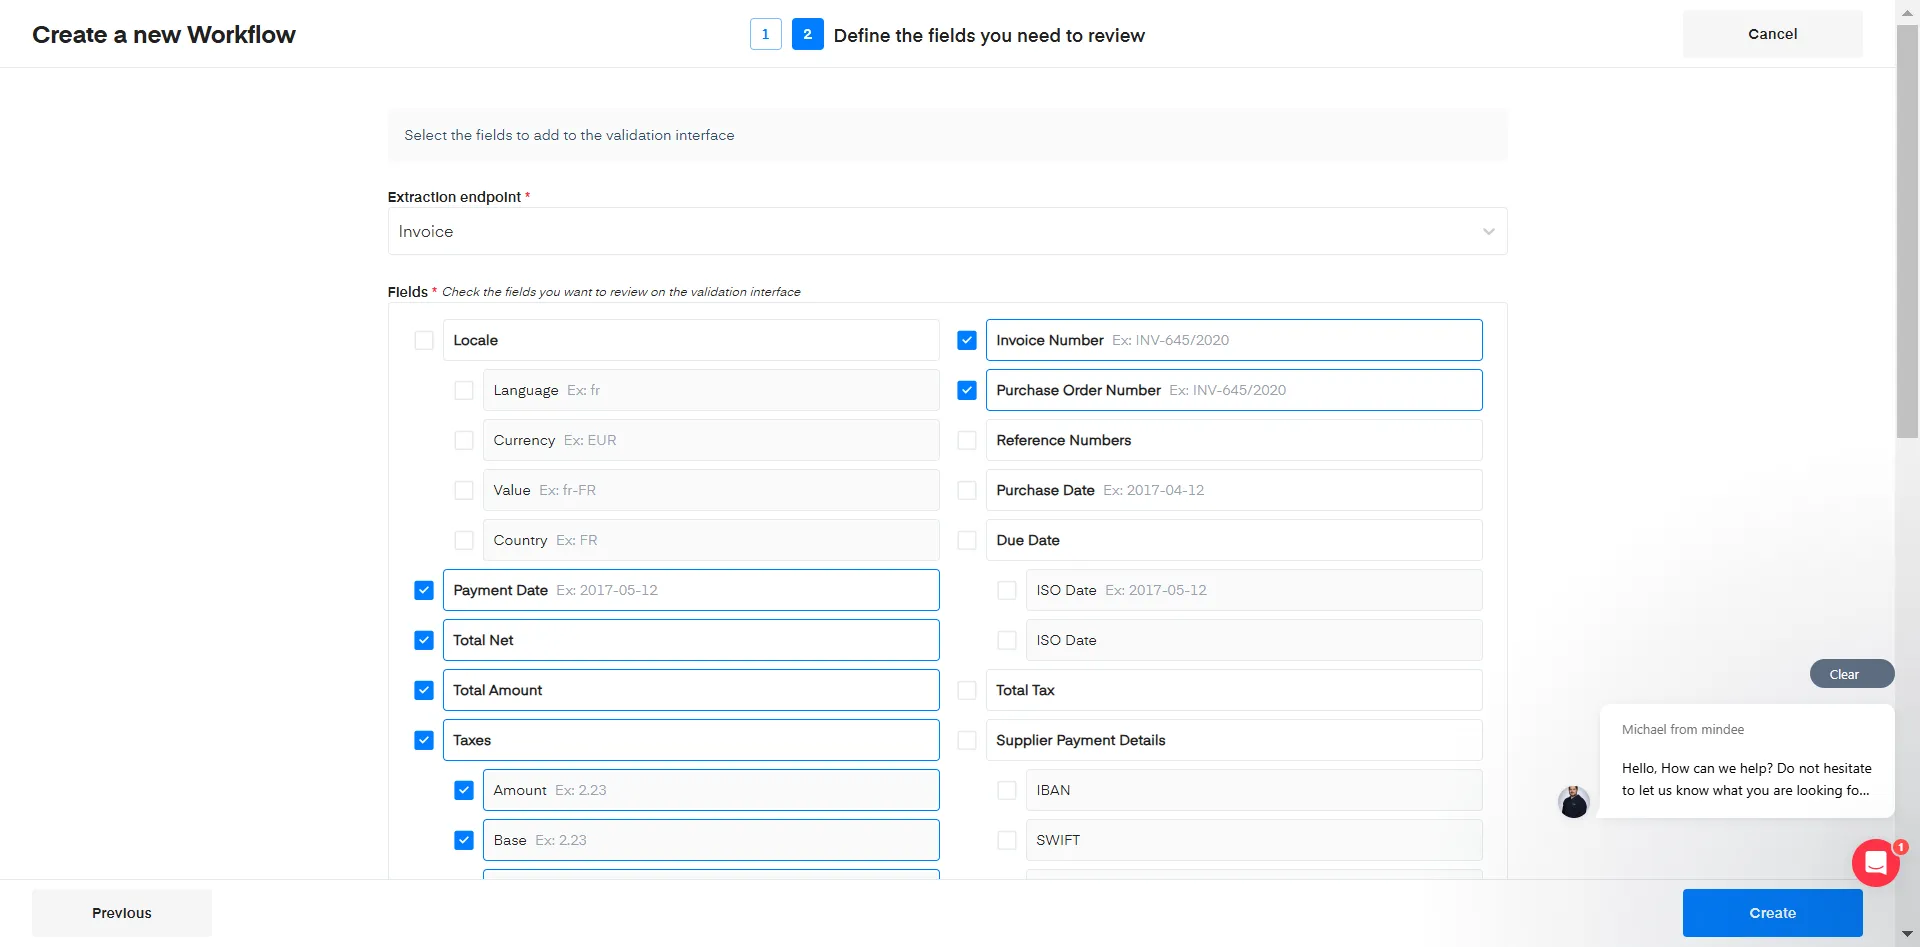
- Select the following fields for our use case:
-
Payment date
-
Total Tax
-
Total Amount
-
Taxes
-
Invoice Number
-
Purchase Order Number
-
Supplier Name
-
Supplier Company Registrations
-
Customer Name
-
Customer Company Registrations
-
Document Type
-
Line Items
- Now you can validate the workflow creation by clicking on the Create button.
After creating the workflow you will arrive directly on the workflow Documents Page.
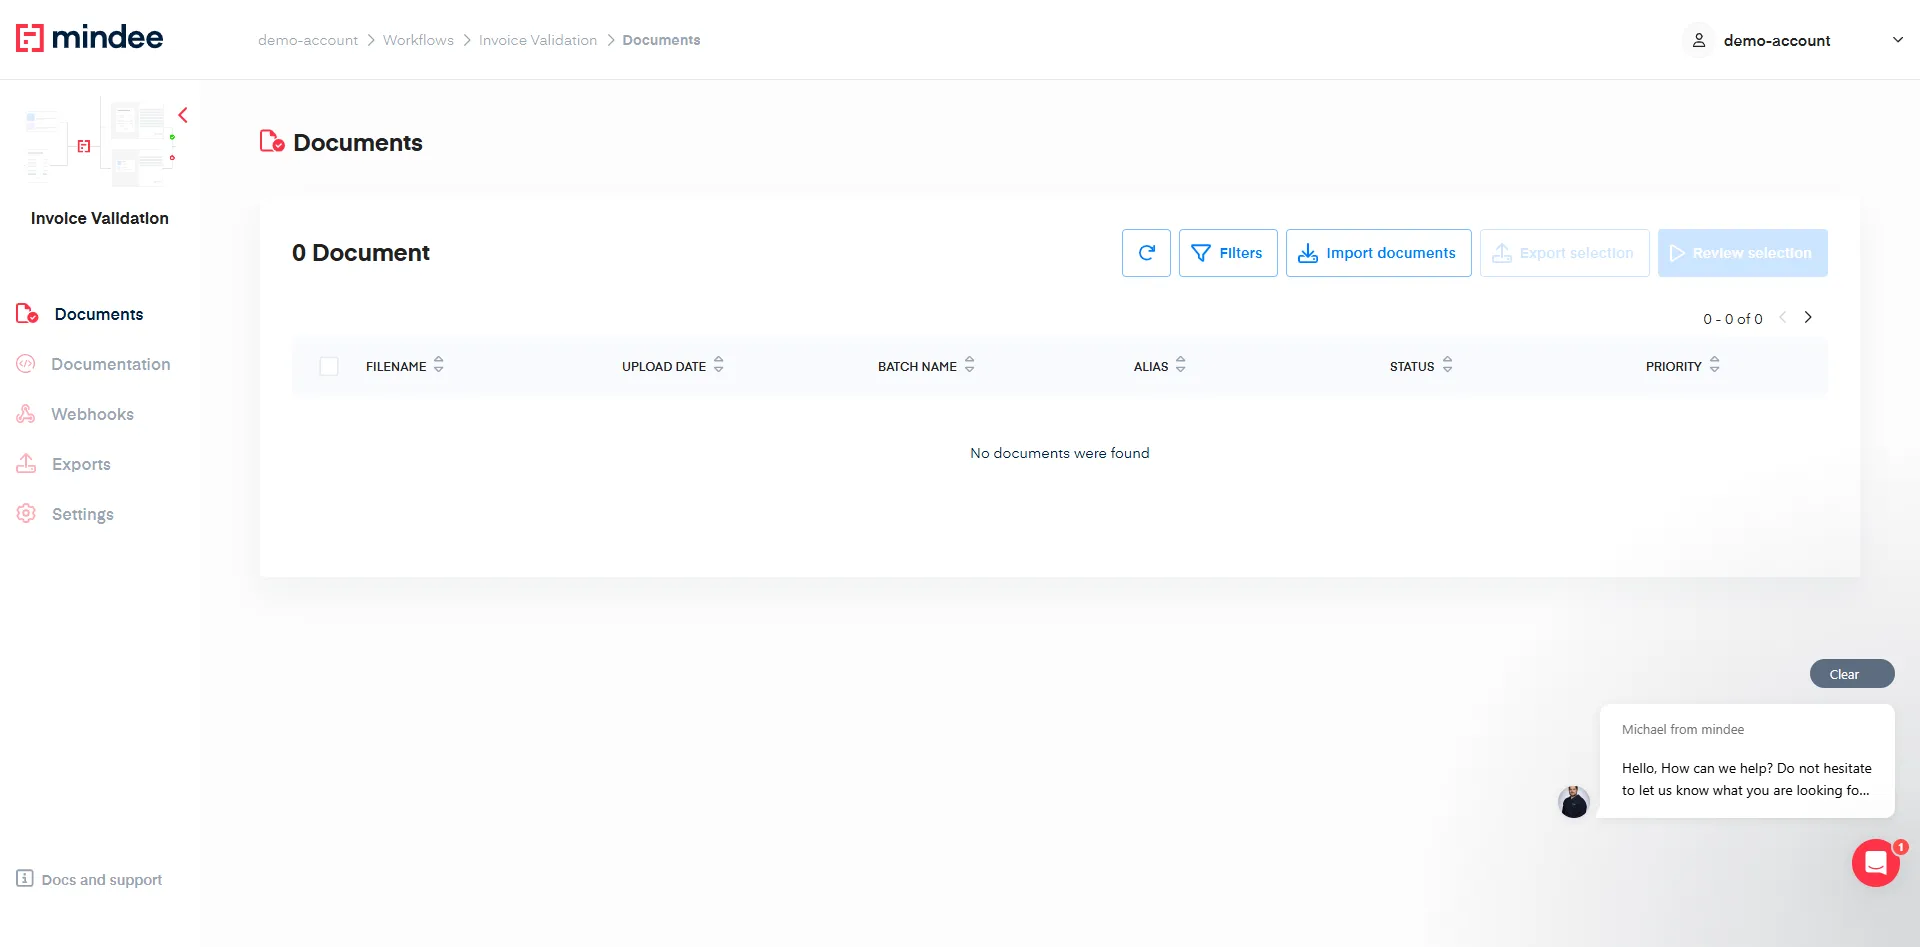
Once your workflow is created, you can access it through the Workflows menu. All created workflows are listed and accessible here.
Add documents
- You'll need to get an invoice. This can be a recently received invoice or you can google for free invoice samples that you can download to test with. Alternatively, you can use the sample invoice provided below.
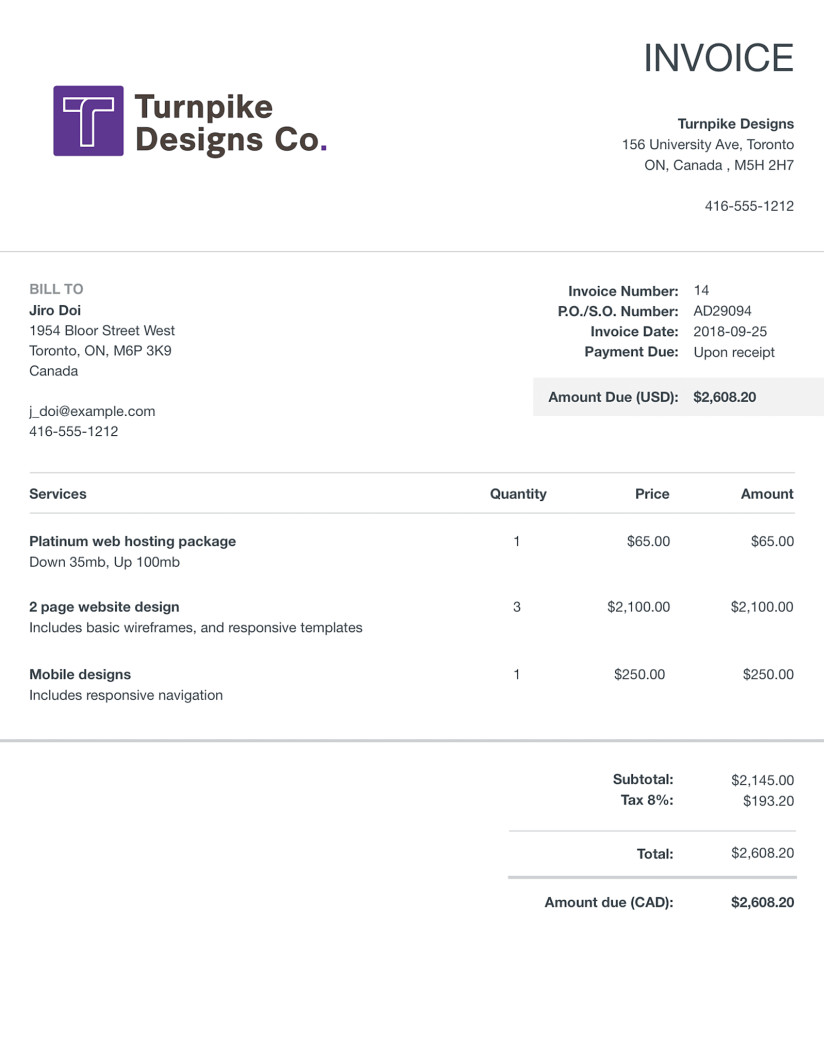
- To add a document, click the Import documents button.
This will display the following popup:
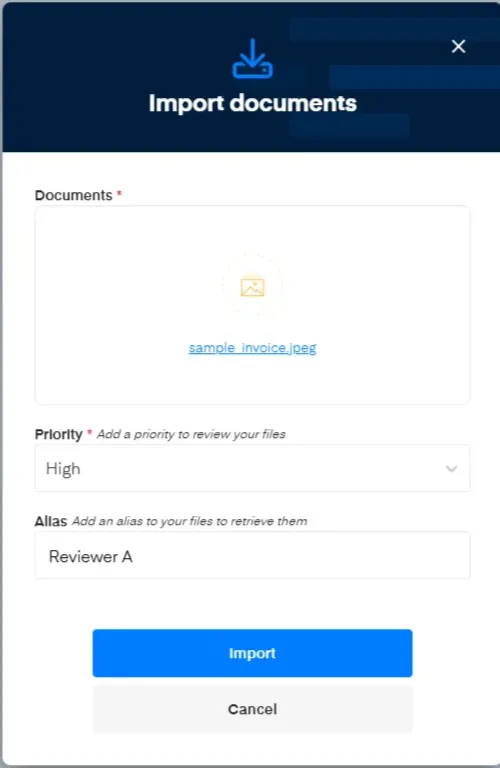
- Add the sample invoice by clicking on the Documents field or using a drag and drop.
- Set the priority (High in our example). The priority is a visual indicator that you can use to filter later on to select first the highest priority documents to be reviewed.
- Set the Alias. The Alias is a text field you can use to filter your documents later. Think of it as a tag to identify a reviewer, geography, supplier, or other category.
- Click Import when finished.
Your imported document will appear in the list.

You can see the Status change from Processing to Processed, once the prediction is available.
You can repeat the process with several documents or a zip.
Filter & select documents
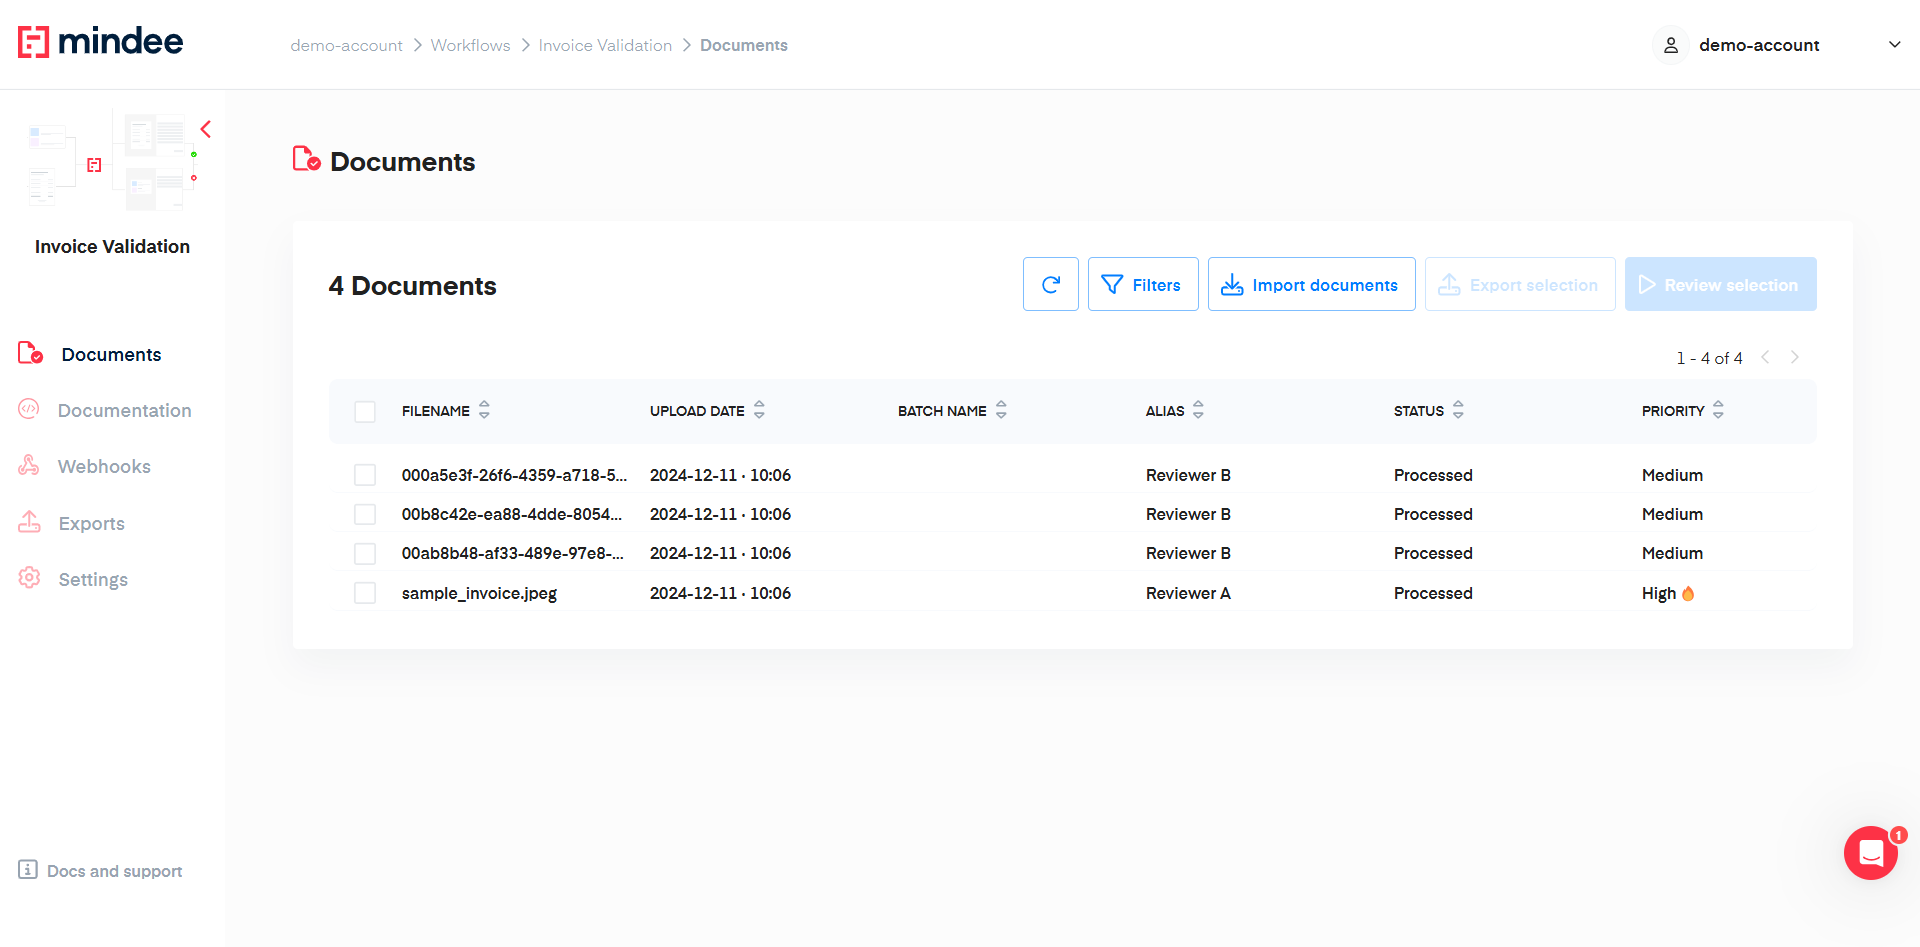
- Click on Filters to display the select your files to be reviewed.
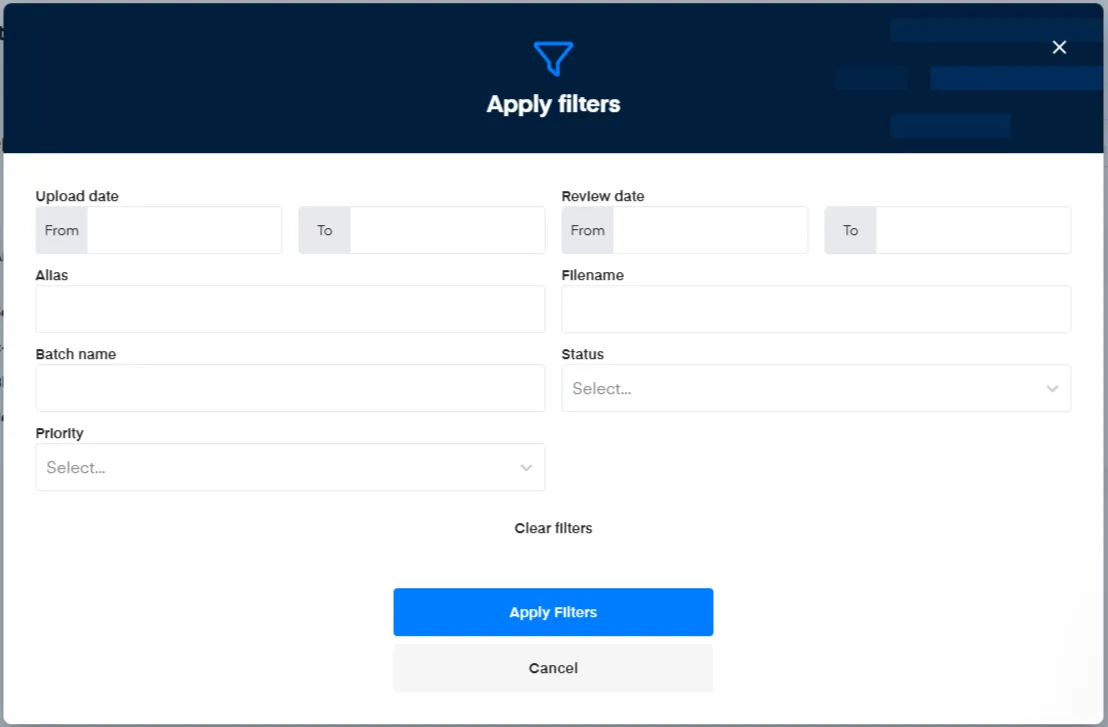
- Let's choose the files that are _Processed _and with the Alias "Reviewer A".

- Hit Apply Filters.
The list of documents only displays the document with the Alias "Reviewer A"
- Now, you can select the document by checking the box or directly next to FILENAME to select all documents from the page.
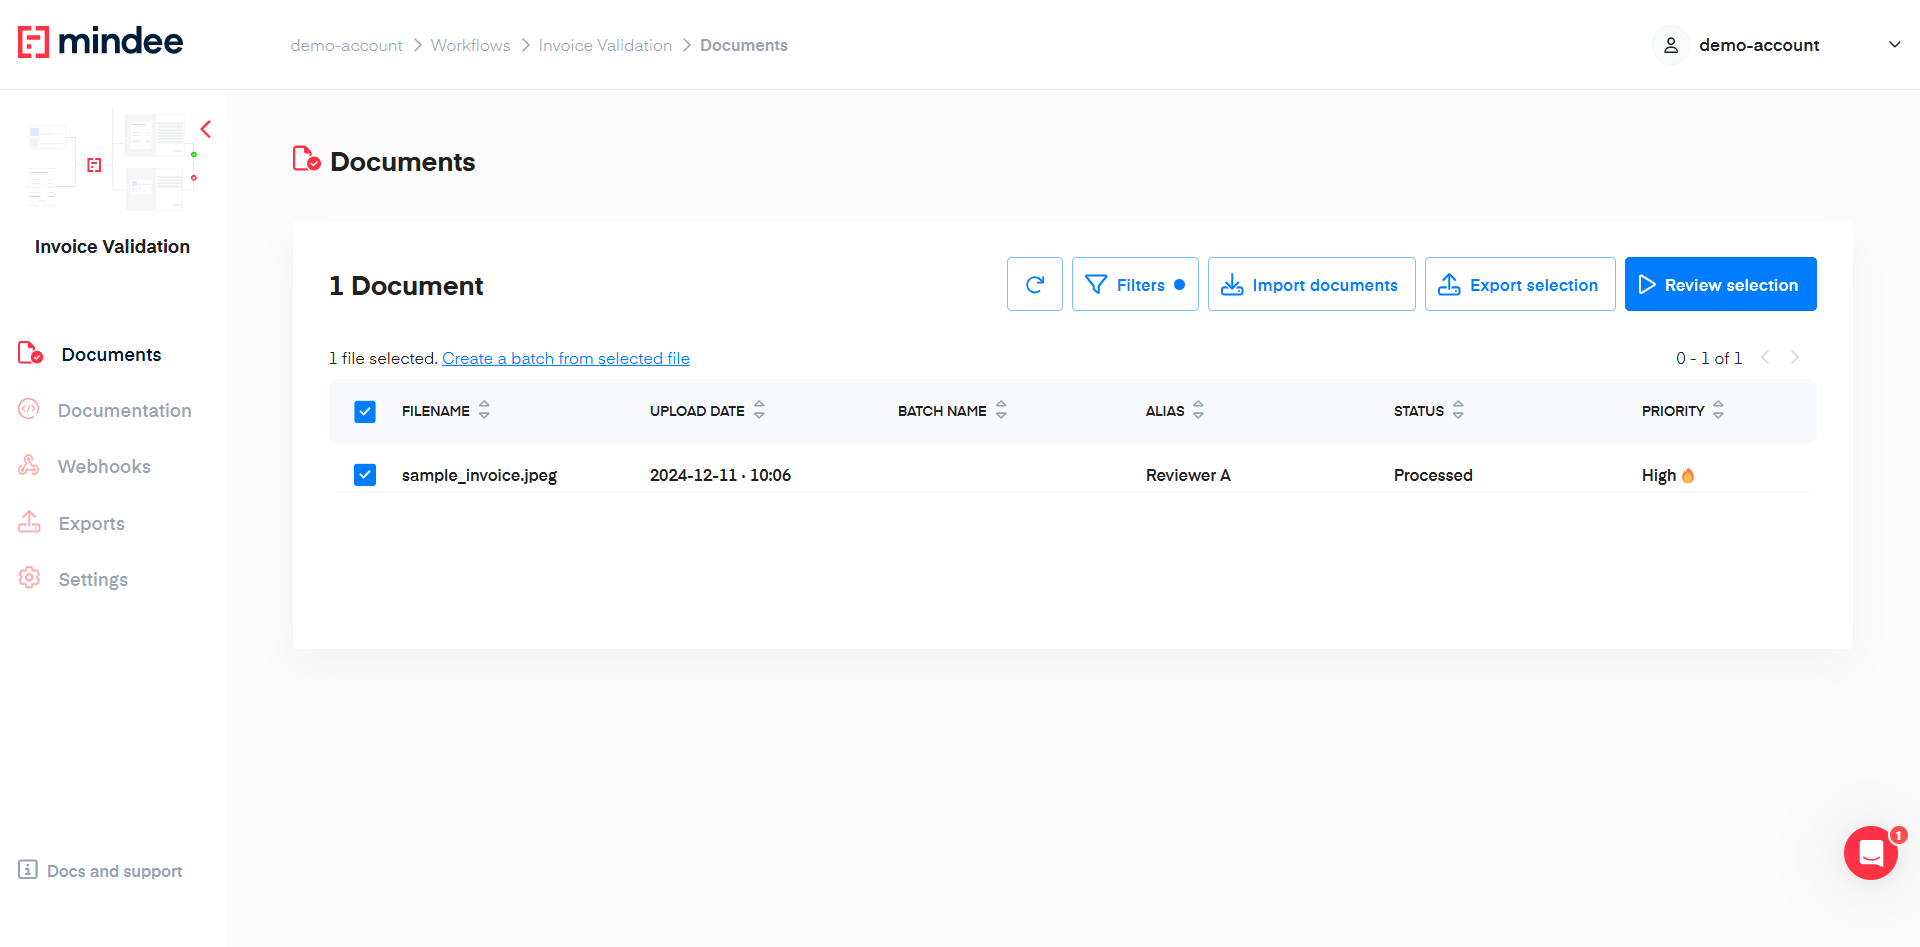
- Click on Create a batch from selected file. Defining a batch for selected documents helps structuring the list of documents to review. You can easily come back to it later on, if you did not finalise reviewing the list. And it ensures that the other reviewers knows you selected this file in case several reviewers participate in the review of the predictions.
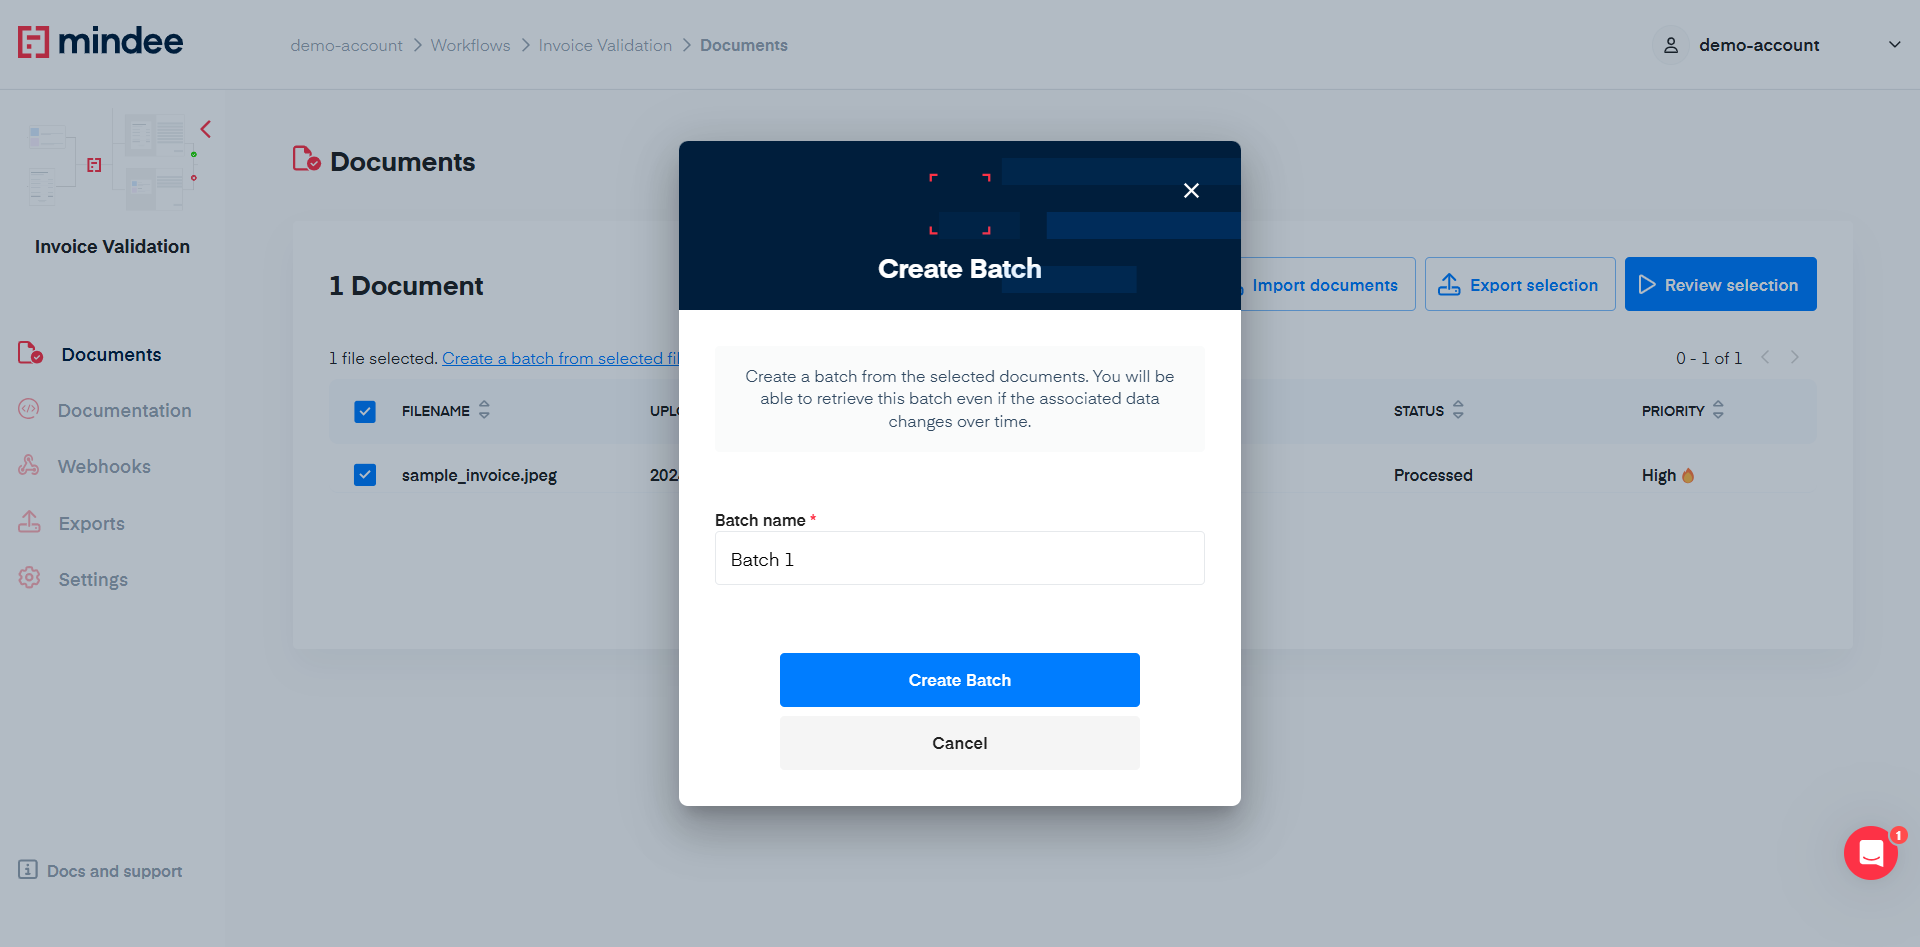
- Set the Batch Name to Batch 1.
- Hit Create Batch.

The Batch Name is now visible for the sample invoice.
- Click on Review Selection to start the validation of the predictions on the sample invoice.
Validate documents
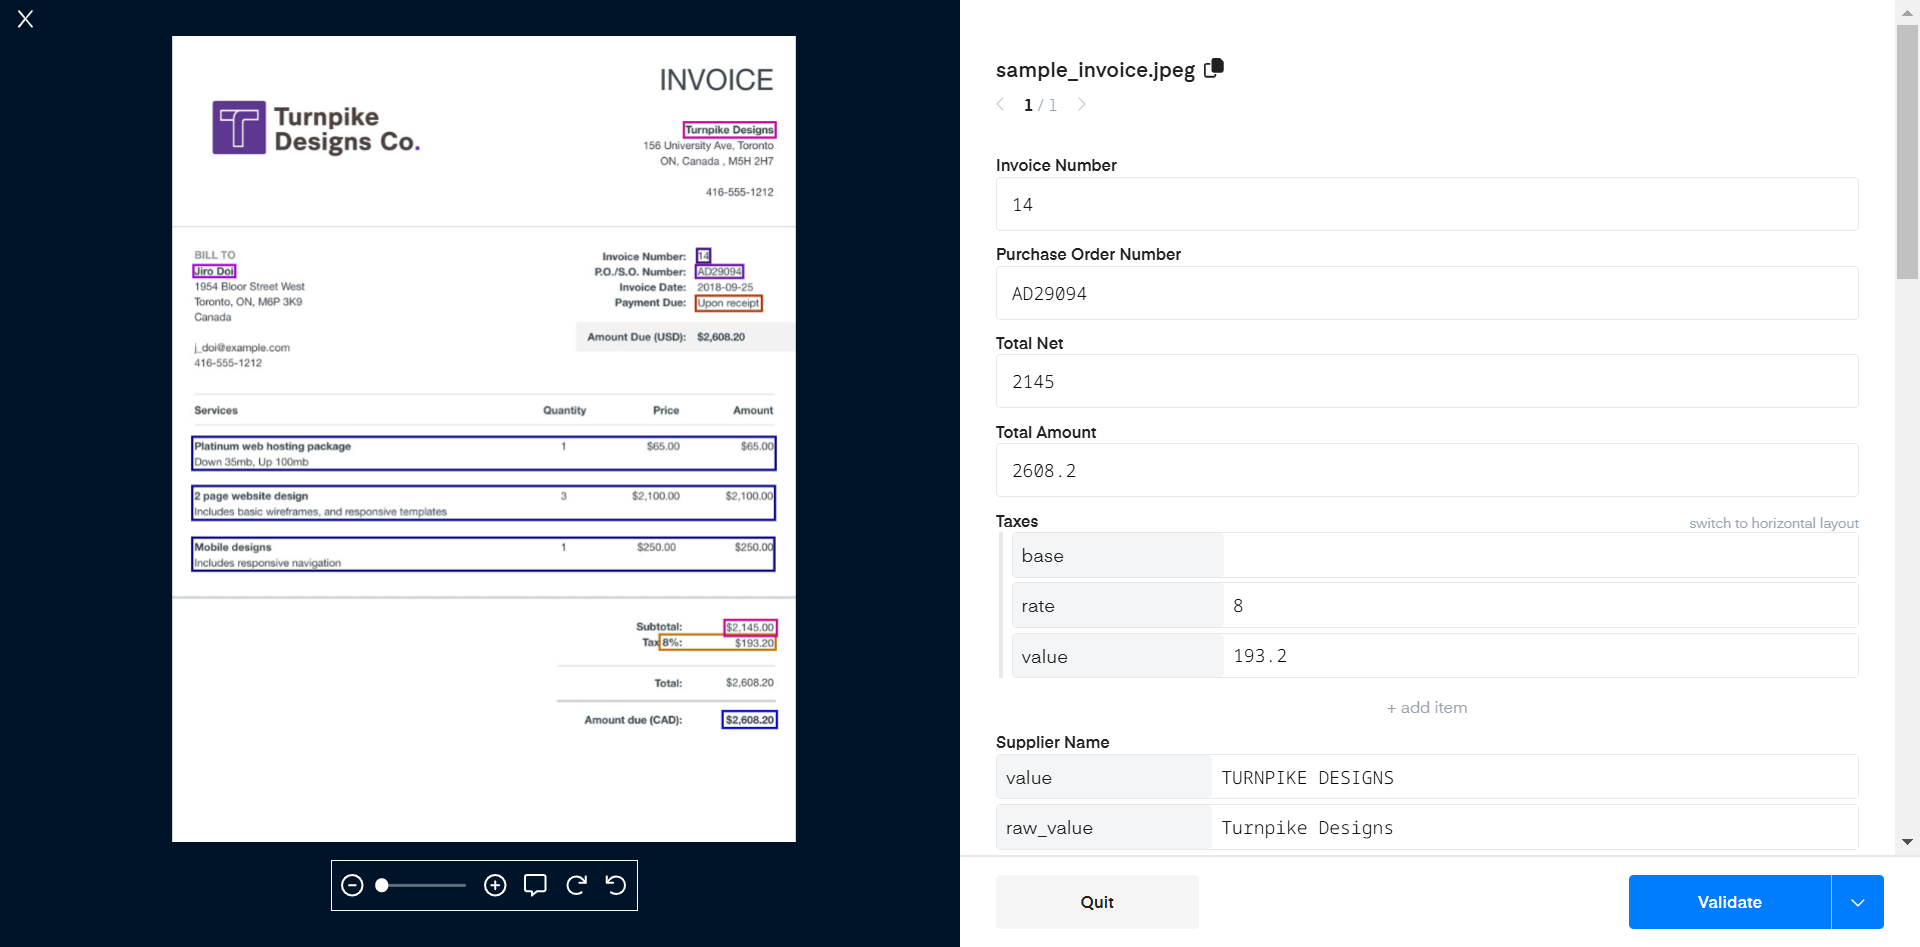
The review interface is now displayed with on the left side the document and some commands to manage the zoom on the document or the rotation of the document. You can see as well on the documents bounding boxes surrounding the elements of the prediction. You can click on them to set the focus on the corresponding field on the right and validate the prediction.
Go through each field to validate the correct value are extracted. When you change the focus on a new field on the right part, you will see the bounding box appear on the document to help you validate the value is correct or not.
On this example, all the value are correctly extracted.
Let's hit validate. As we have only one document, the review interface will close.
In the case you selected several documents you will just move to the next document until you hit the end of the selection or close the interface.
Export validated data.
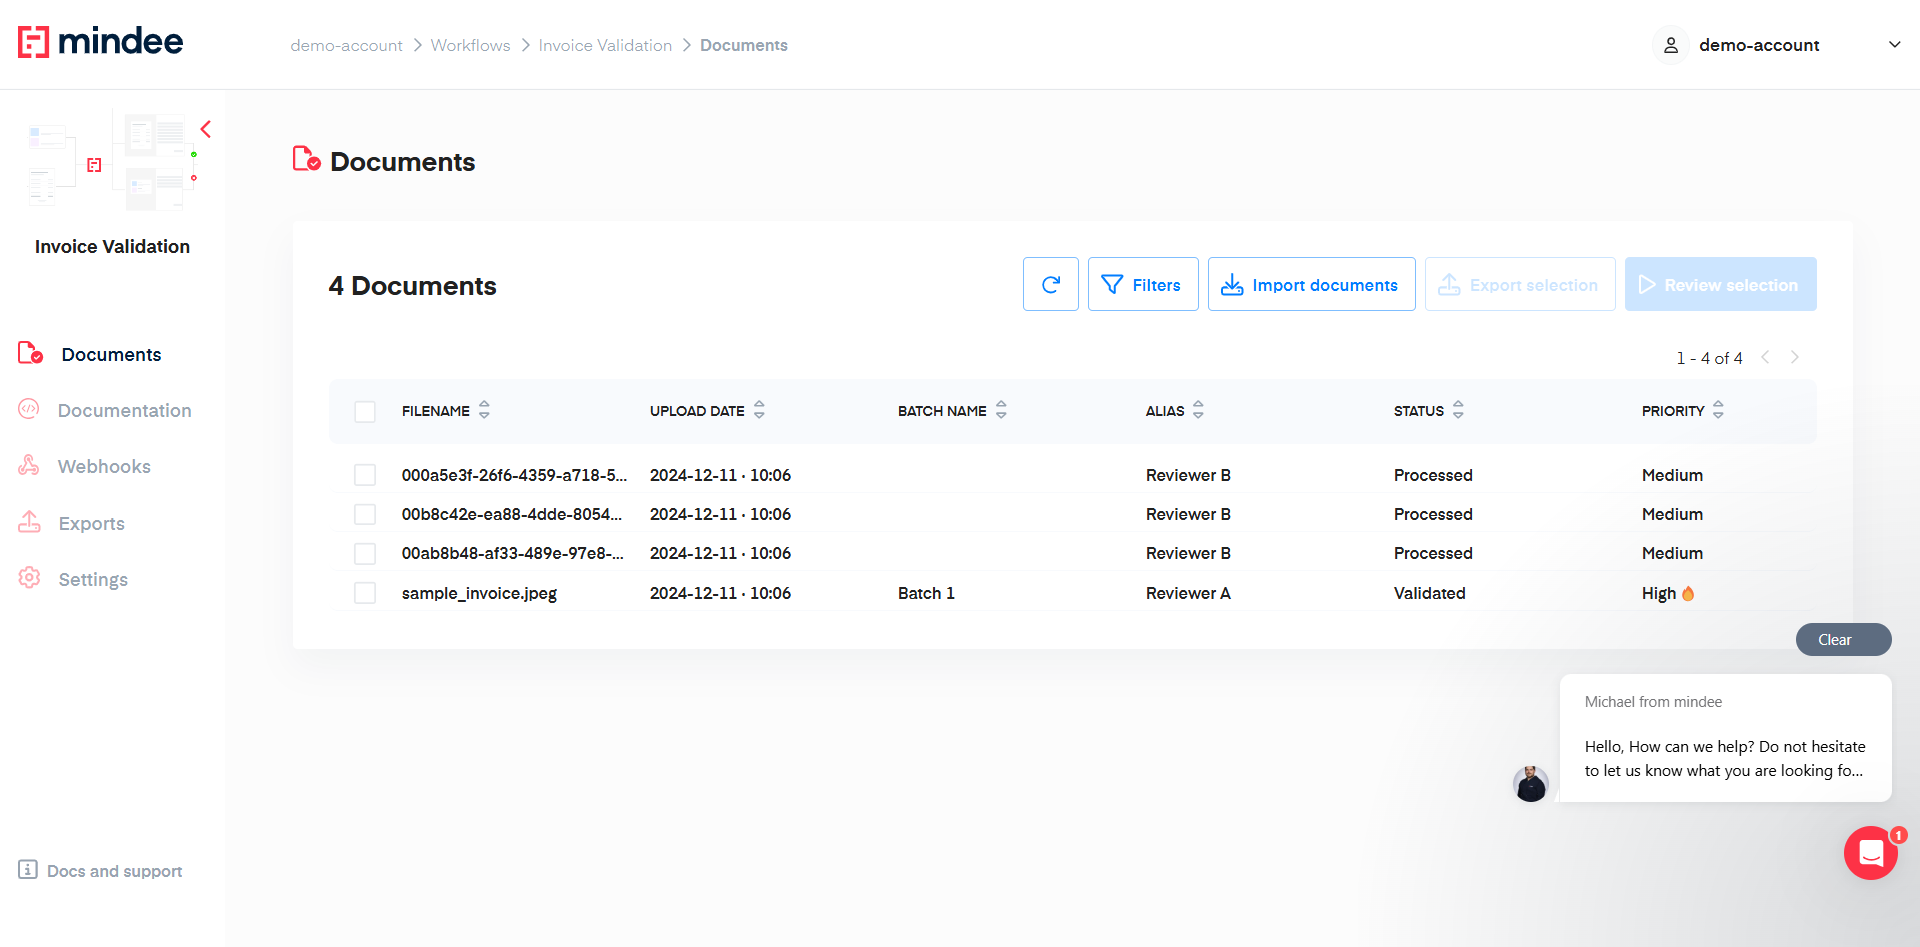
We now have a Validated document, let's export the validated data.
- Select the document using a filter as previously or just by checking the box.
- Hit Export selection
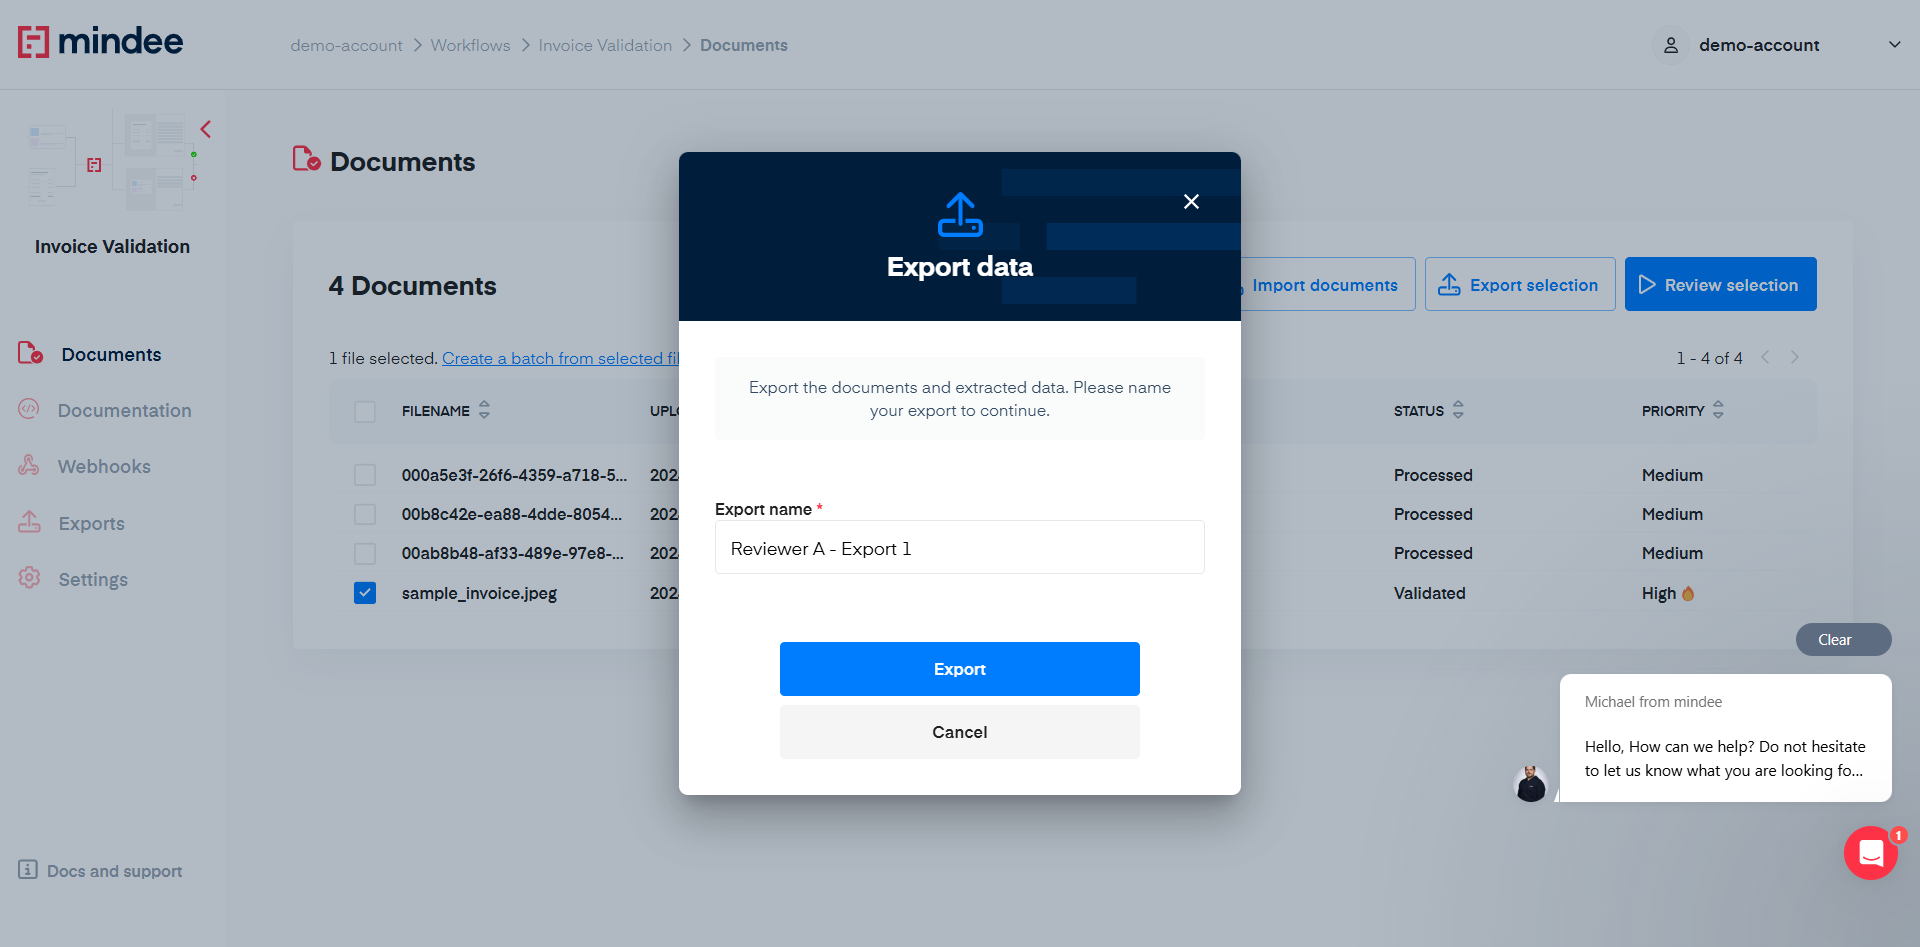
- Enter An export name In our Case let's call it Reviewer A - Export 1
- Click on the Exports menu item on the left to display the list of all the exports.
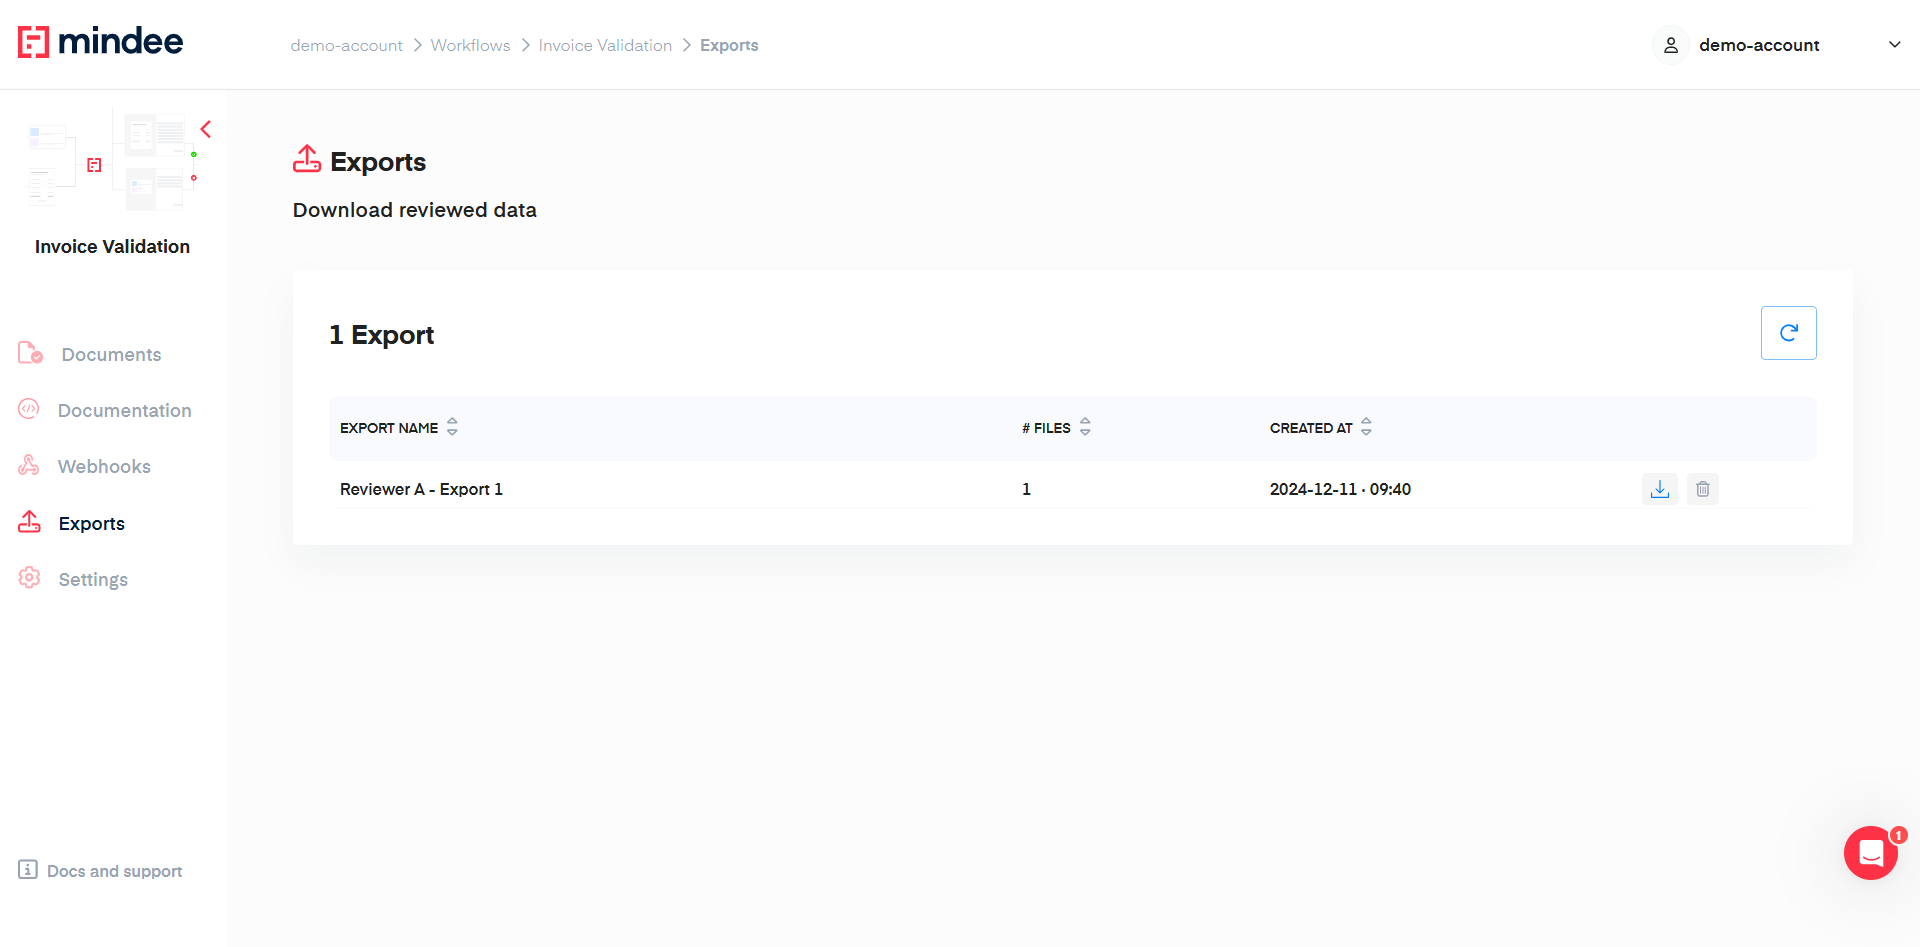
- Click on the download button on the right to access the .csv export.
The export provides the following fields for all the documents within the selection:
- filename,
- priority,
- status,
- the predictions
- the reviewed values
You can access the exports later on unless you delete them.
Updated 8 months ago
