
Prerequisite
Access to RAG is limited to Enterprise customers.
Once activated you will see the RAG menu item appear on your workflows.
What does RAG stand for?
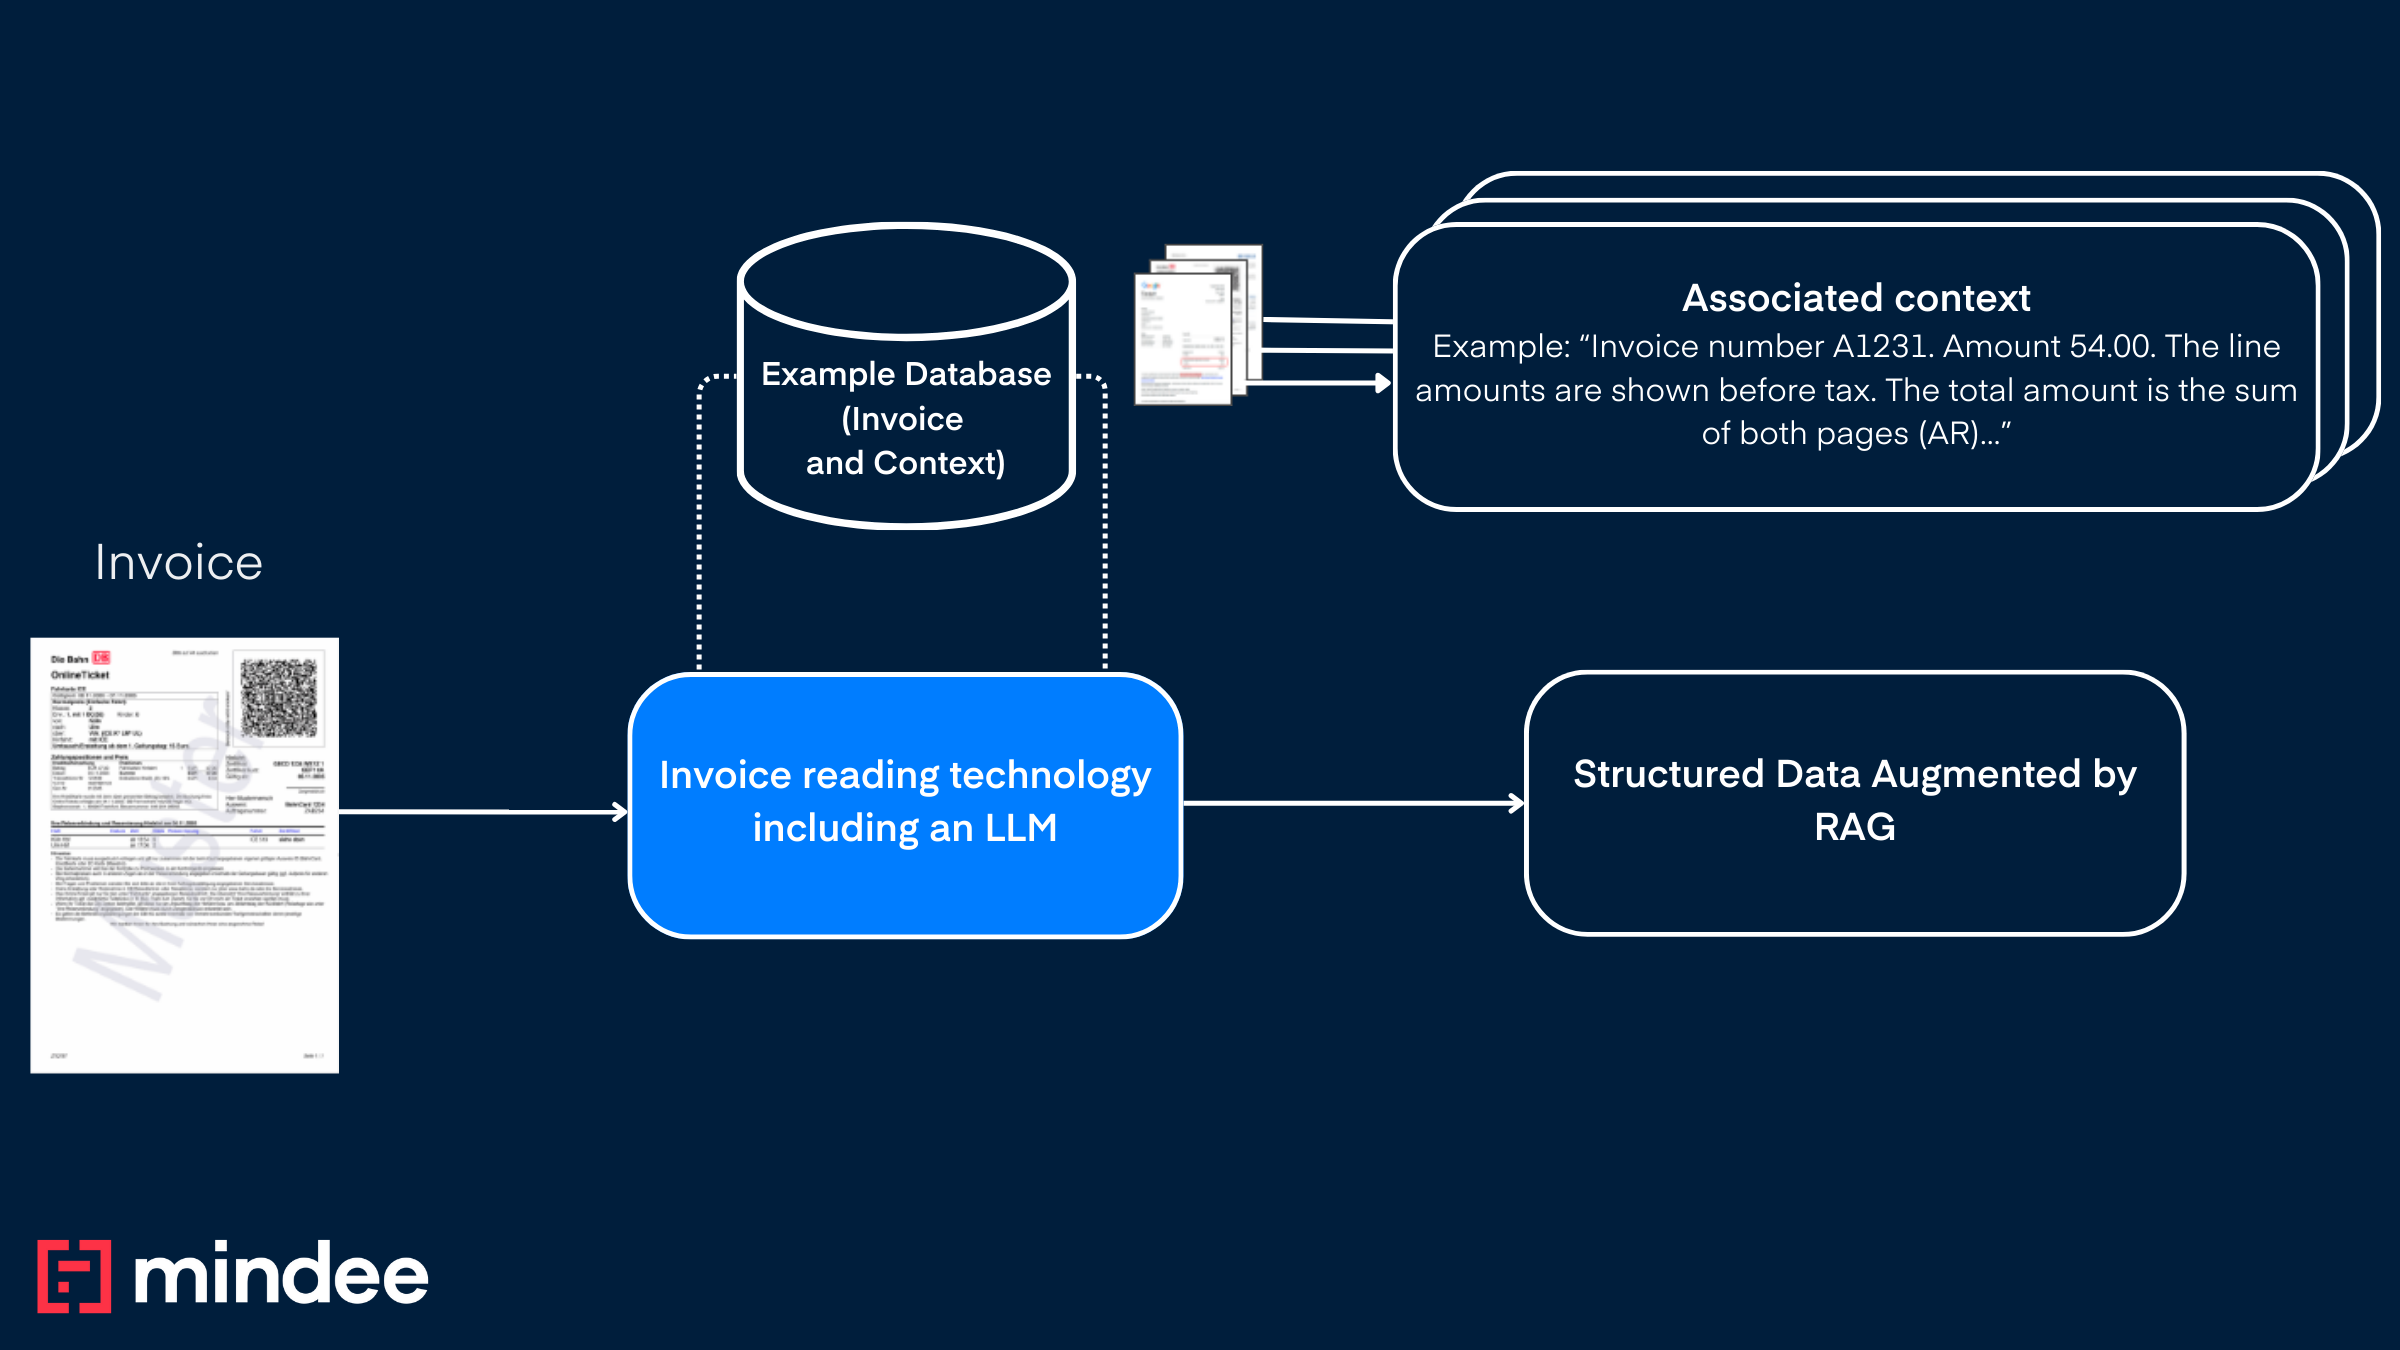
Mindee’s Retrieval-Augmented Generation (RAG) solution empowers users to customize and refine document extraction with unprecedented flexibility. Traditionally, our models operate with fixed extraction rules, making it challenging for clients to correct recurring errors or tailor results to specific business needs. RAG solves this by allowing users to provide example documents paired with the desired extraction, enabling our models to learn from past corrections and apply them to similar documents automatically. By leveraging both textual and visual document similarity, RAG enhances accuracy and adaptability, ultimately reducing frustration and improving extraction performance on your specific flow.
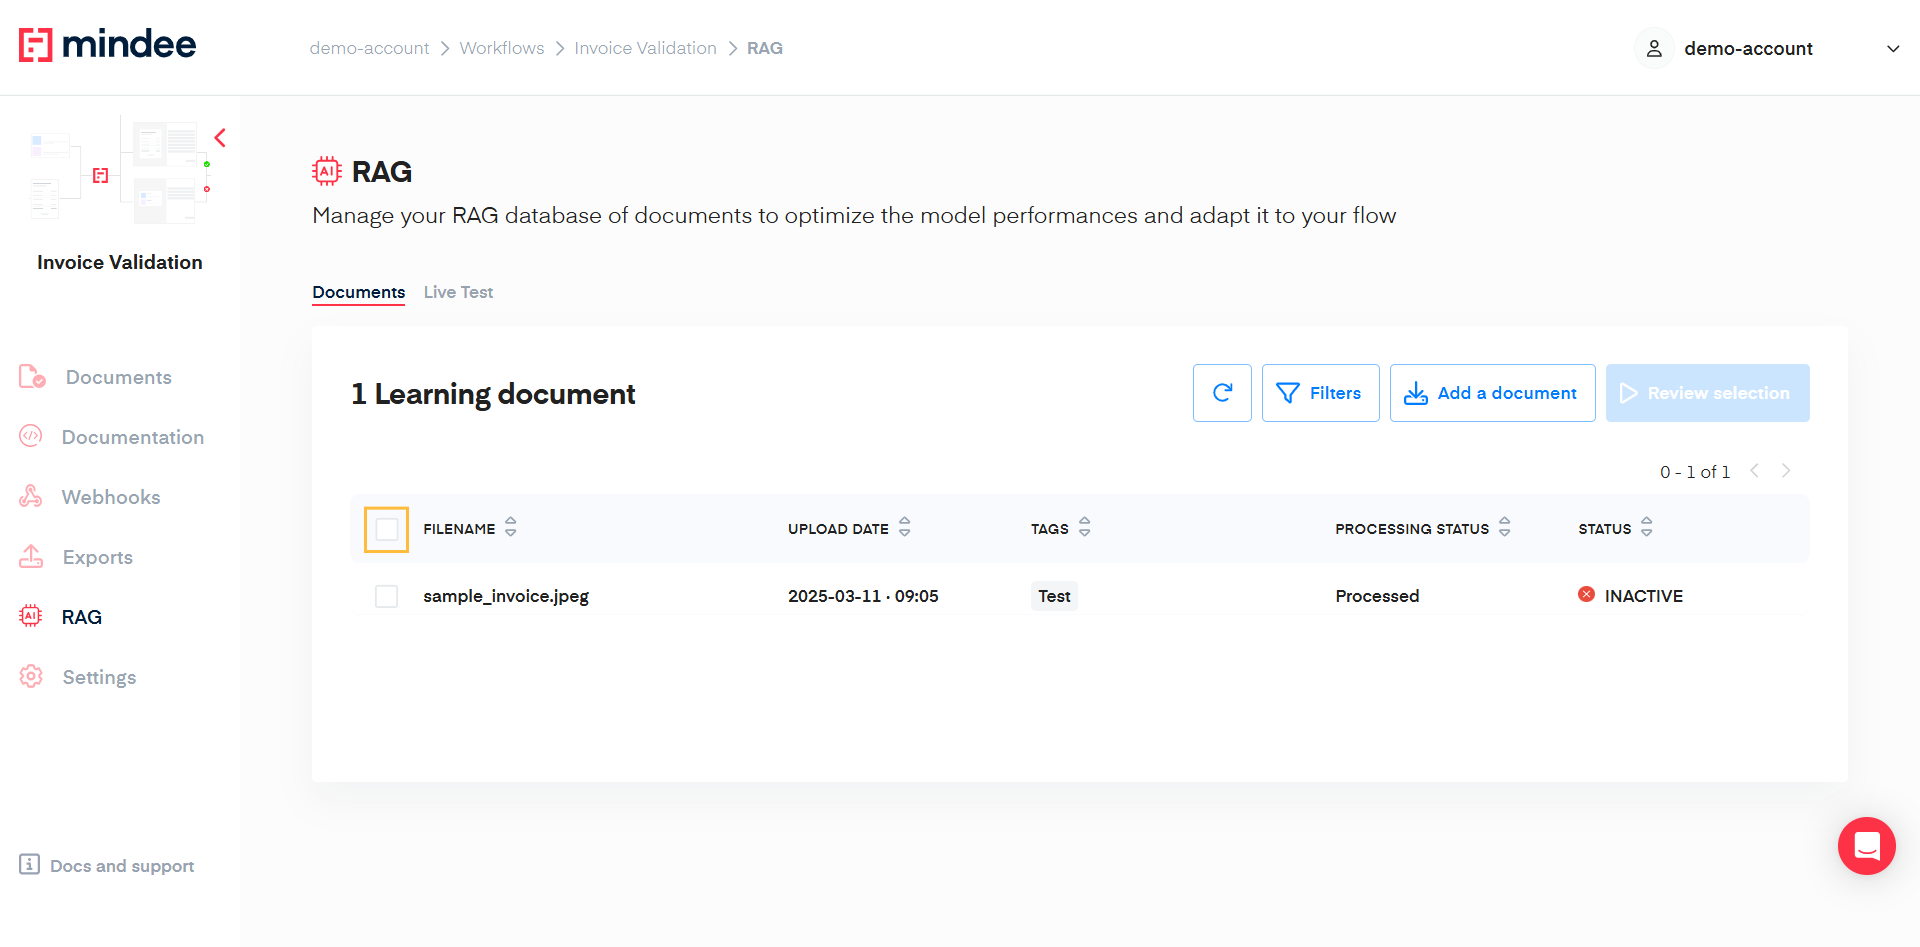
Overview
RAG are accessible from any workflows if it has been previously activated (Prerequisite).
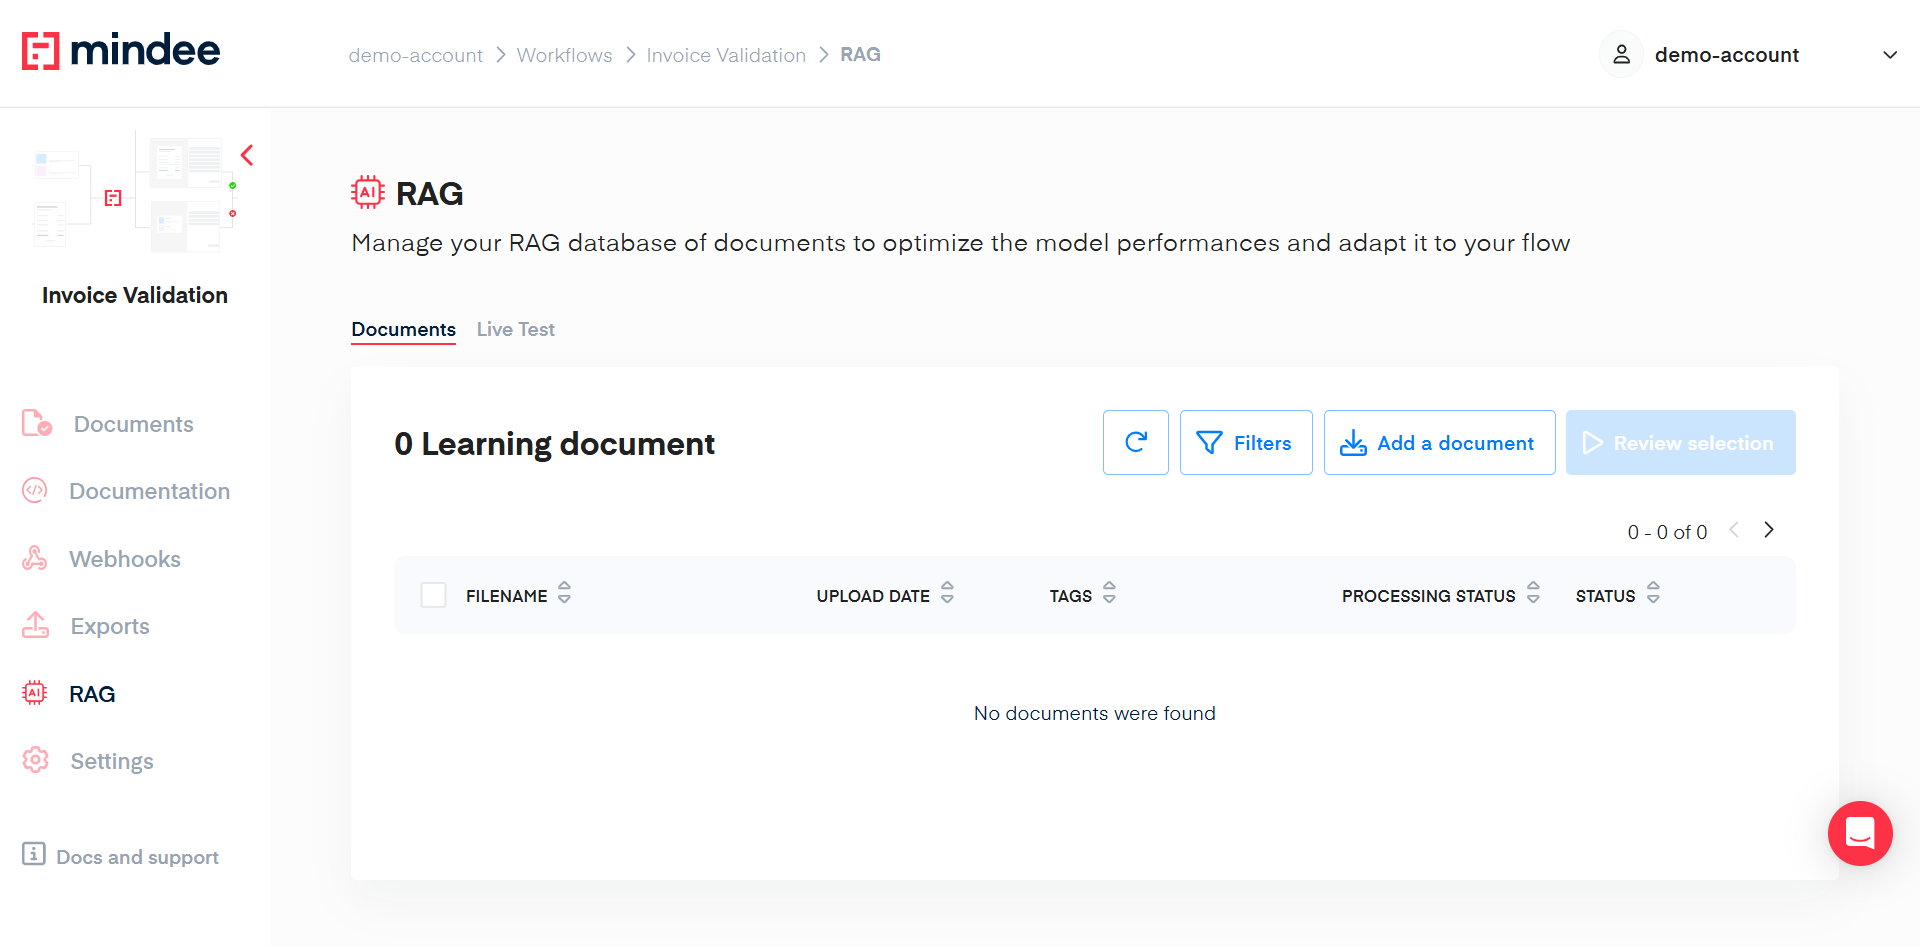
The RAG - Documents page works has a learning database where you can Add documents, validate the data extracted and use these documents to "learn" and to improve the extraction on similar document types.
On this page, you can:
- Import new documents
- Filter the document list
- Get document details
- Select files
- Review Selection
- Test the efficiency of the RAG
Import new documents
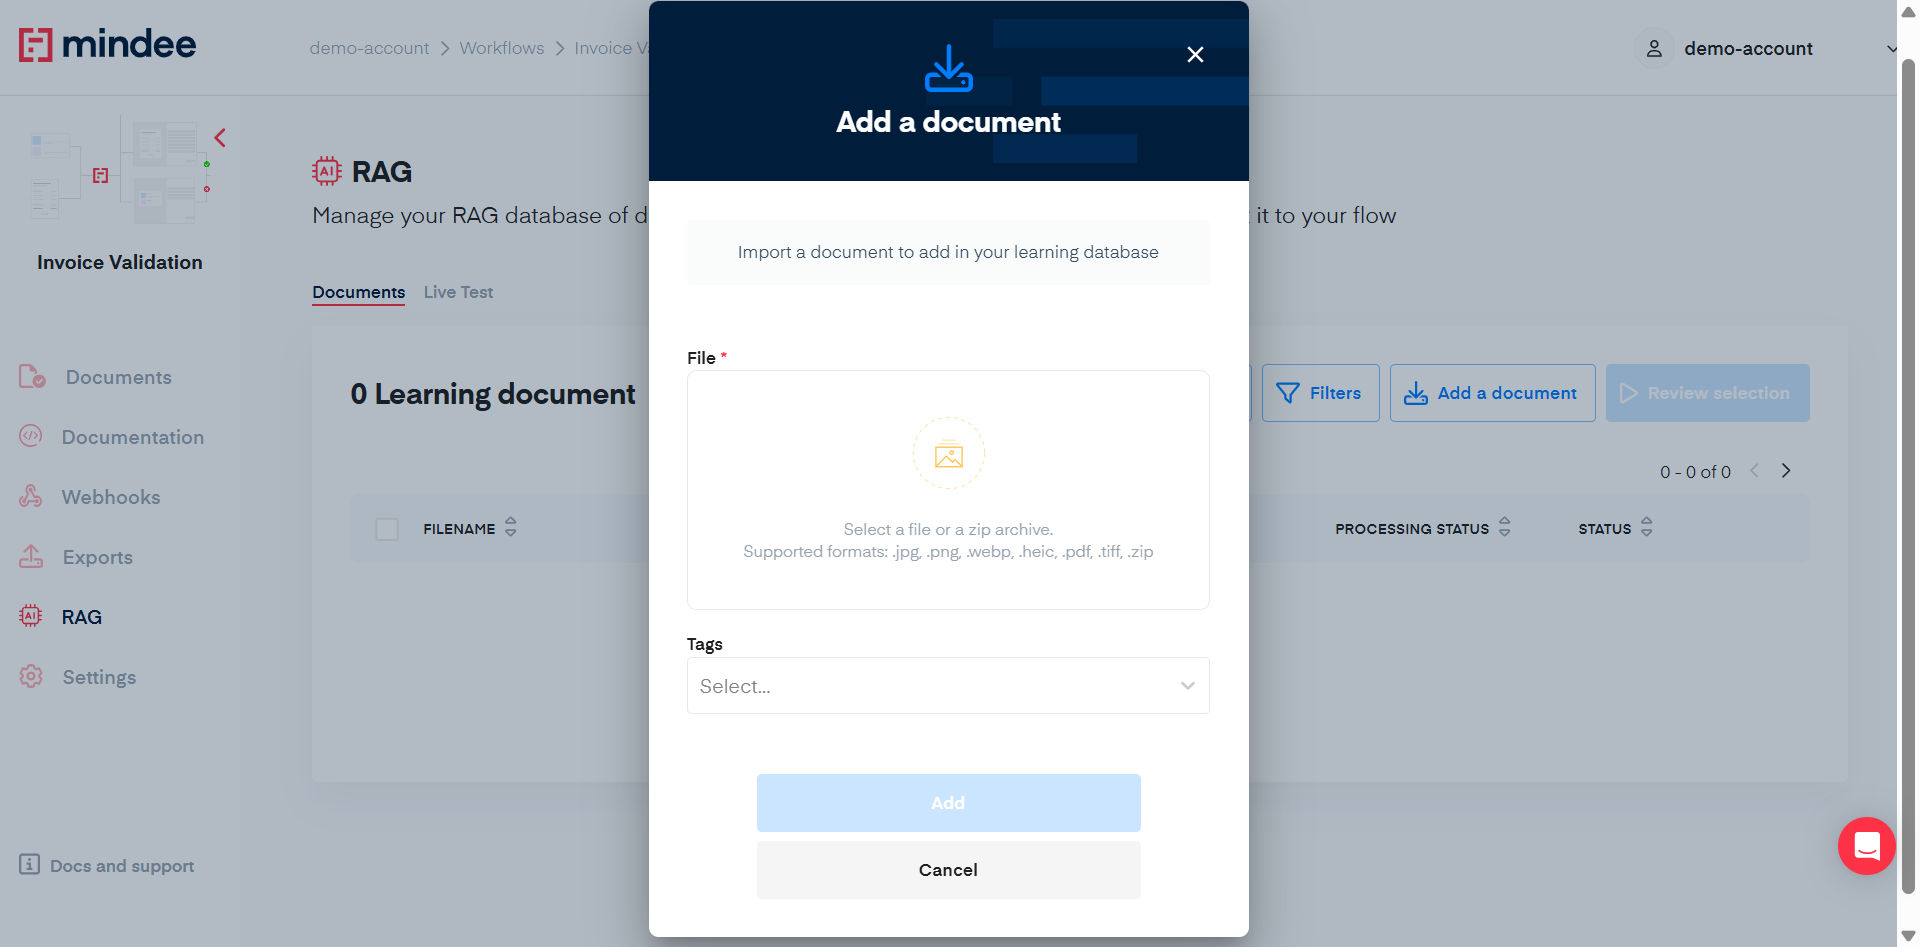
To add a document, click the Import documents button.
This will display the following popup:
Documents needs to be annotated in the RAG tab to be used for learning features!
Documents uploaded and reviewed in the Documents tab interface are separated from the one used for learning purpose. It fills other use-cases, such as Human In The Loop validations and exporting data.
Make sure you're in the RAG tab when uploading and reviewing documents for learning purposes.
Documents
You can upload either a single document or a ZIP file containing multiple documents you want to annotate. Simply click the upload field or drag and drop your file in the input.
See Document inputs for more information on supported files.
Tags (optional)
When typing in the Tags input, it will search for existing tags you already used on some of your learning documents. You can type something completely new in order to create a new tag. You can add several tags to a single document.
Tags can be useful to label your documents, in order to be able to filter them out later.
The tag is a text field you can use to filter your documents later. You can add several tags
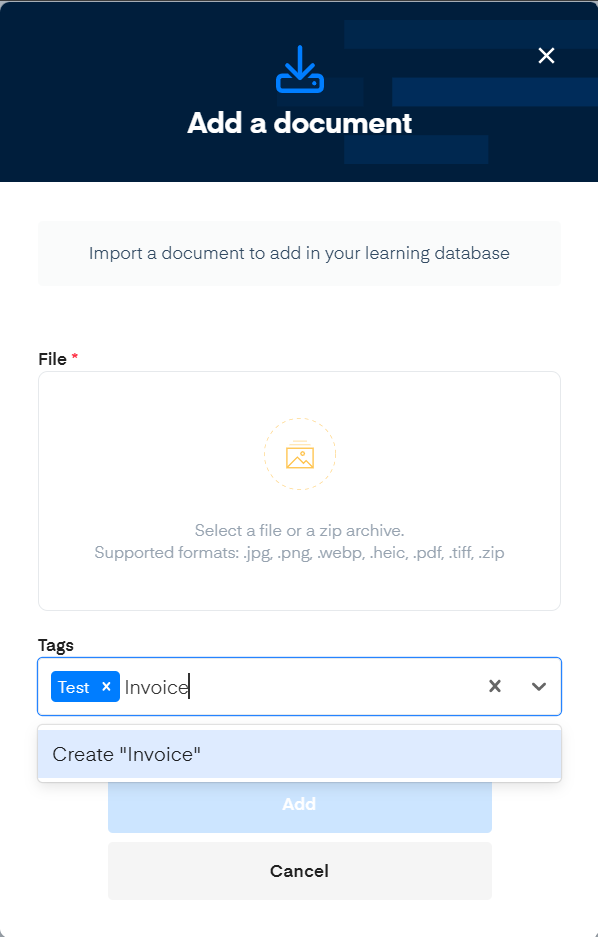
Click Add when finished, your imported document will appear in the list.

The list will refresh itself depending on the Processing Status of your document. Once it is in a Processed state, you can select it and review your selection.
In case the document does not change its status from Processing to Processed, click on the rotated arrow to manually refresh the list.

Filter the document list
Filters help you find documents that match specific criteria, in case you want to find some specific documents in your list of learning documents.
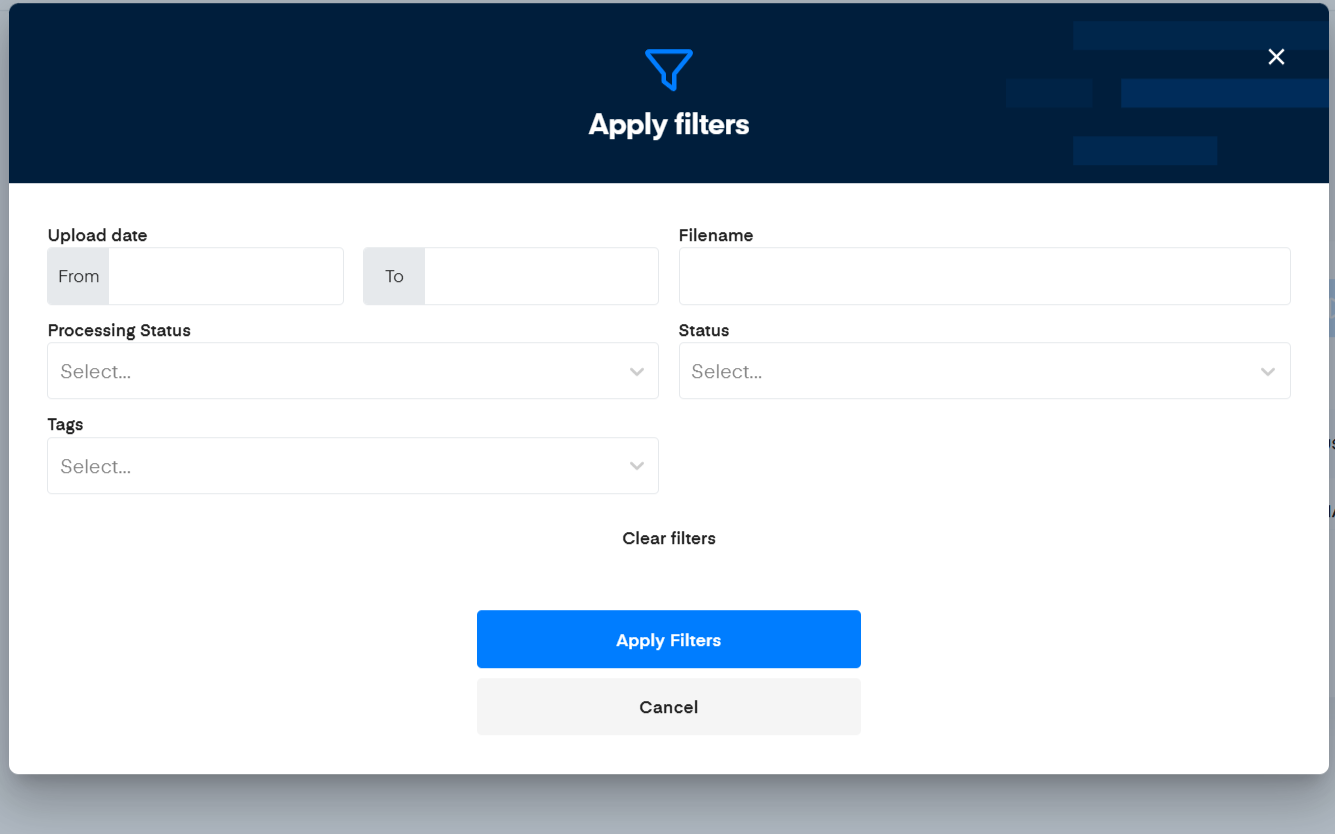
Available filters include:
- Upload date: Set the start date, end date, or time period when documents were uploaded
- Filename: Filter by document name
- Processing Status: Be able to filter based on your documents' processing status
- Tags: Filter by Tags.
- Status: Select one status from the dropdown list [ACTIVE / INACTIVE]
Click Apply filters to show only documents matching your criteria.
Note that all criteria are combined with AND logic.
Get document details
Click a document name to view and update its details in a popup window.
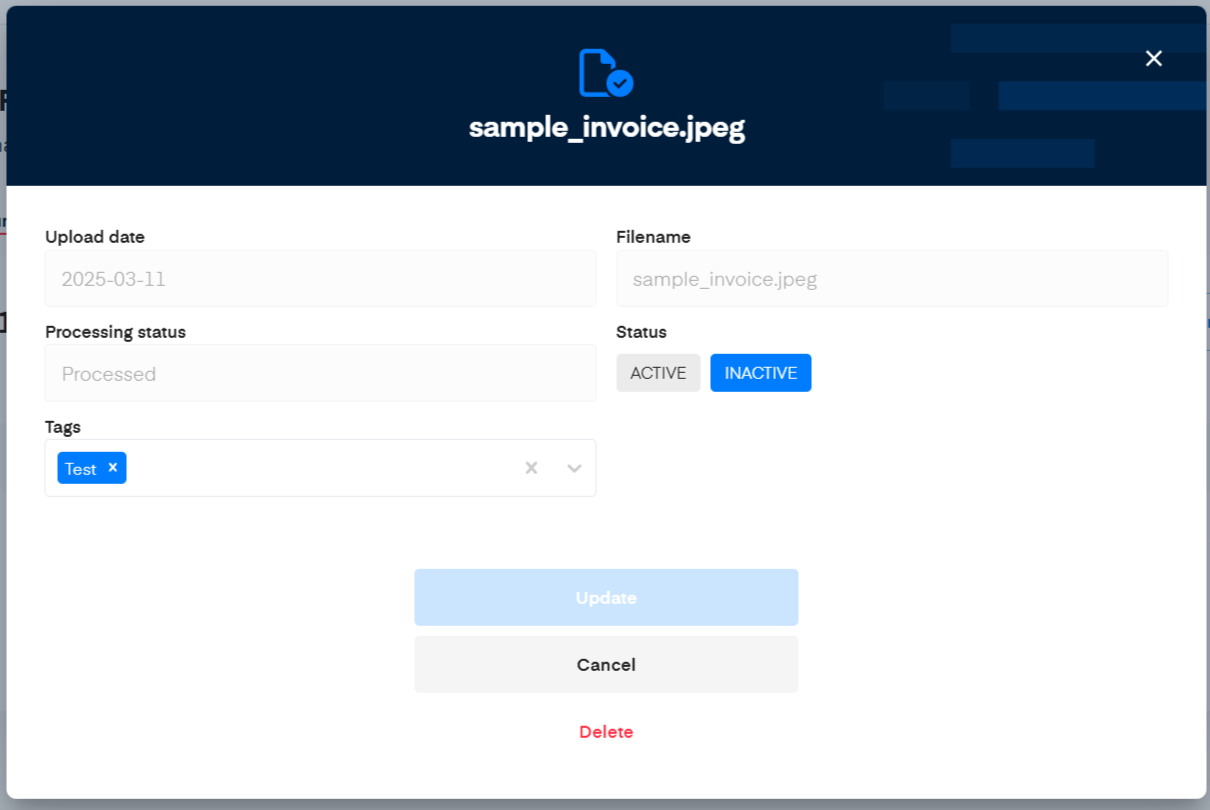
The following fields cannot be edited:
- Upload date: When the document was uploaded
- Filename: The document's name
Only the Tags, and Status can be edited.
- status can either be ACTIVE or INACTIVE.
- ACTIVE: The document can be matched (Retrieved). Note a document can be ACTIVE only if it has been validated using the review interface.
- INACTIVE: The document cannot be matched or used.
You can also delete the document by clicking Delete.
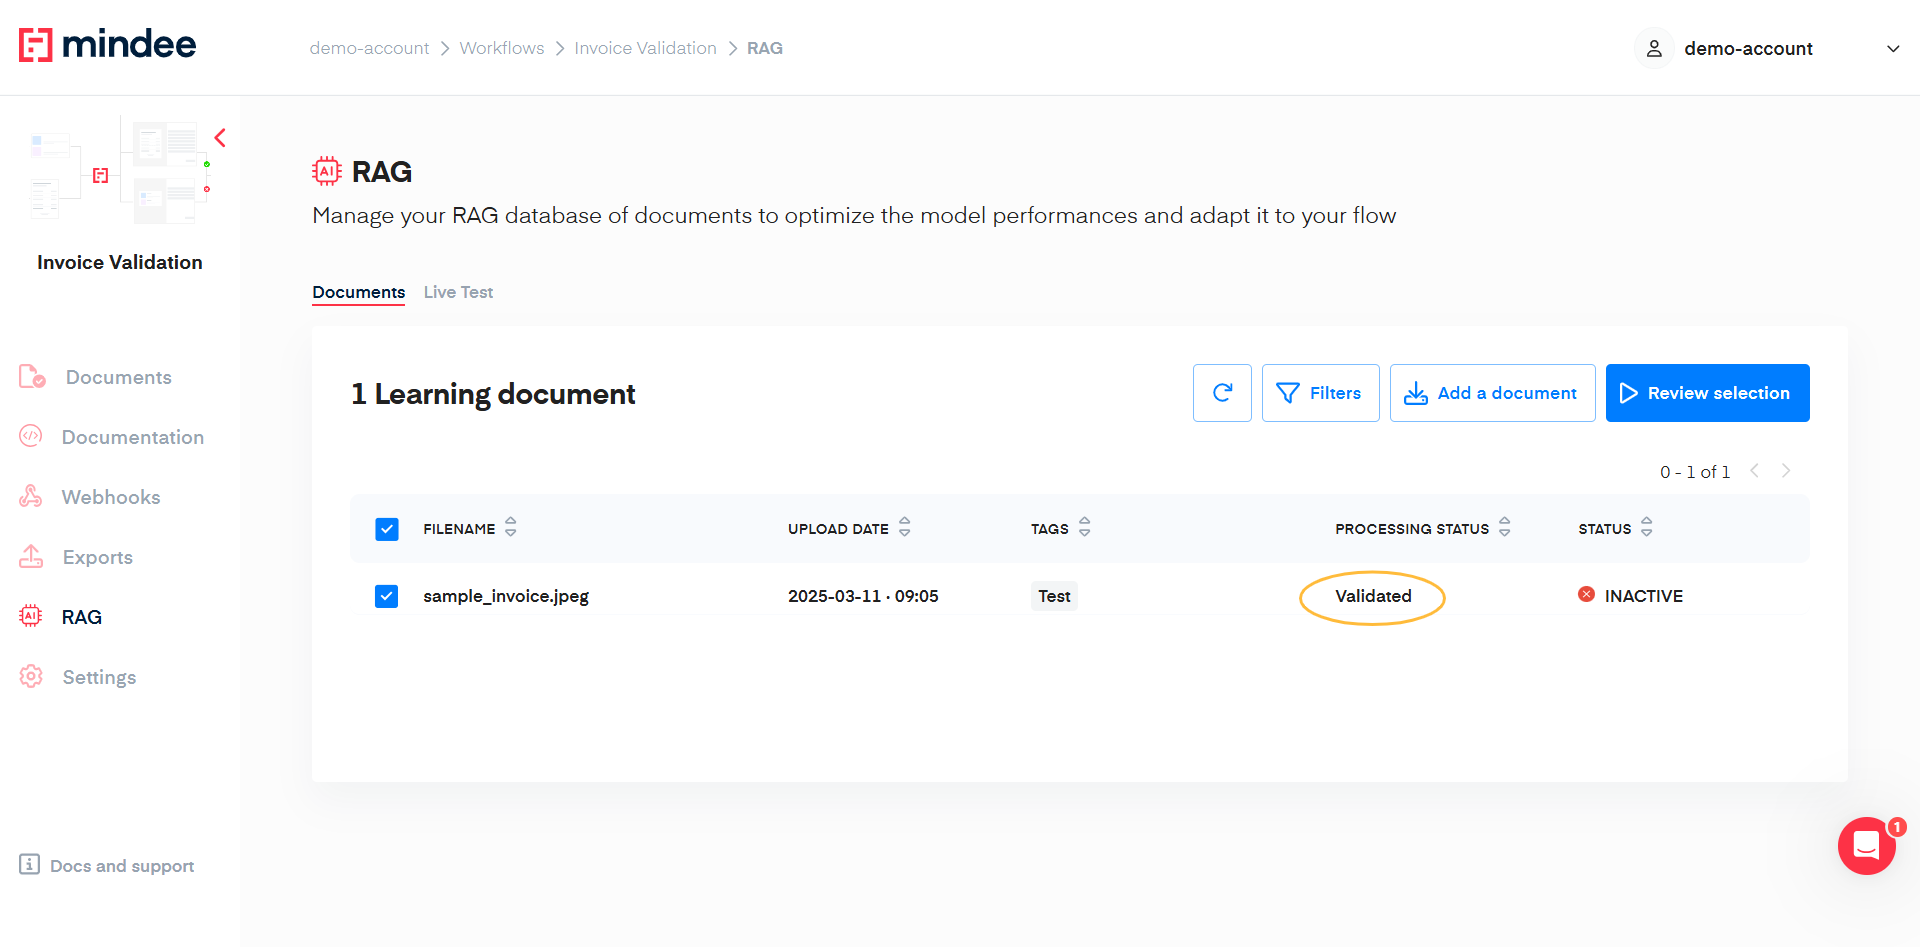
Select documents
After filtering, select documents by clicking the header checkbox or individual document checkboxes.
Once you make a selection, you'll see the number of files selected and a create a batch option to save your selection.

Review Selection
Once you have documents in your selection you can start to review those by clicking on the Review selection button on the right of the table.
Selection limitation
Today the selection of documents is limited to 25.

The review interface will appear when you start the review. Check the Review interface page for more details.
Selecting field and adding natural language guidelines

On the left, you will find a checkbox. Checking it will enable RAG corrections when the document is matched. You can use this feature to make sure RAG will only affect fields you have extraction issues on.
On the right side, clicking Update natural language guideline will give you the ability to add some more context on how to find the right value on the document, or explaining our models what should they do with this specific field.
Once a document is validated, you can change its status to ACTIVE to make it part of the knowledge database of the RAG. Check the Get document details section.
Test the efficiency of the RAG
Once you have at least 1 document ACTIVE in your RAG database, you can test it by clicking on the Live Test tab.

Note:
The Retrieval part of the RAG, works using both text and the image to match a document within the ACTIVE learning documents. In the case, no document is matched, the extraction will work as usual: without the augmentation of the RAG.

The Live test interface enables users to test and validate the efficiency of the RAG on their document flow.
As a user, you can add a document and compare the extraction with and without the RAG activated. Note that for the moment you will need to add the document twice:
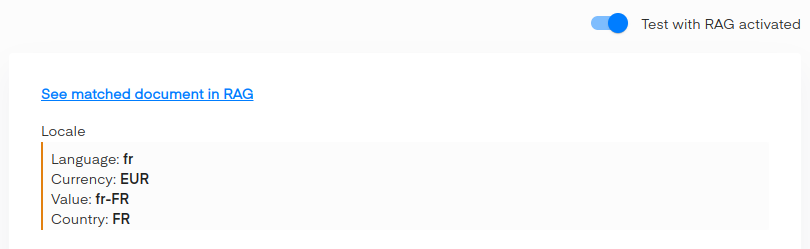
- Once with the Test with RAG activated;
- Once with the test with RAG deactivated.
And compare manually the extracted data between the 2.
Matched Document
To help you finetune your RAG, if a document has been matched, a See matched document in RAG link will appear on top of your prediction. Clicking it will bring you to the annotation interface of the matched document if you want to change some of the annotations made.
Pre-filled RAG database
For better performances, depending on the API you use for your workflow, your RAG will be pre-filled with some hidden in-house documents we know will higher your performances. In that case, the document can still be matched, but clicking the link will show an Error 404 page.
Use your RAG in production
Creating executions
executionsA workflow execution is a document that runs through your workflow.
These are the documents you will find available for review in the Review Interface.
When uploading documents manually from our interface, if you have a RAG enabled with some active documents, the RAG will run on the documents you send. When using our API, you control whether or not you want to active learning features.
You can upload a document and run it through a specific Mindee workflow using:
POST
https://api.mindee.net/v1/worfklows/<workflow_id>/executionsHeaders:
Content-Type: multipart/form-dataAuthorization: Token <my_token>Required Form Data:
document: The document to process, accepts a file object, URL, or base64-encoded stringOptional Form Data:
alias(string) : A custom name for the documentpriority(string): One oflow,mediumorhigh
You can see more information on how to create executions on the Documentation tab, including sample codes in different language.
To apply RAG when creating an execution through API, just send rag=trueas a query parameter. The default value being false.
This endpoint being asynchronous, you will just receive a JSON indicating your document is being processed, as well as an execution id for future reference.
Example JSON
{
  "api_request": {
    "error": {},
    "resources": [
      "execution"
    ],
    "status": "success",
    "status_code": 202,
    "url": "https://api.mindee.net/v1/workflows/<workflow_id>/executions"
  },
  "execution": {
    "id": <execution_id>,
    "workflow_id": <workflow_id>,
    "file": {
      "alias": null,
      "name": "a62a23f1-eb46-4aa7-85f8-19b2ed3e3e3e-page-001.jpg"
    },
    "batch_name": null,
    "priority": "low",
    "status": "processing",
    "created_at": null,
    "uploaded_at": "2024-09-26T17:01:00.947013+00:00",
    "reviewed_at": null,
    "type": "manual",
    "inference": null,
    "reviewed_prediction": null
  }
}
No polling endpoint is available for executions, as it is a feature made to be used through our Review Interface. However, you can create a Webhook and receive events for:
workflow.execution.create: when an execution is createdworkflow.execution.update: when an execution is updated or reviewedworkflow.execution.delete: when an execution is deleted
See next part for asynchronous prediction using RAG, with execution storage disabled and polling capabilities.
Asynchronous Predictions
If you don't need the Review Interface in your workflow, you can use our predict_async endpoint to run documents through your workflow, and enable RAG on specific documents.
POST
https://api.mindee.net/v1/workflows/<workflow_id>/predict_asyncUsing the
rag=truequery parameter, you can choose to enable the RAG when doing predictions on this endpoint.
- In the initial API call response, you will find in the
jobkey, apolling_urlkey that you can use to know which endpoint you need to call in order to retrieve your job status. - To use Webhooks, you will need to define your Webhook in the Dashboard part of the API your workflow is using.
See documentation
Webhooks defined directly on your workflow affect the executions flow, not the predict calls.
For more information on how to call this endpoint, enable webhooks or doing manual polling, see Asynchronous Prediction part of our API documentation.
When rag is activated, a ragkey will be present in the document level extras (inference.document.extras) of your API response or received webhook. This key contains a matching_document_id indicated what document have been matched.
Updated 4 days ago