
Set Up Your Custom API
Set up your API
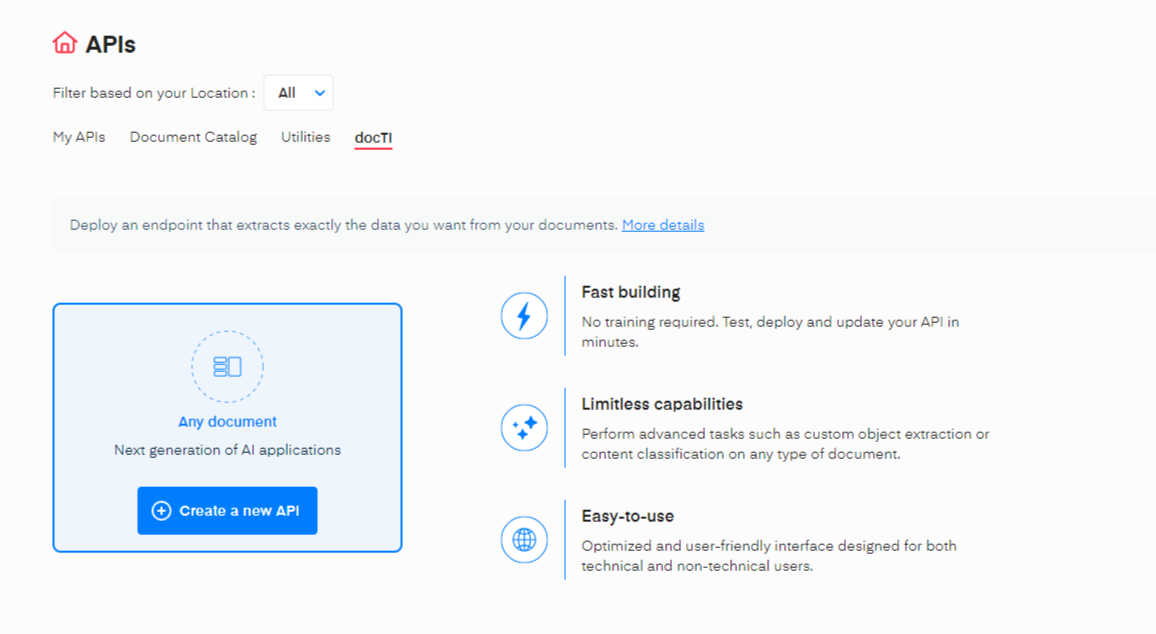
Once you have signed up and logged in at https://platform.mindee.com, navigate to the docTI tab and press the Create a new API button, as shown below:
First, we need some basic information about your new, custom document processing API. That info will help us highlight your API under the tab My APIs .
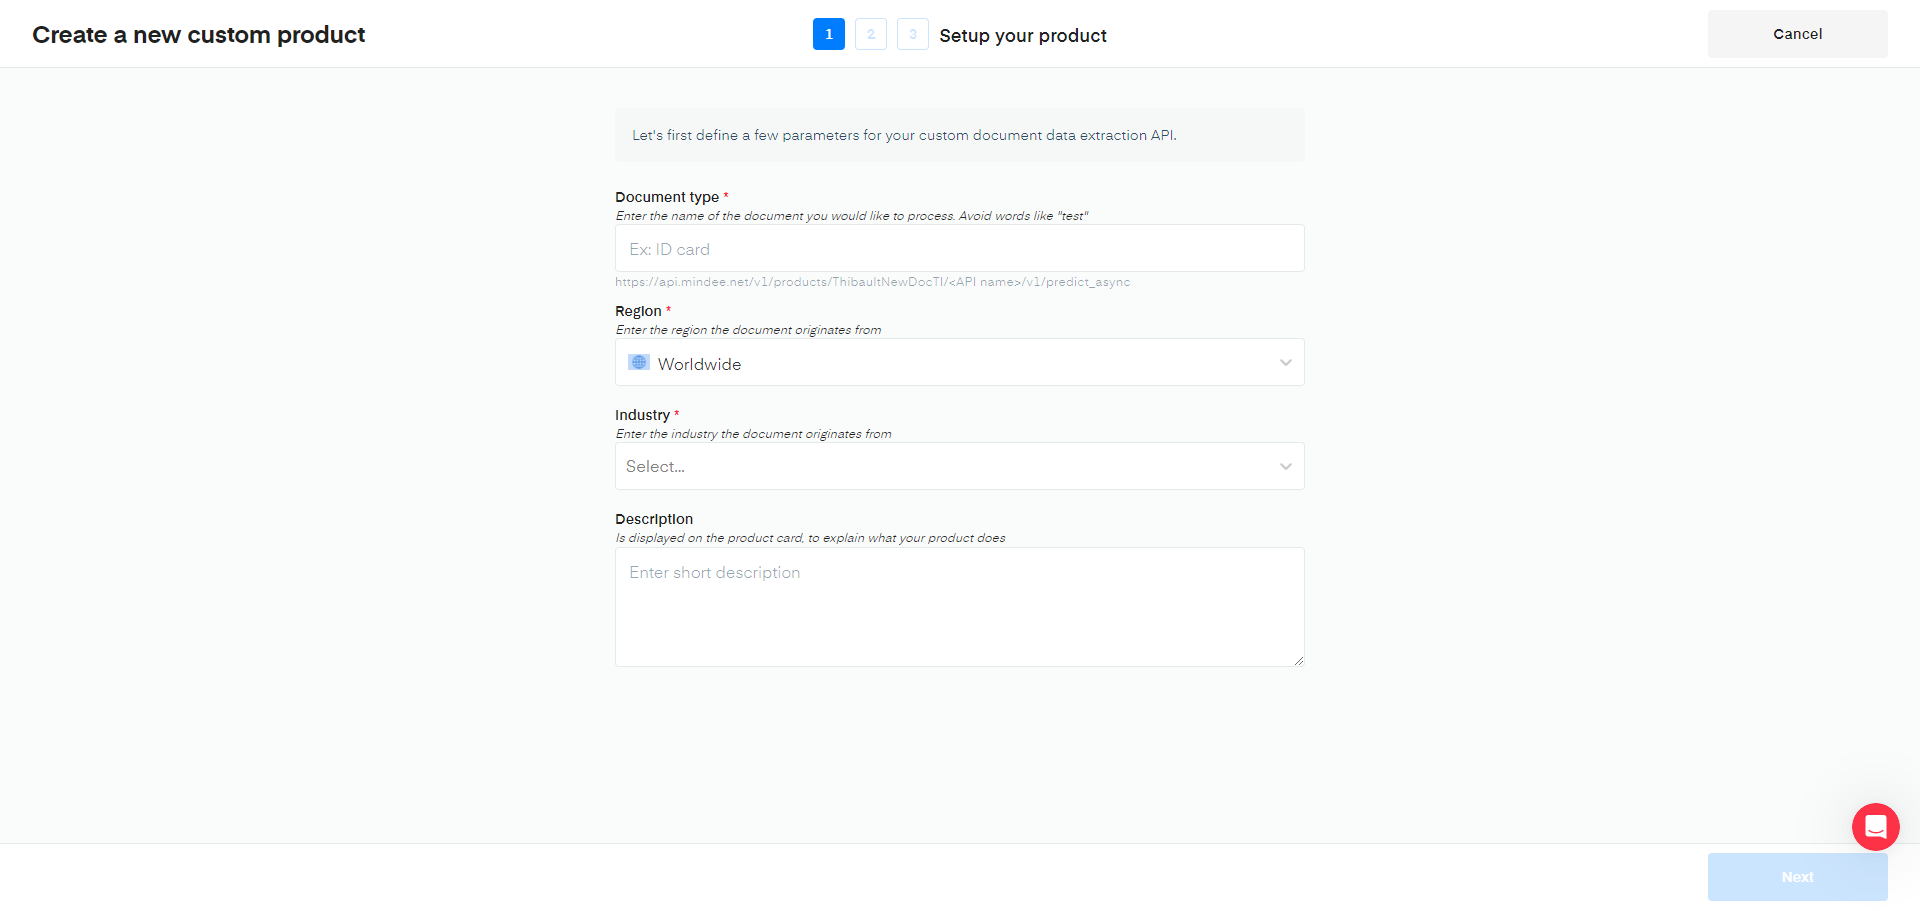
The requested properties are the following:
Document type
This field is used to define your API name and endpoint URL.
To ensure best performances:
- use words that describe your document the best, i.e "ID card" if you aim at processing ID cards;
- avoid using generic names that do not correspond to a document type, i.e. "Test API".
Region
Define the regions: countries or continent from which your documents originate from. By default worldwide.
You can either start typing the country or continent to filter the list, or scroll.
Industry
Choose the industry related to your use case. You have the following choices possible:
| Industries | Description |
|---|---|
| Legal Services | Document parsing or legal firms to extract and analyze legal documents, contracts, and case files. |
| Healthcare | Parsing medical records, patient histories, and insurance claims is vital for healthcare providers and insurers. |
| Finance and Banking | Parsing financial statements, transaction records, and banking documents helps with auditing, compliance, and customer service. |
| Insurance | Parsing policies, claims, and customer information is essential for insurance companies to process claims and underwrite policies. |
| Real Estate | Parsing property documents, leases, and contracts helps in property management and real estate transactions. |
| Human Resources | Parsing resumes, job applications, and employee records assists in recruitment, onboarding, and talent management. |
| Government and Public Sector | Parsing official documents, public records, and forms for administrative purposes and compliance. |
| Retail and E-commerce | Parsing invoices, receipts, and product catalogs aids in inventory management, sales analysis, and customer service. |
| Manufacturing | Parsing production records, supply chain documents, and quality assurance reports helps in production planning and quality control. |
| Education | Parsing student records, transcripts, and academic documents supports admissions, enrollment, and academic research. |
| Logistics and Transportation | Parsing shipping documents, delivery orders, and freight manifests assists in logistics planning and tracking. |
| Marketing and Advertising | Parsing customer feedback, surveys, and marketing reports helps in market analysis and campaign optimization. |
| Energy and Utilities | Parsing utility bills, energy consumption reports, and infrastructure documents aids in energy management and billing. |
| Telecommunications | Parsing customer contracts, service agreements, and billing statements supports customer service and billing operations. |
| Agriculture | Parsing agricultural reports, crop yields, and supply chain documents helps in farm management and planning. |
| Media and Entertainment | Parsing content metadata, distribution agreements, and licensing contracts supports content management and distribution. |
| Automotive | Parsing vehicle registration documents, maintenance records, and warranty information aids in vehicle management and service. |
| Travel and Hospitality | Parsing booking confirmations, itineraries, and customer reviews assists in reservation management and customer service. |
| Pharmaceuticals | Parsing drug labels, clinical trial data, and regulatory documents supports drug development and compliance. |
| Technology and Software | Parsing software licenses, technical documentation, and user feedback helps in software development and customer support. |
The Document type, the Region and the Industry are used to pre generate a first data model to set you on the right path to a performant product.
API name
The resource name of your API URL. We automatically generate one for you based on your Document type but you can customize it at your own convenience. Note however that you can’t use special or accented characters. The format of your API URL complies with the following scheme: https://api.mindee.net/v1/[username]/[API_name]/v1/predict
Description:
An optional, short blurb aimed at conveying the purpose of the API. This description will appear below the image under my APIs tab (and others if you choose to share your API with other users). We suggest you make it as clear and concise as possible to maximize its effectiveness.
Add a typical document of your use case
It is therefore recommended to have at least 1 document nearby. This document will be used to test and validate your data model.
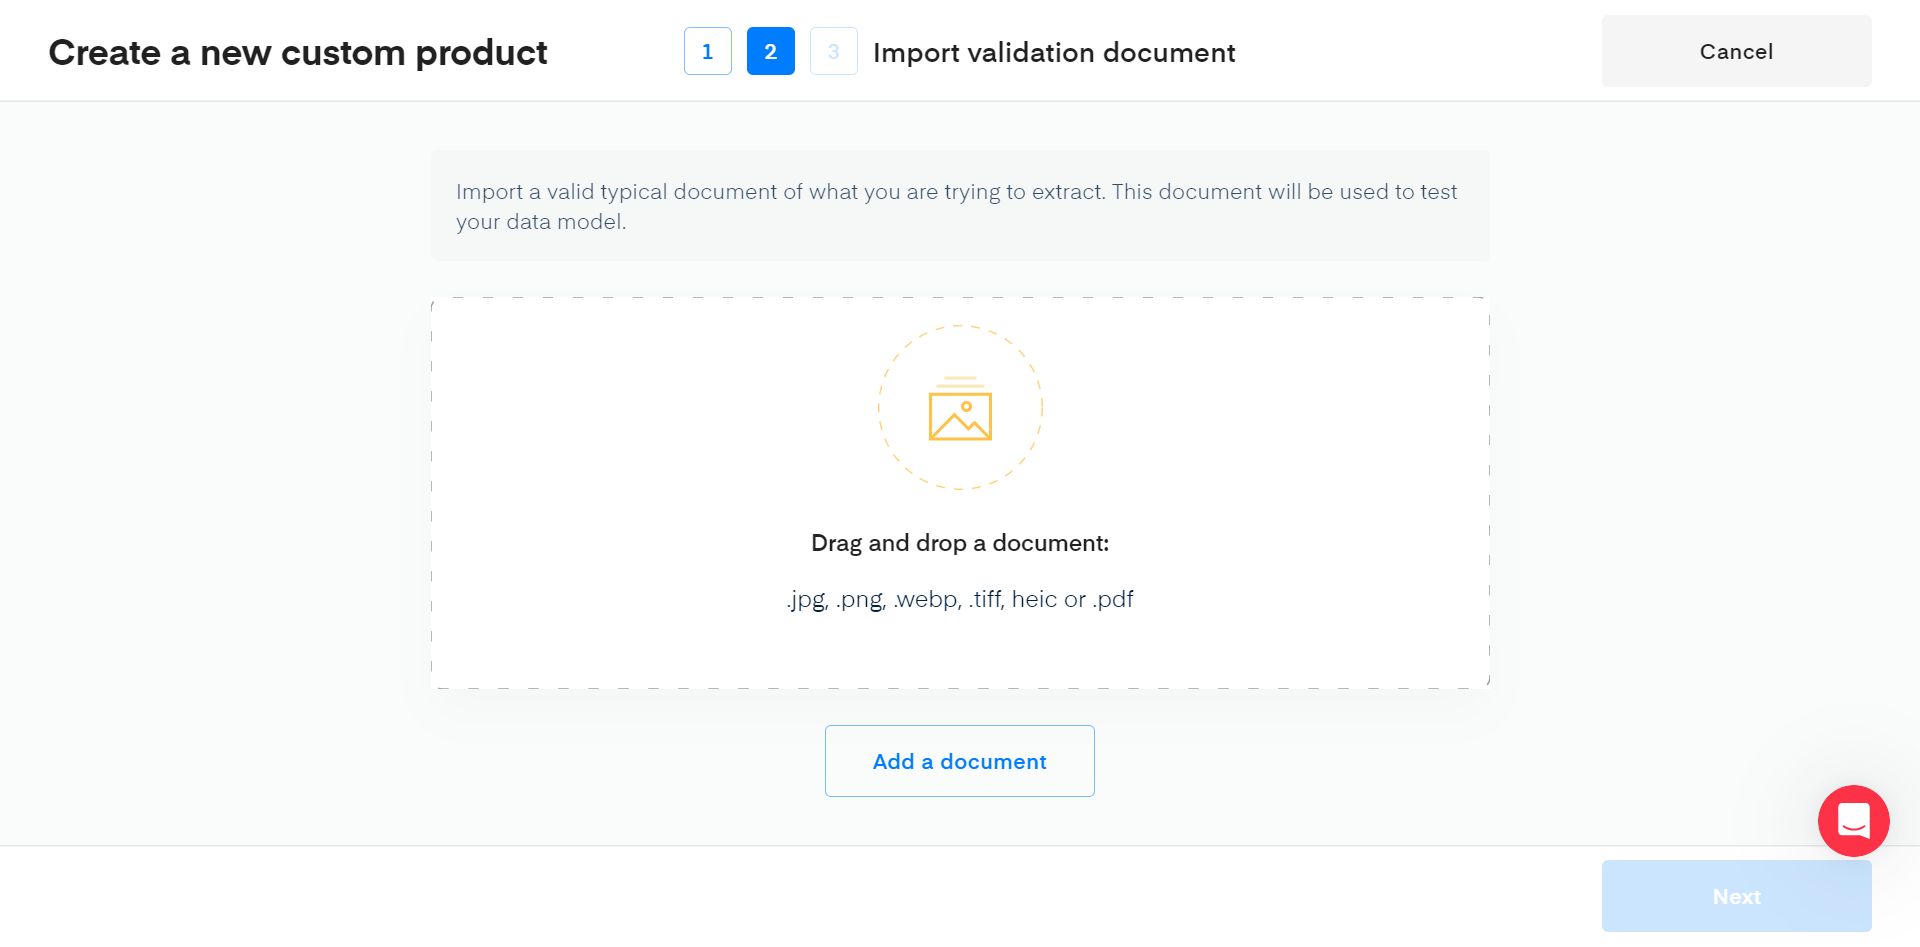
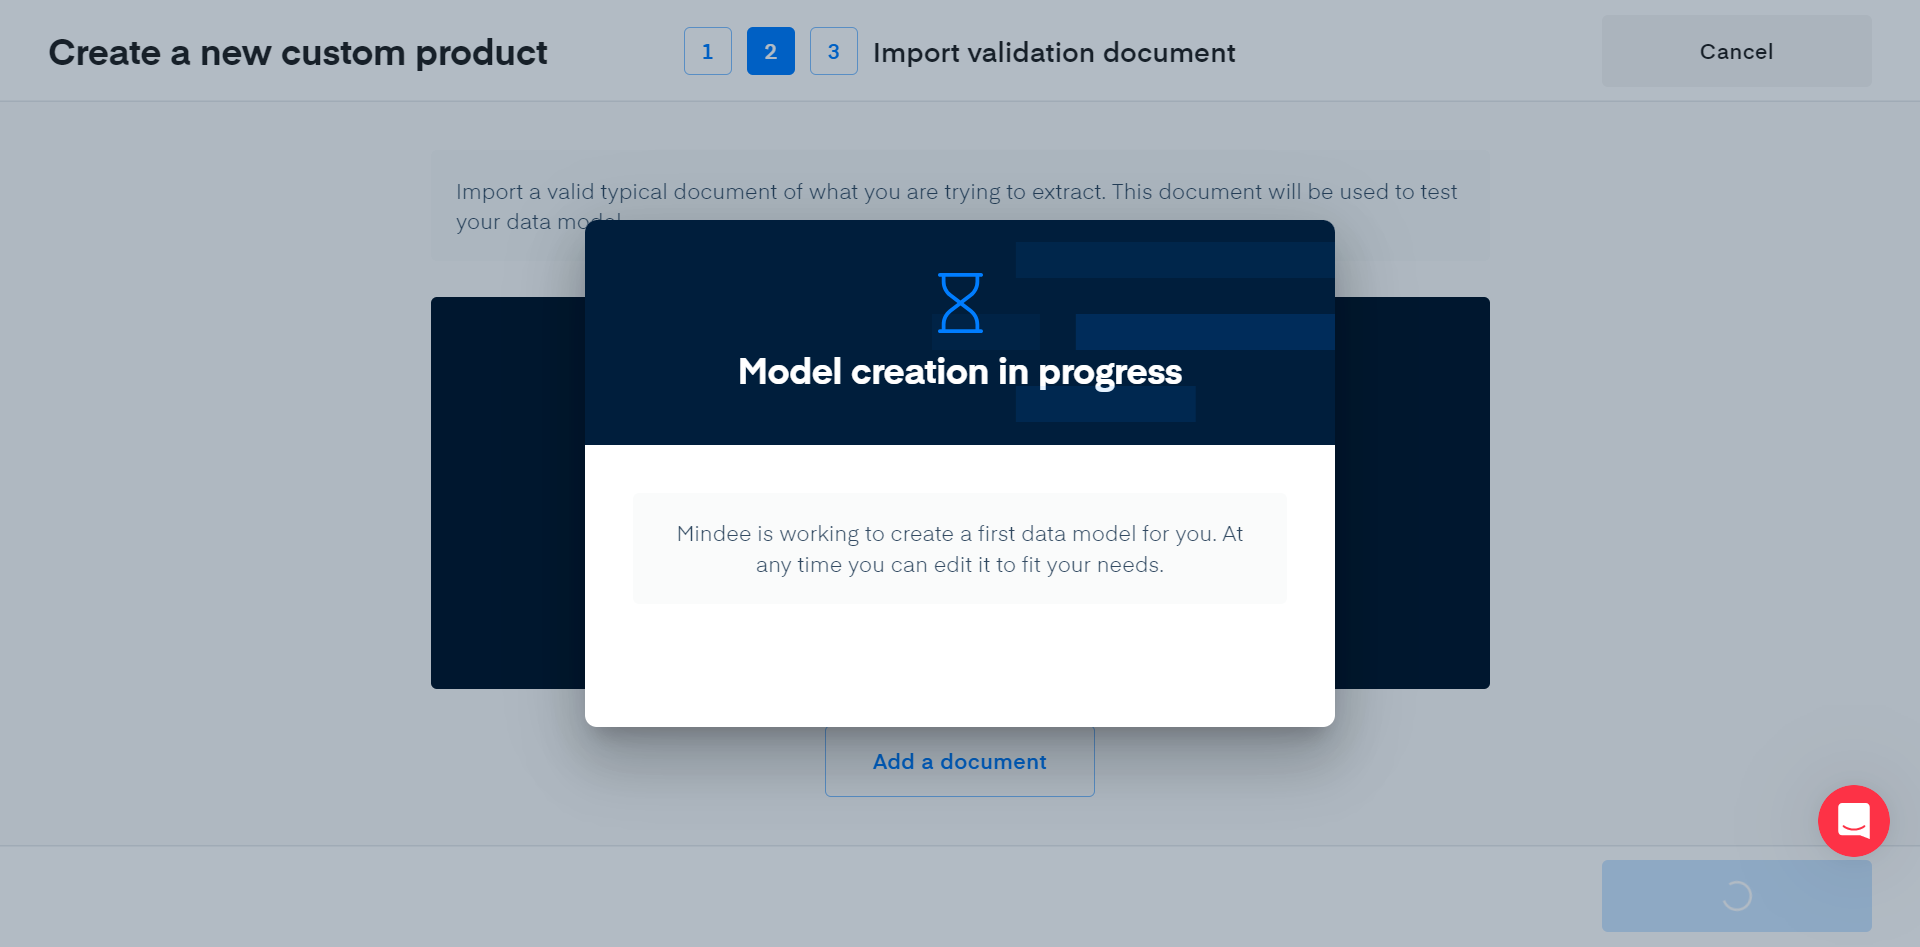
After adding your validation document, Mindee will prepare your product and build an initial data model
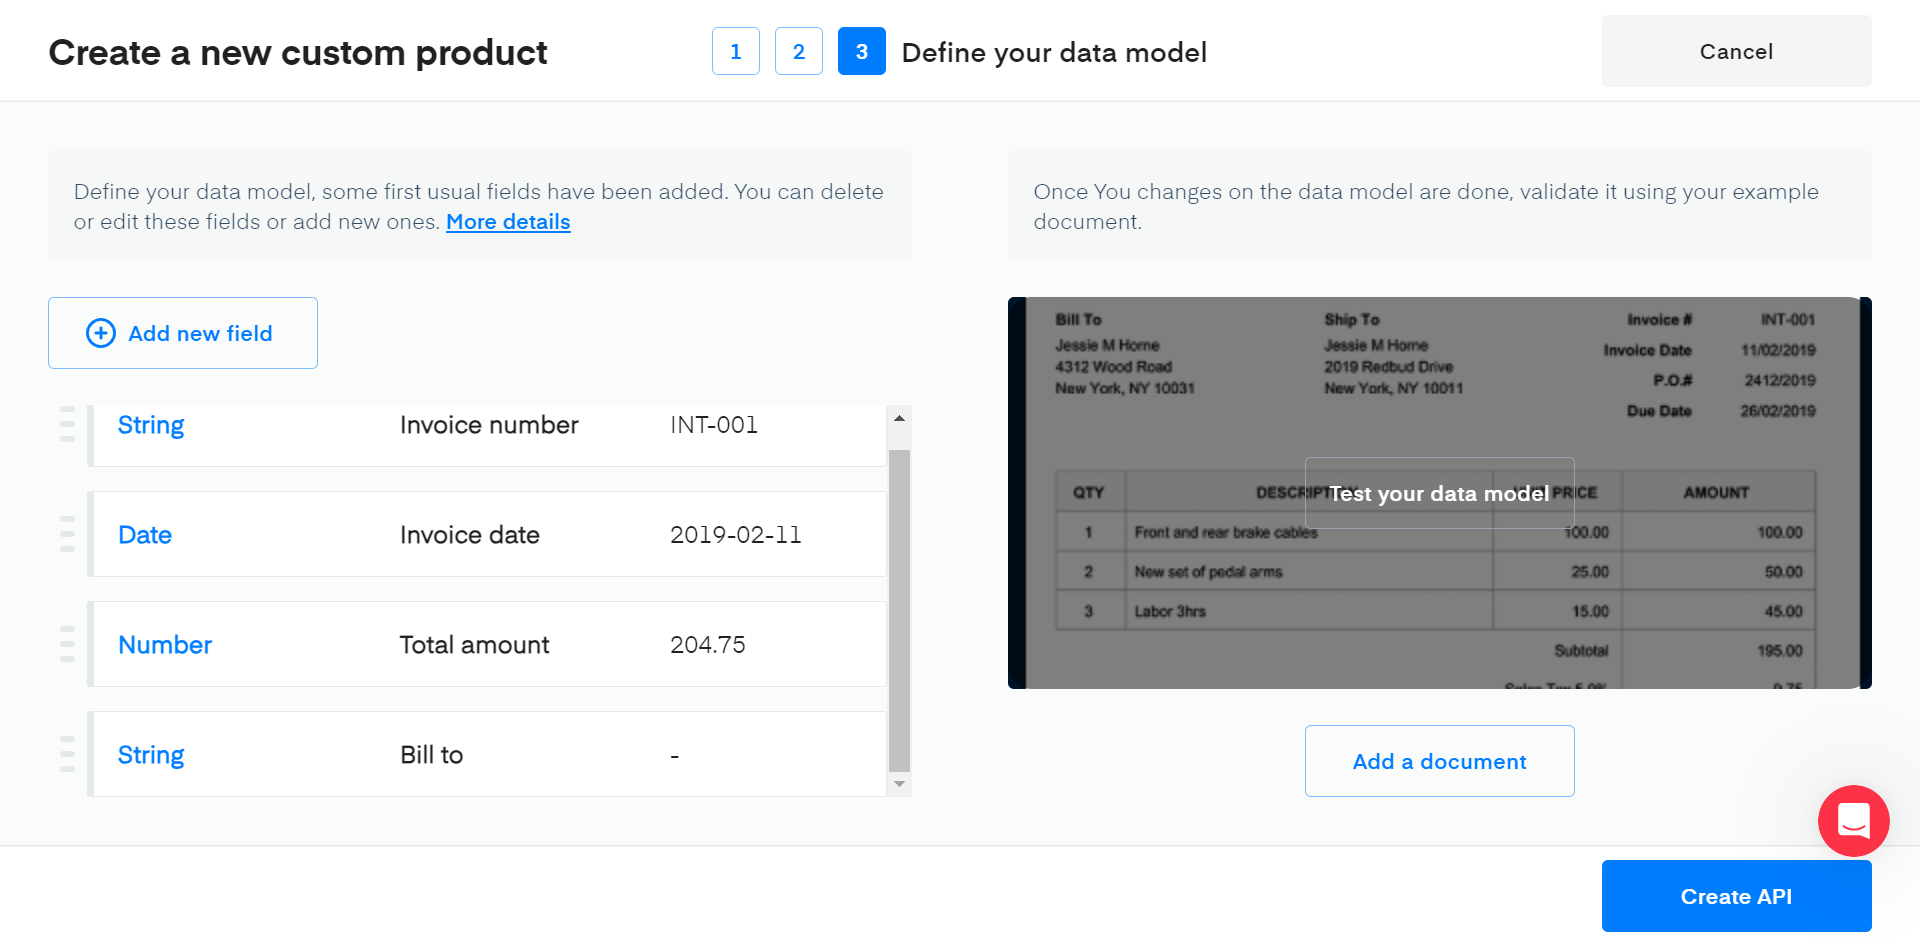
Data model definition
When you arrive at this stage, you will be proposed a first data model with the results of the inference already visible.
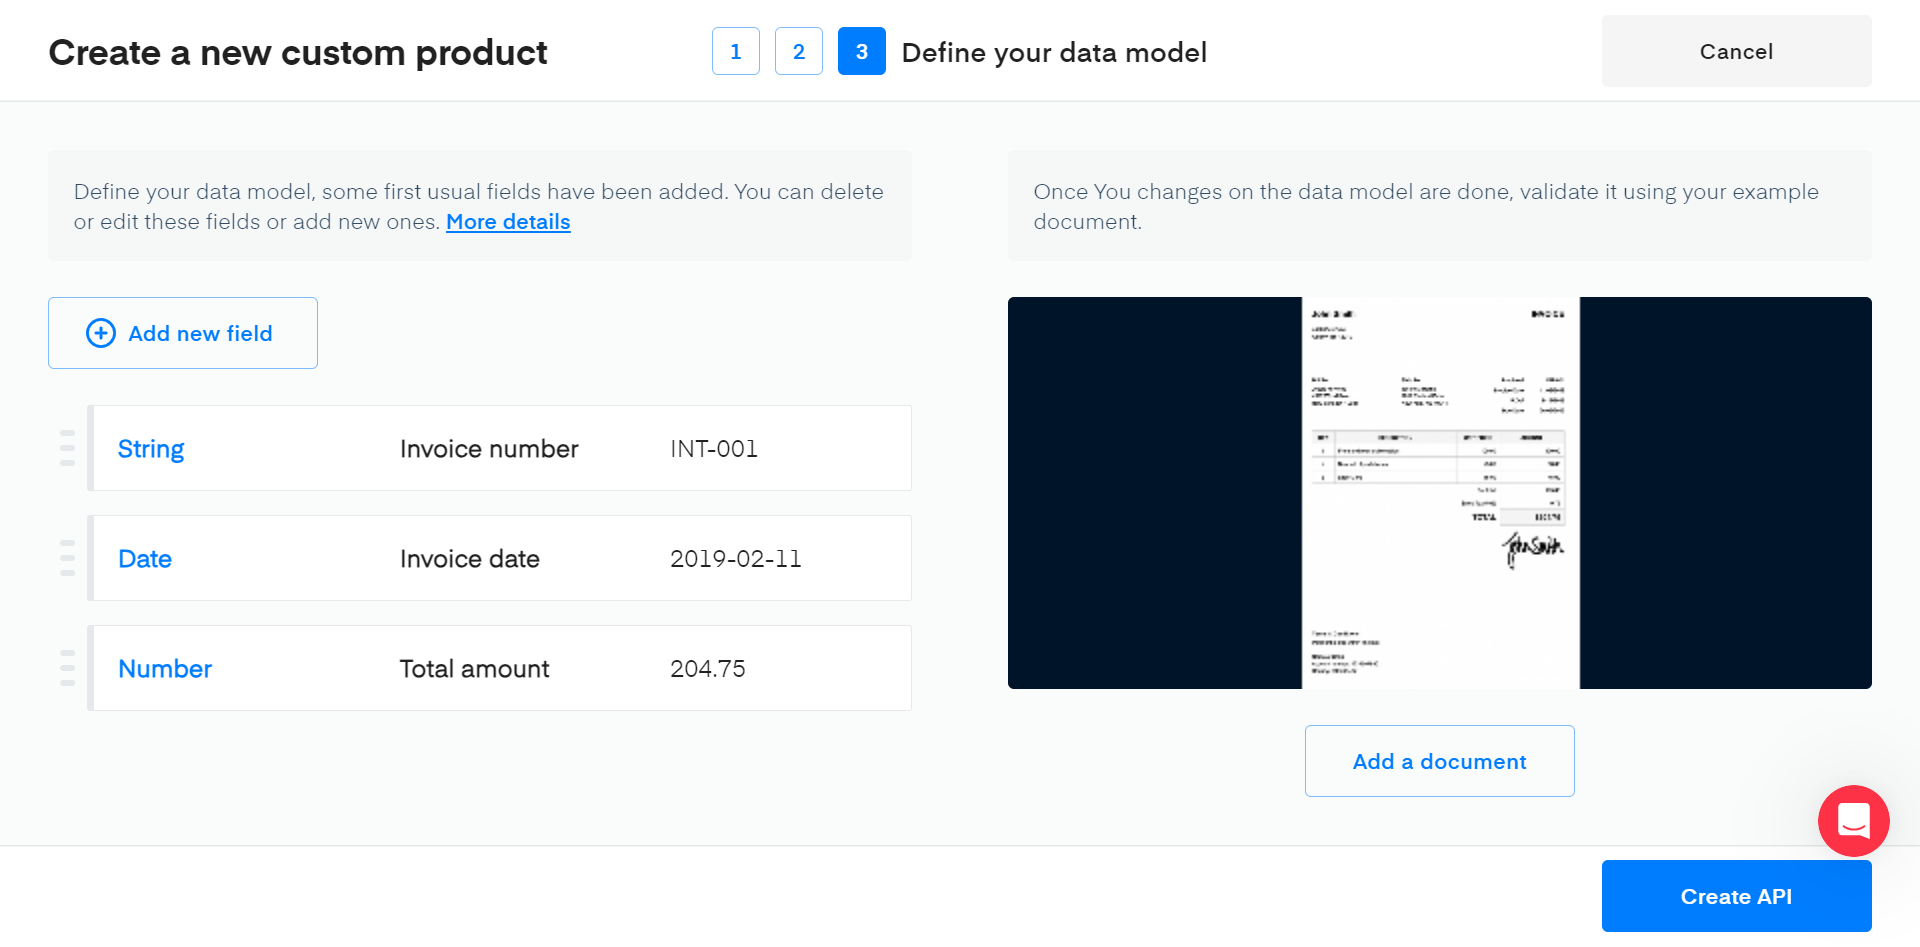
You will of course have the possibility to Edit or Delete each of those fields to ensure your final data model matches your needs.
By clicking on Add new field you have the possibility to add a new field to the data model and for each to choose the type amongst the following one:
You can add fields by clicking on the corresponding card:
- String: This field is the most generic one. You can use it to extract a specific text from a document, i.e. a First Name from an Id card.
- Number: A number field can be any decimal number or integer, such as amounts, percentages, quantities…
- Date: Date can extract both Date and / or Time. Dates can be written in any format and will be returned in ISO formats yyyy-mm-dd.
- Phone number: A phone number can be any phone number (any countries).
- Email address : to extract email addresses.
- URL: URL can be any kind of URLs, websites, links, …
- Classification: Define the set of possible classes the documents can belong to. Each class must be exclusive: a document must belong to one class and cannot belong to many classes. If the document belongs to none of the proposed classes, the output will be Null.
- Object: Define a composite field which includes one or several items of different types. Can be used to extract tables from documents.
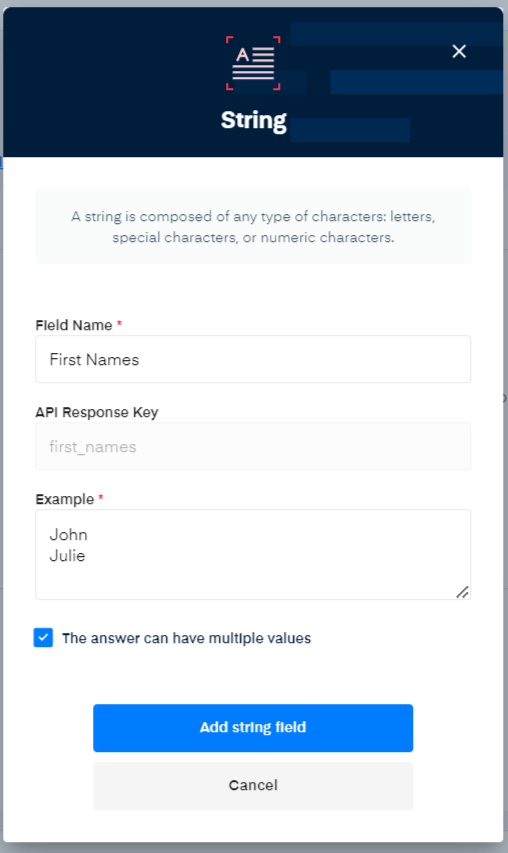
Once you select a field type, the following information is required for each field:
-
Field Name: For each field, define a name that will be used to create the corresponding API JSON response key.
To ensure maximum extraction performances:
- use descriptive and explicit words, i.e. “First Name”, “Last Name” or “Full Name” instead of “Name”;
- avoid names that do not correspond with what you are trying to extract, i.e. "Field 1";
- when applicable, use words that are used in the document for describing the value you want to extract, i.e. “Date Of Birth: 01/01/2000” use the name “Date Of Birth” -
API response key: is directly defined from the Field Name and cannot be edited.
-
Example: Examples are very important to describe:
- formatting instructions (respect case);
- example of data the model should extract.
To improve performances: - use a real world example from a document;
- respect the case and the format you want for your output;
- don’t describe the field.
-
The answer can have multiple values: Check the box if you need the model to extract several values in the documents. The values will be outputted as a list.
Whenever you modify the data model, you will have the possibility to retest it: A button will appear on the image Test your data model.
Once you’re done setting up and testing your data model, press the Create API button at the bottom of the screen.
Updated 13 days ago